Coveralls Web UI
Overview
This section is an overview of each page of the Coveralls Web App UI, along with the available information and actions to be found there.
Getting Started
Managing Your Repos
- The Dashboard
- The Add Repos Page
- Repo Start Page
- Repo Page
- Repo Settings
- Repo Notifications
- Build History
- Build Page
- Job Page
- Source File Page
Managing Your Subscriptions
Managing Your User Account
Product Updates
Sign In
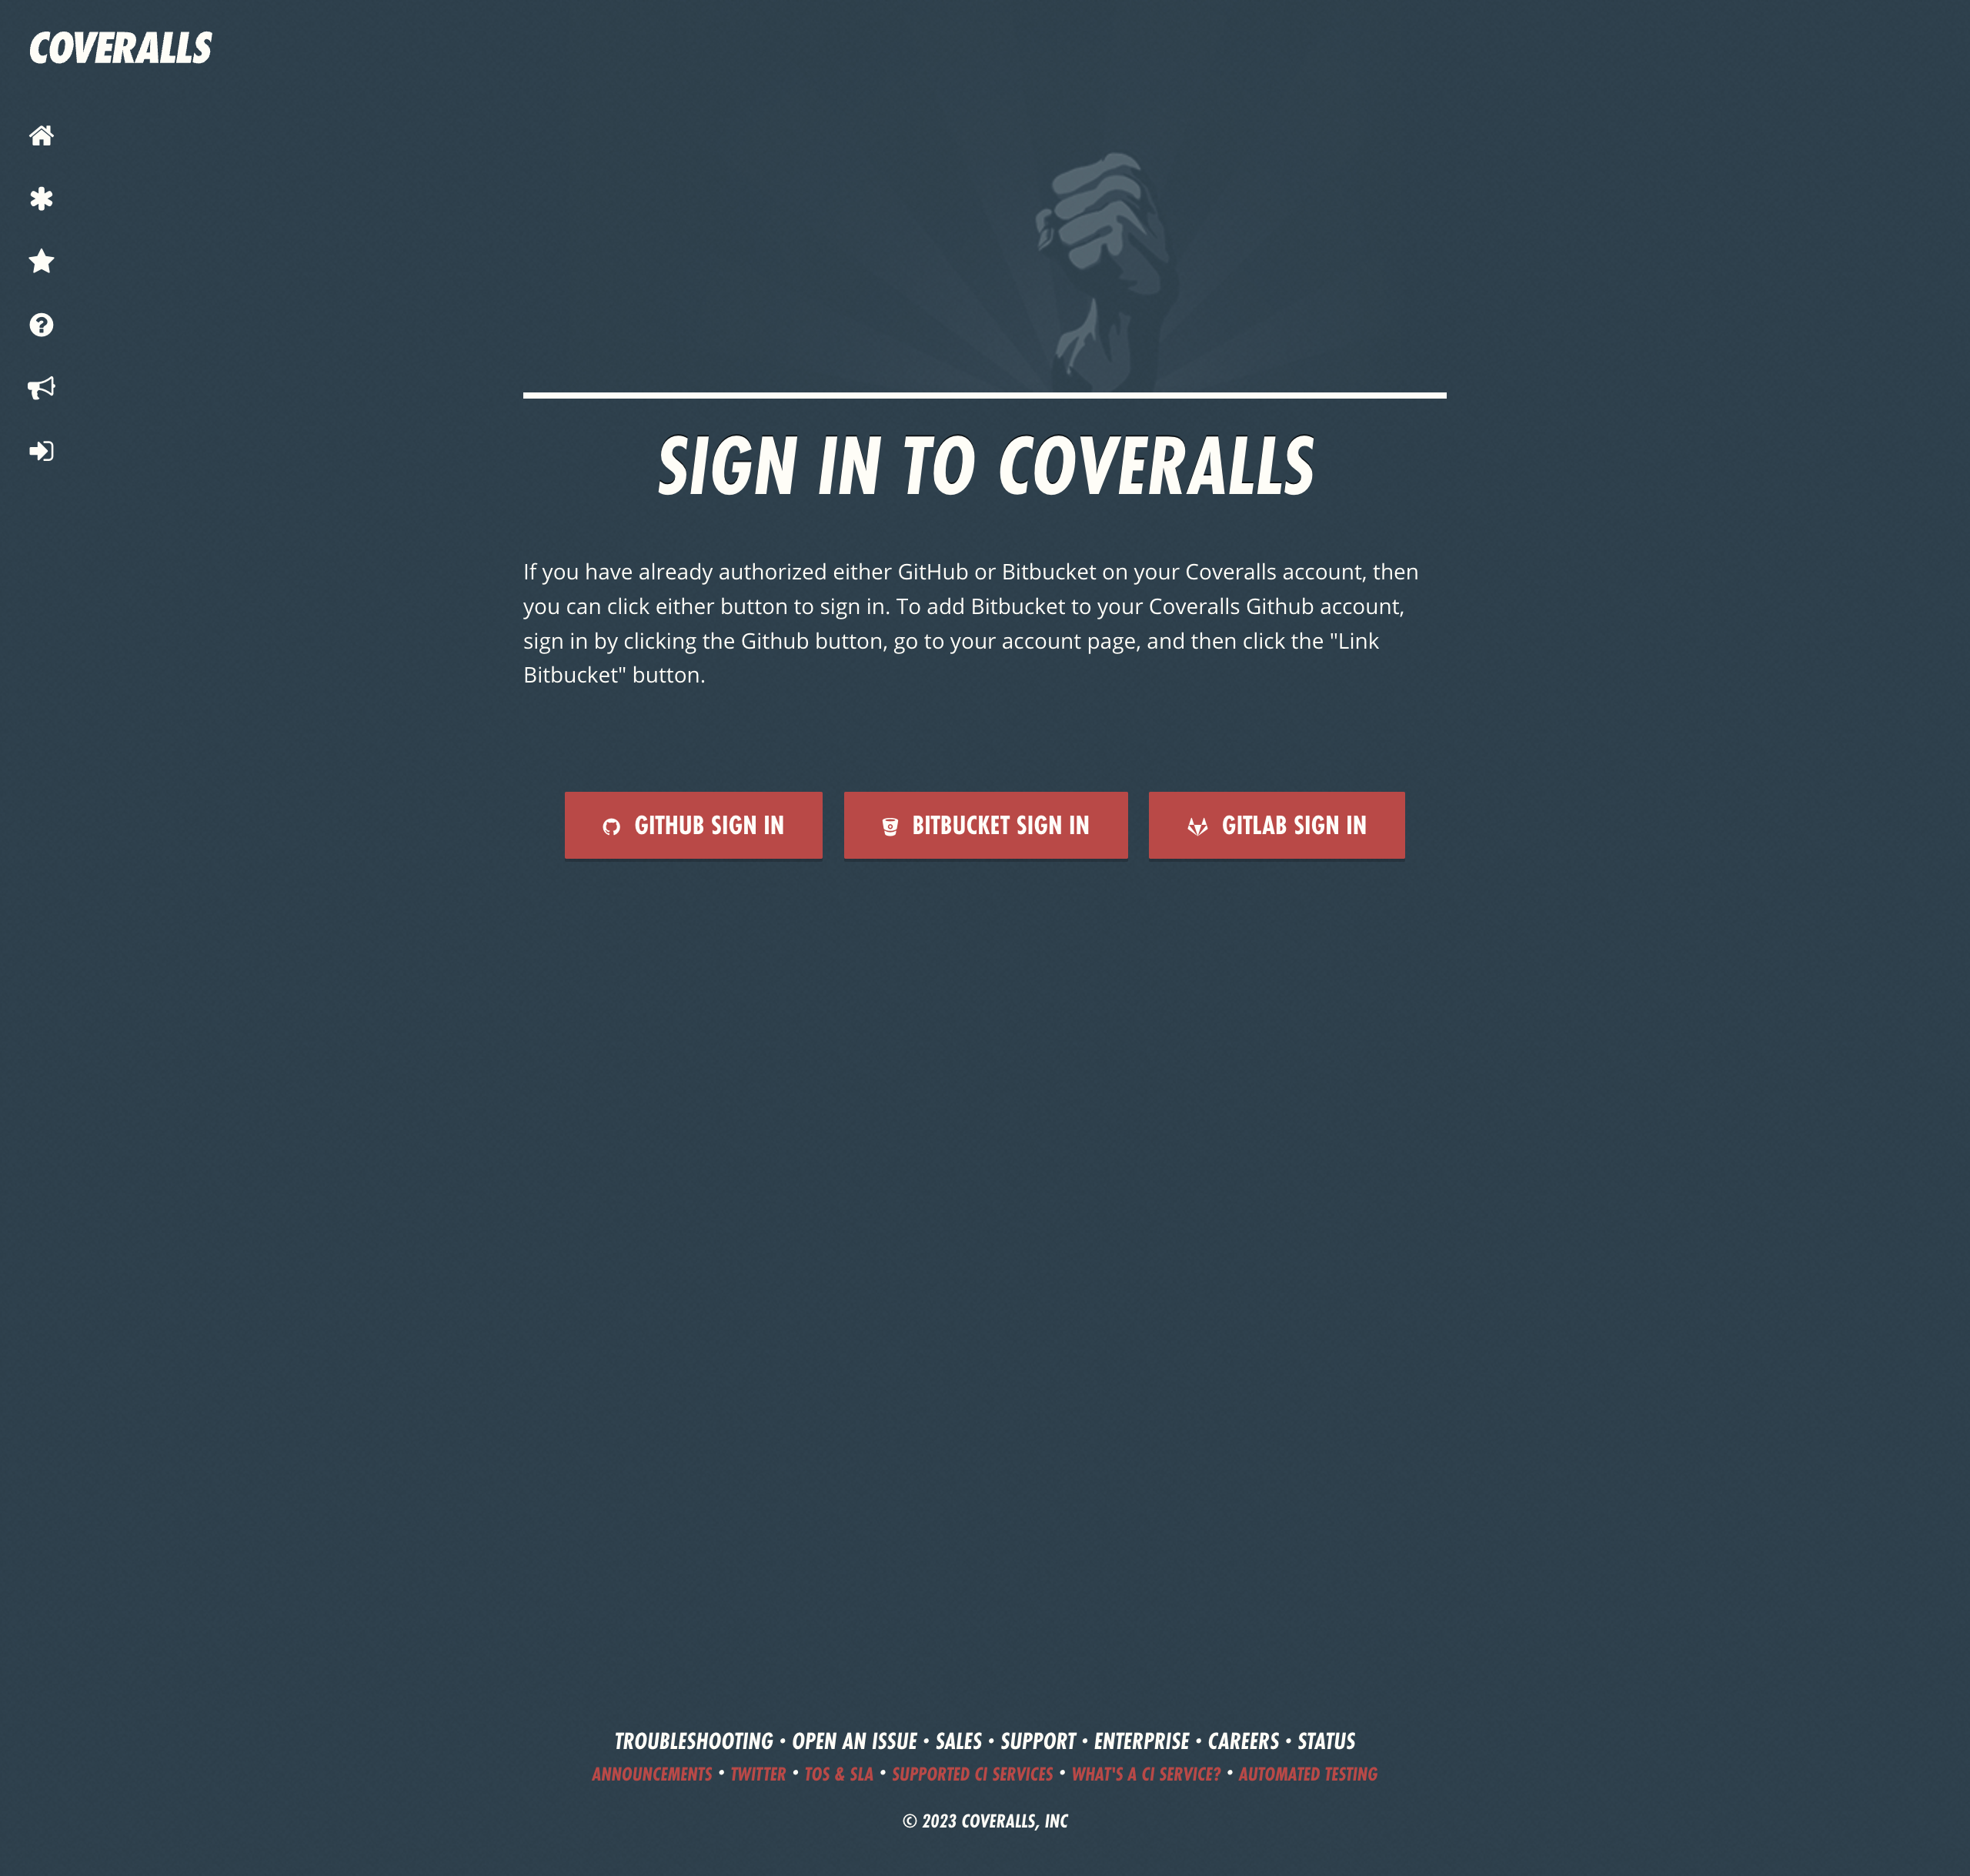
The Sign In Page is where you’ll go to log in to your Coveralls account. Using Coveralls is free without a subscription for public repos, and creating an account is easy; all you need to do is log in through your git repo host. If you need a subscription, you can sign up for one.
Sign In Page Info & Actions
- Sign In via Github — Click to sign in with your Github account
- Sign In via Gitlab — Click to sign in with your Gitlab account
- Sign In via Bitbucket — Click to sign in with your Bitbucket account
Sign Up
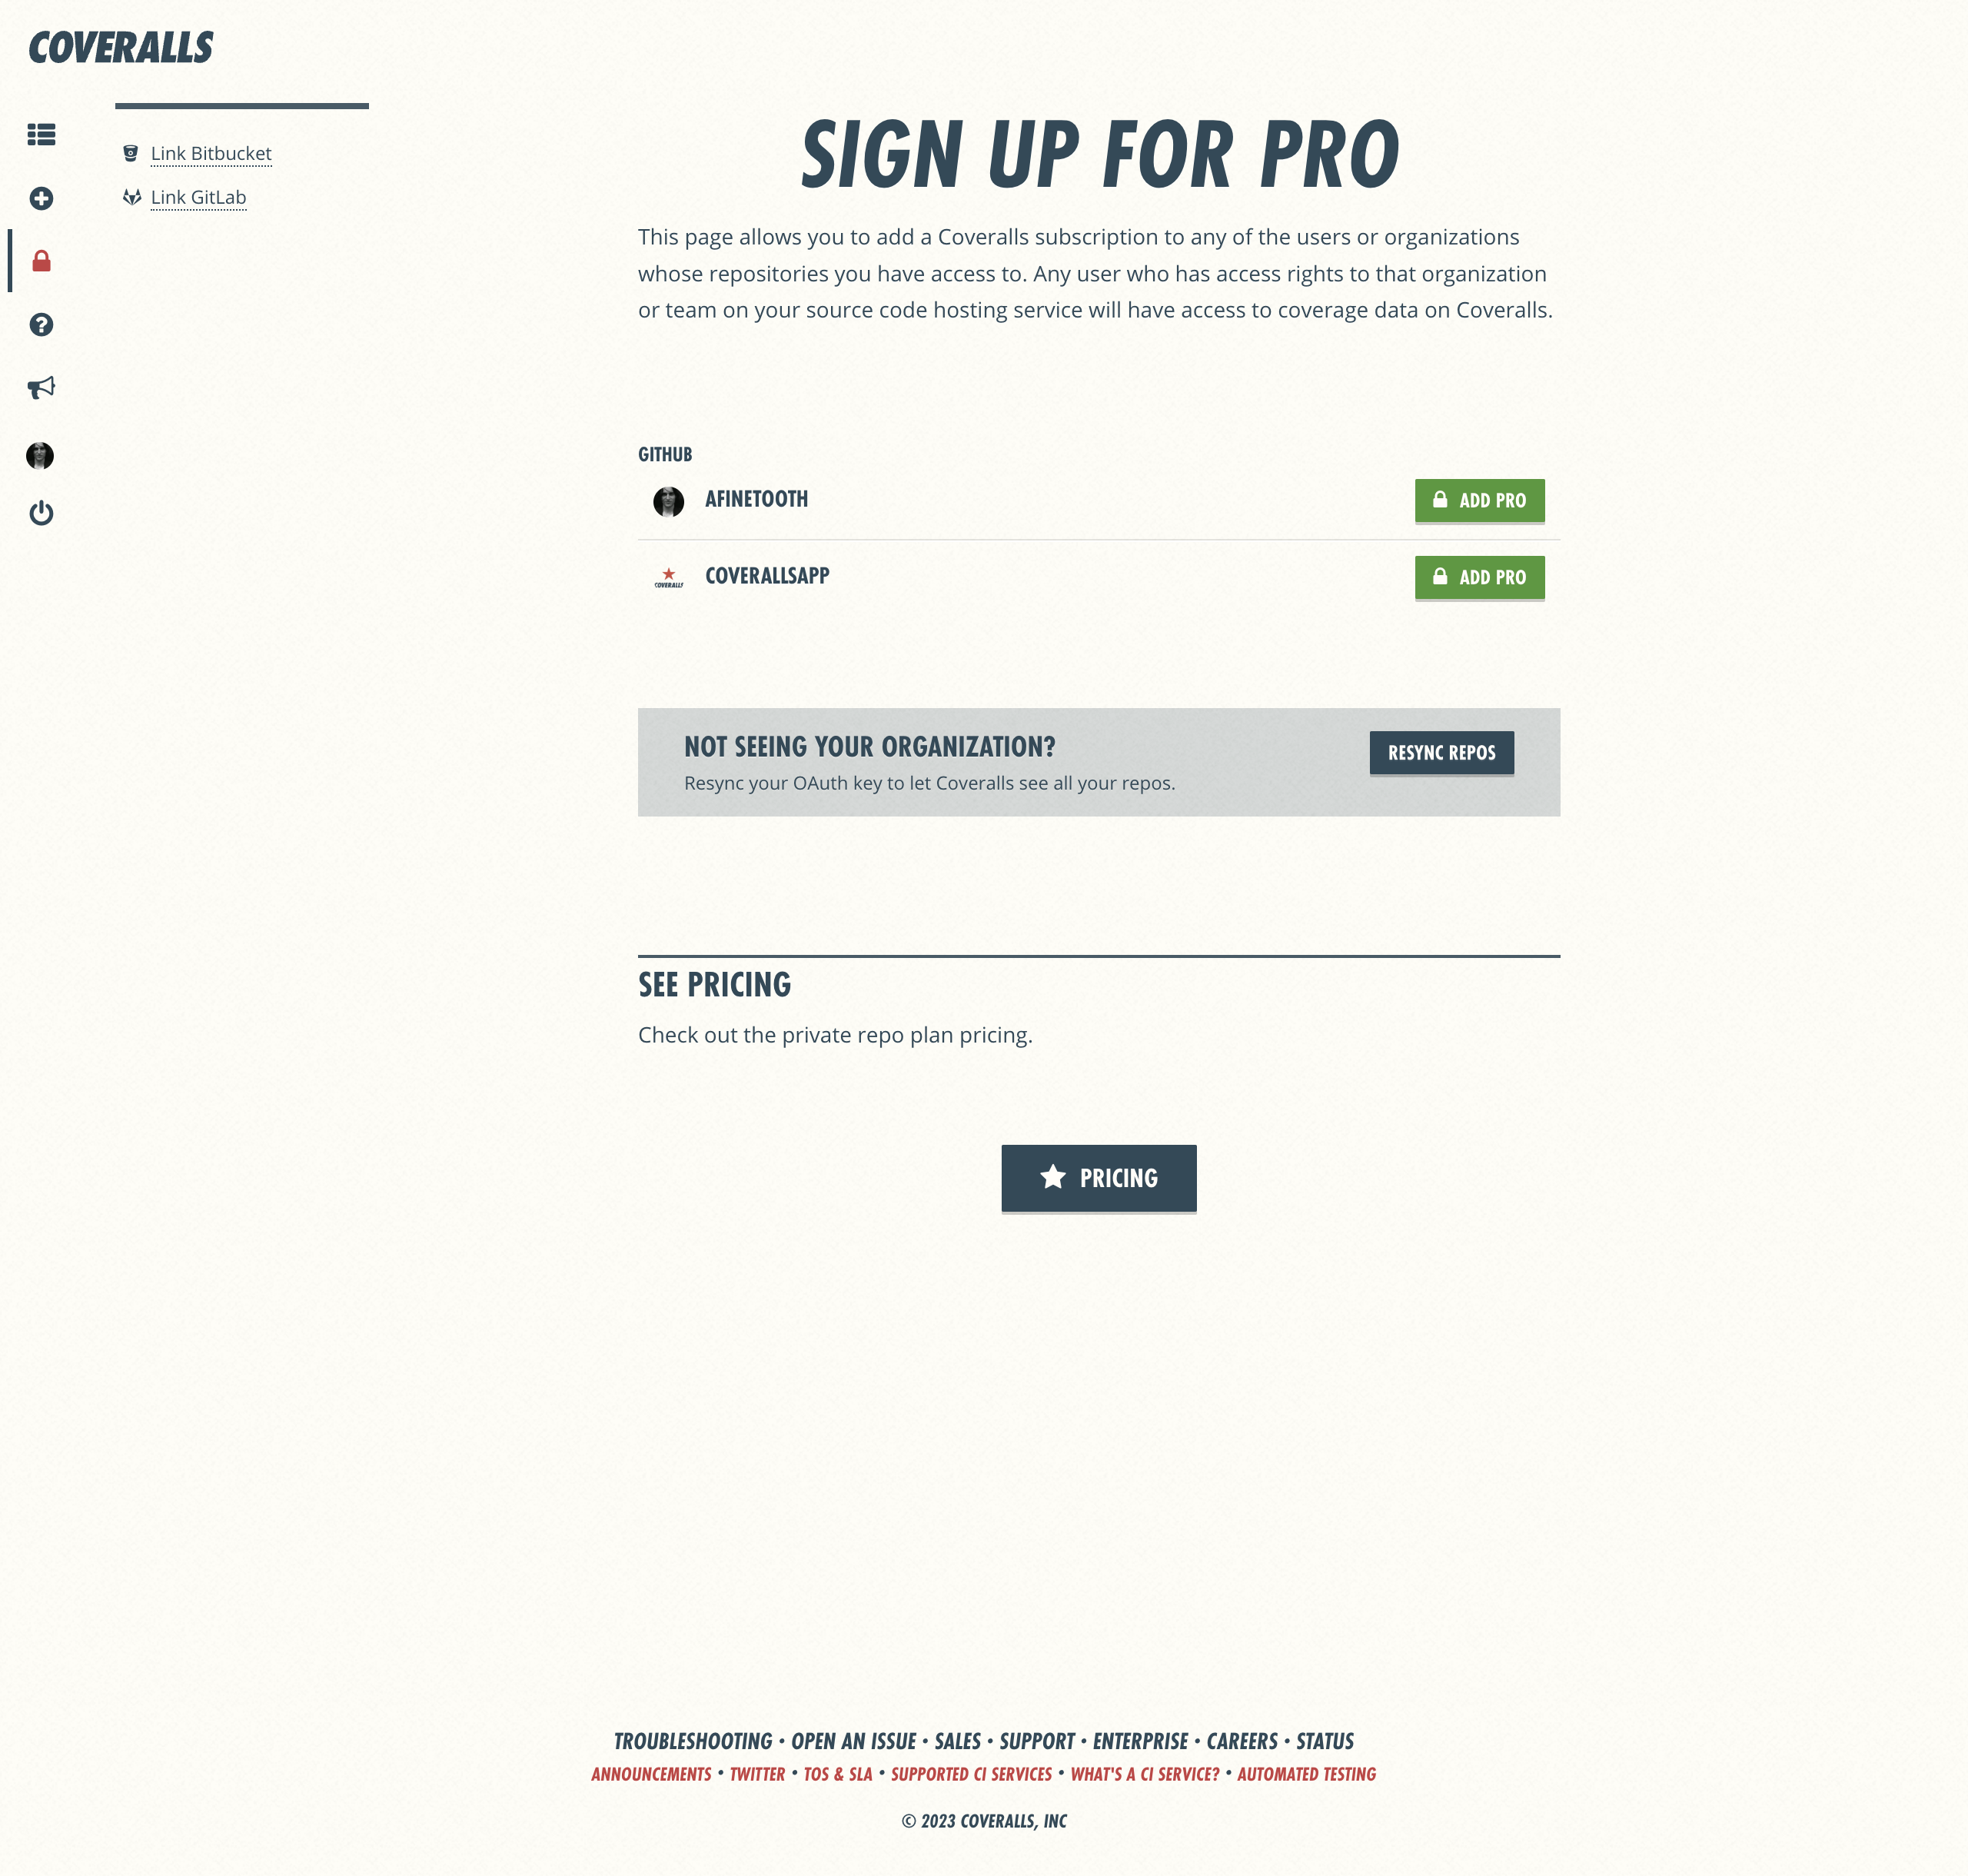
The Sign Up Page is where you’ll go to create a new Coveralls subscription. You only need a subscription to use Coveralls with private repos. Otherwise, you can just sign in to start using Coveralls for free with your public repos.
Sign Up Page Info & Actions
- Add Subscription — Click to create a new subscription for any of your orgs
- See Pricing — Click to view pricing info for Coveralls Cloud plans
- Resync — Click to refresh available orgs from connected services
Sign Up > Choose Plan
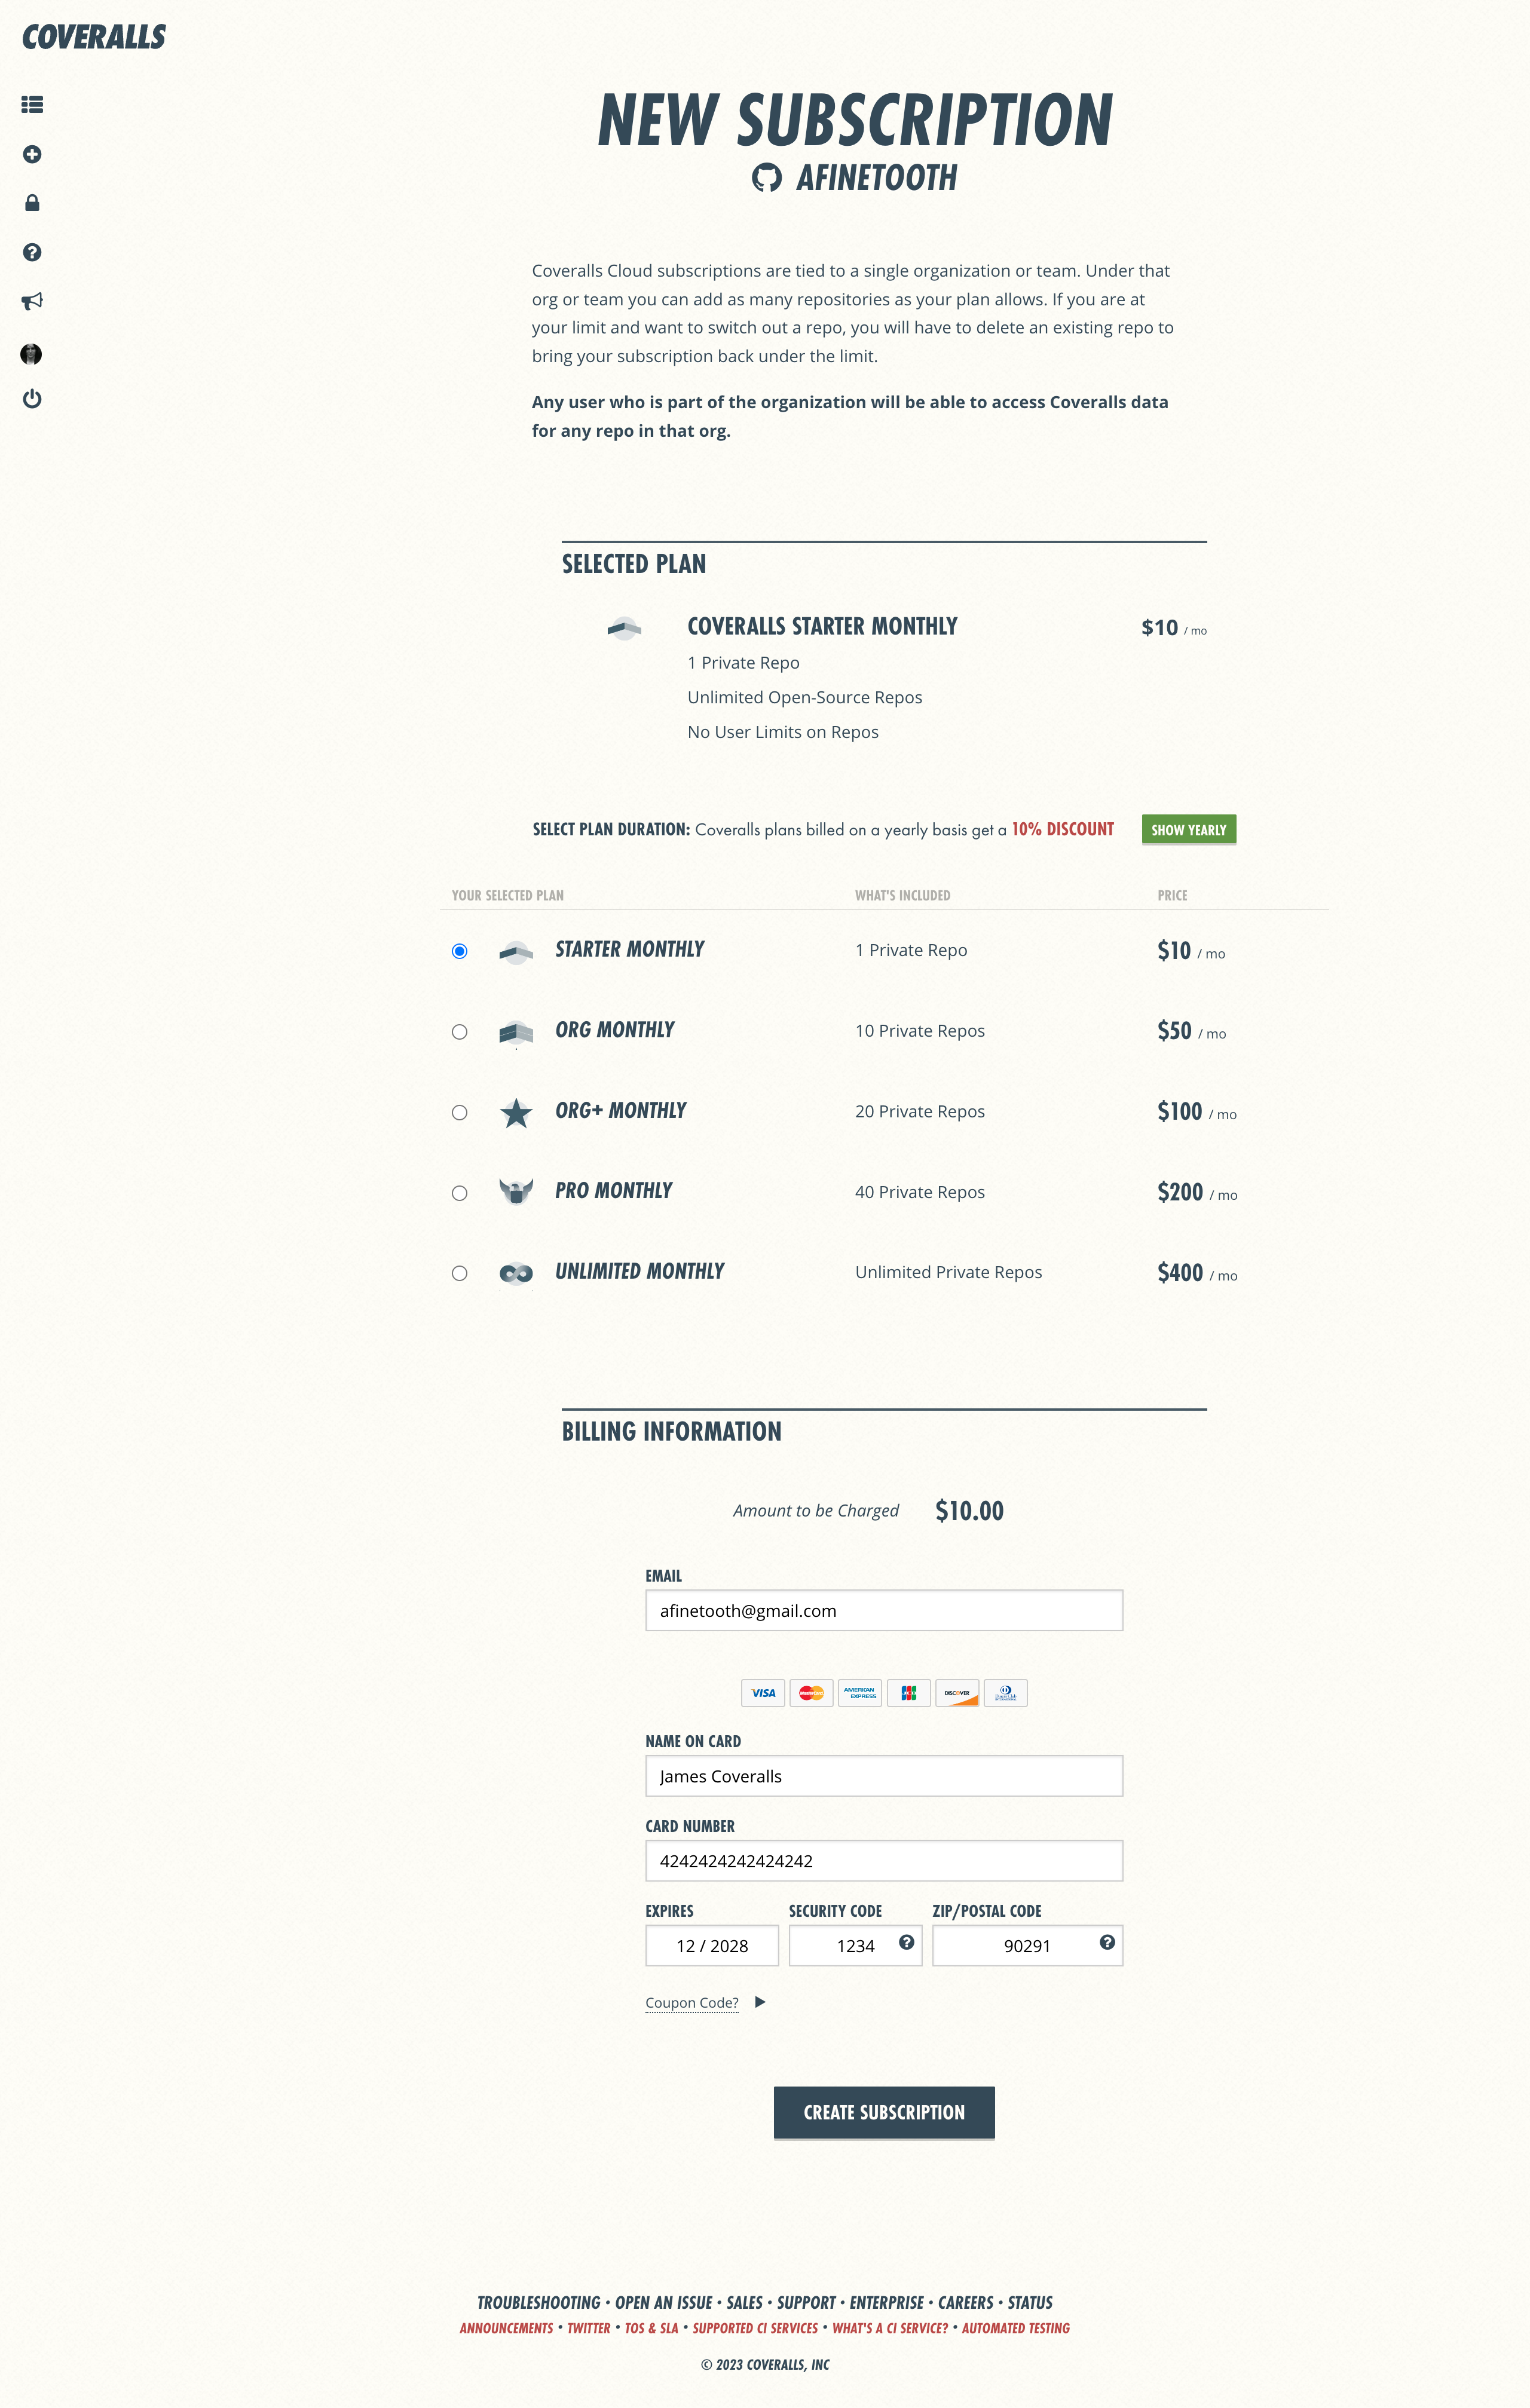
After choosing your org, you’ll need to choose a plan for your new Coveralls subscription. You can choose between plans based on the number of private repos you need to track coverage for, and choose from plans paid monthly, or annually with a 10% discount.
Sign Up > Choose Plan Info & Actions
- Select Plan — Click to select a plan
- Show Yearly/Monthly — Click to change plan durations & pricing
- Billing Info — Enter an email and billing info for your subscription
- Coupn Code? — Enter a coupon code to apply a discount to your subscription
- Create Subscription — Click to create your new subscription
Sign up > Last Step
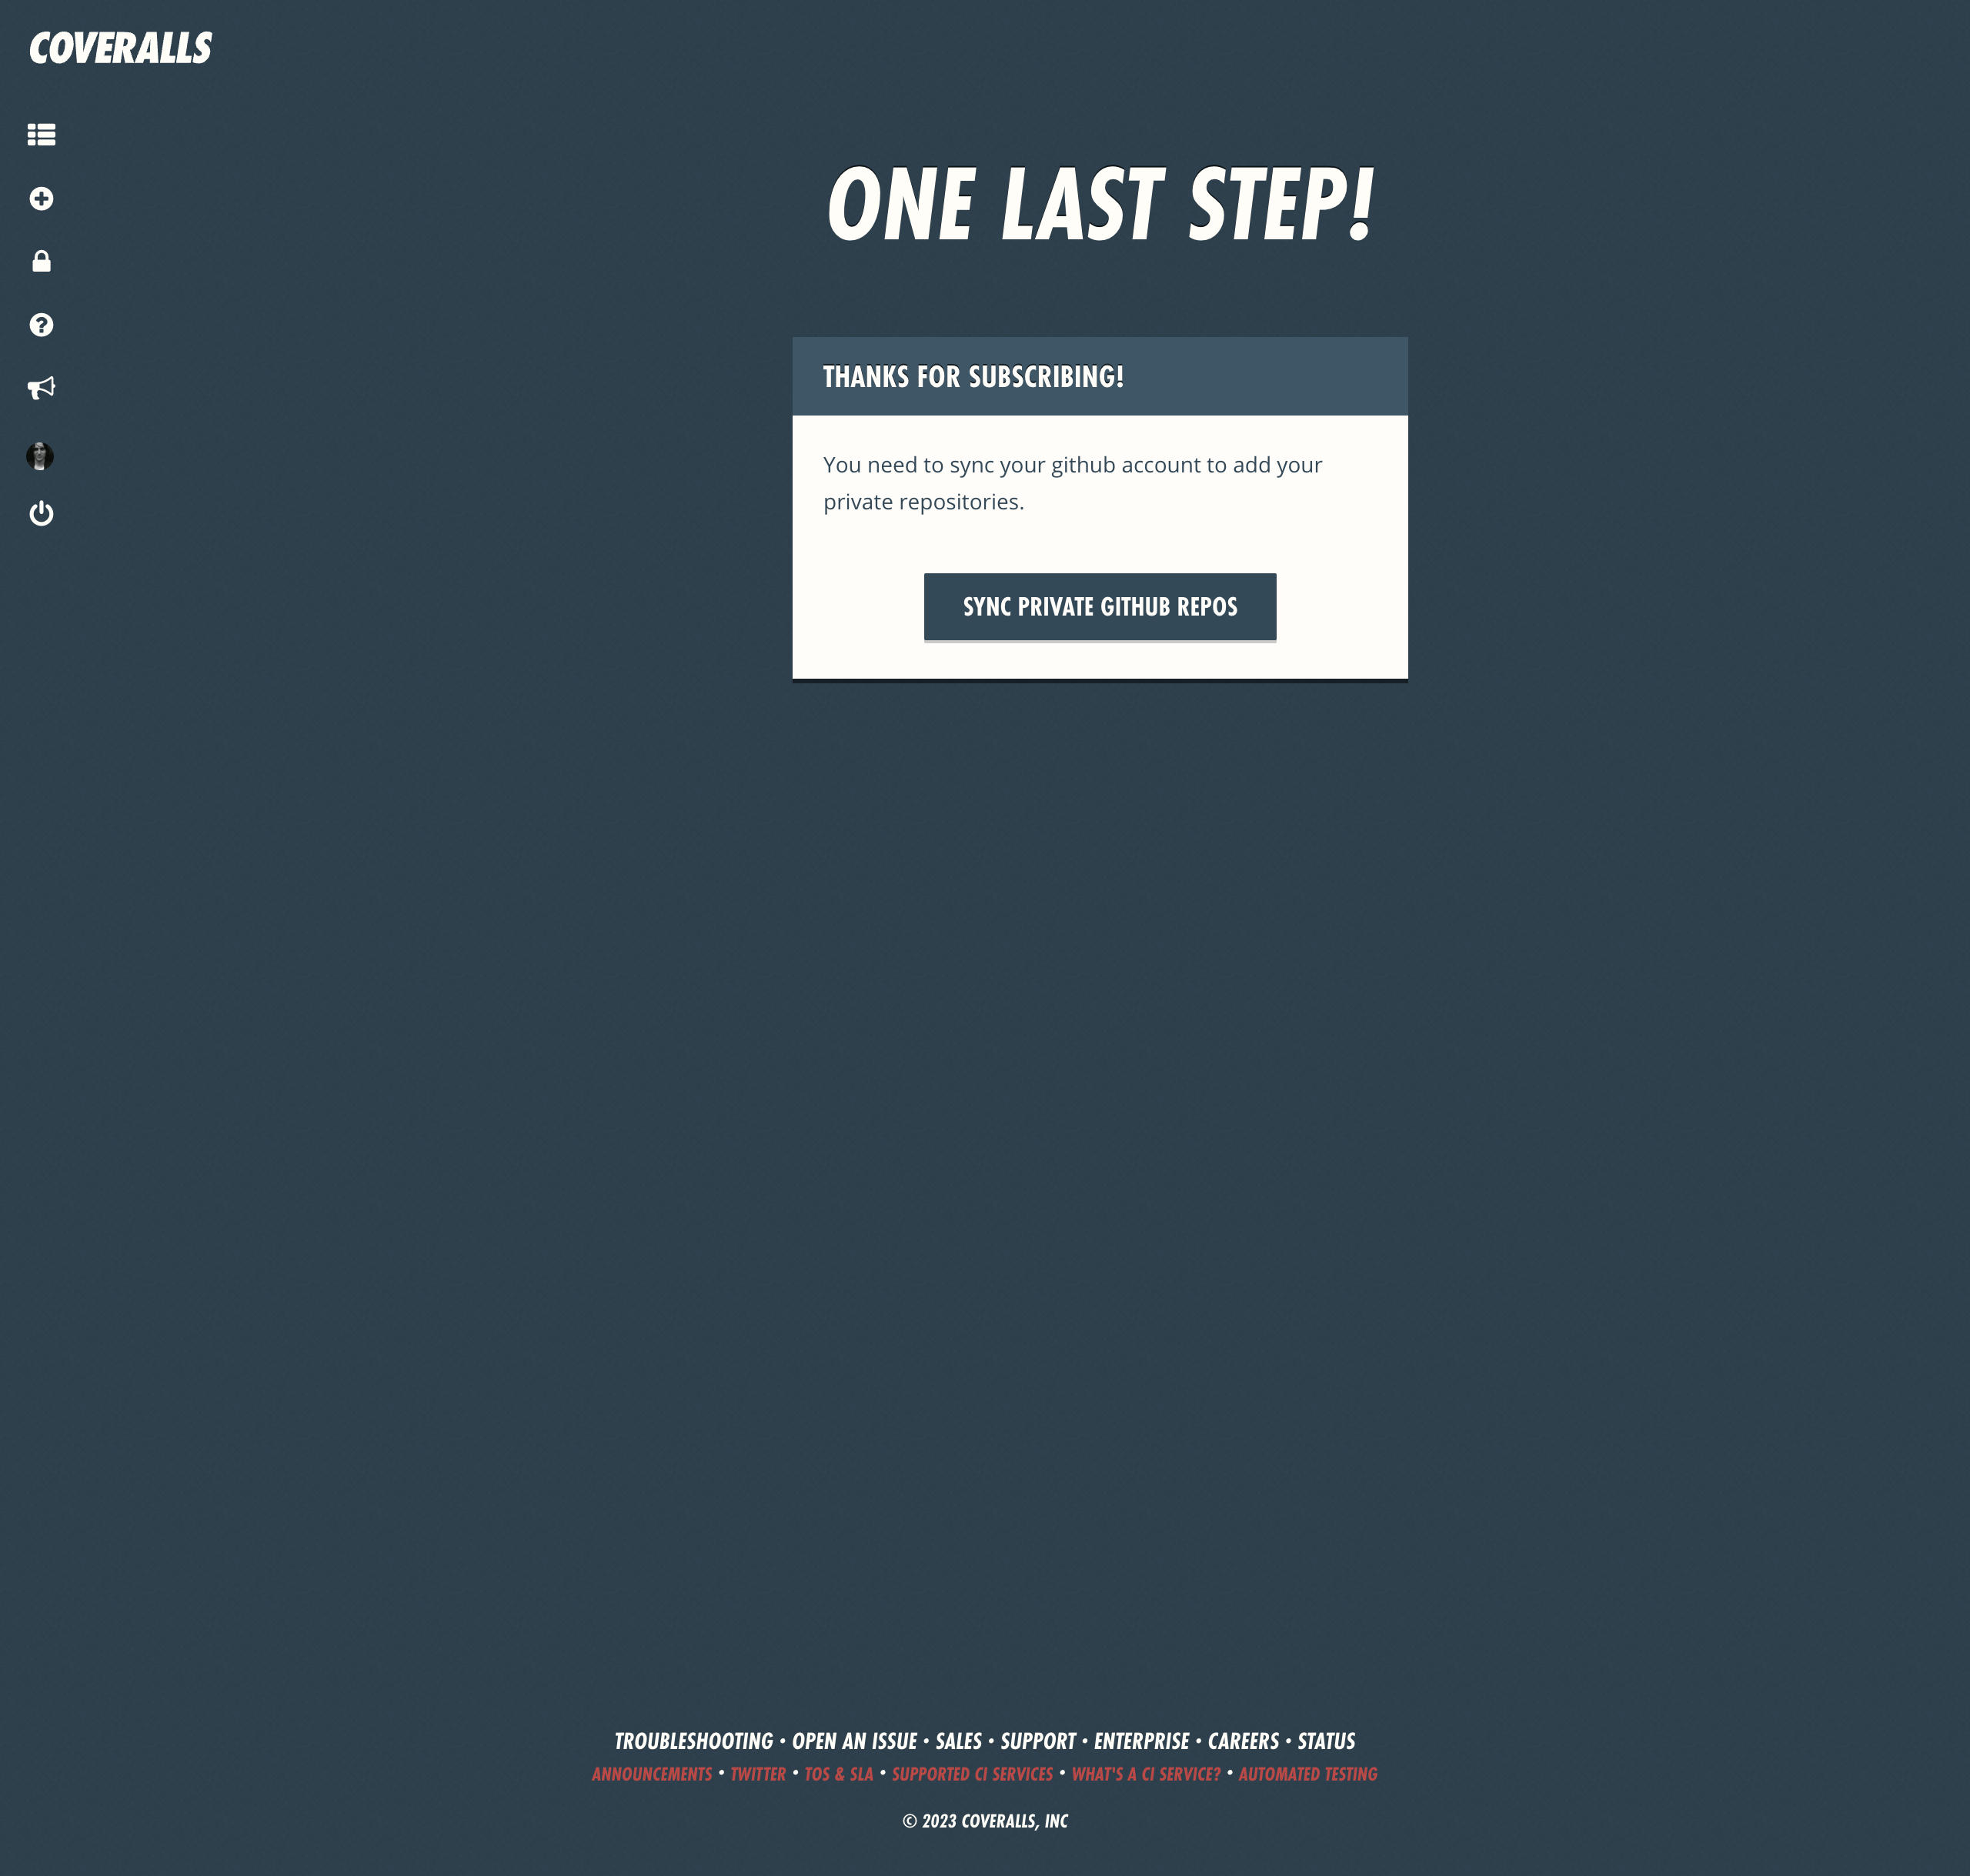
After creating your new subscription, you’ll see the Last Step page, where you can refresh your list of available repos after changing your access scope to private with your new subscription.
Sign up > Last Step Info & Actions
- Sync Private Repos — Click to make all private repos available to your subscription
Welcome (New Subscription)
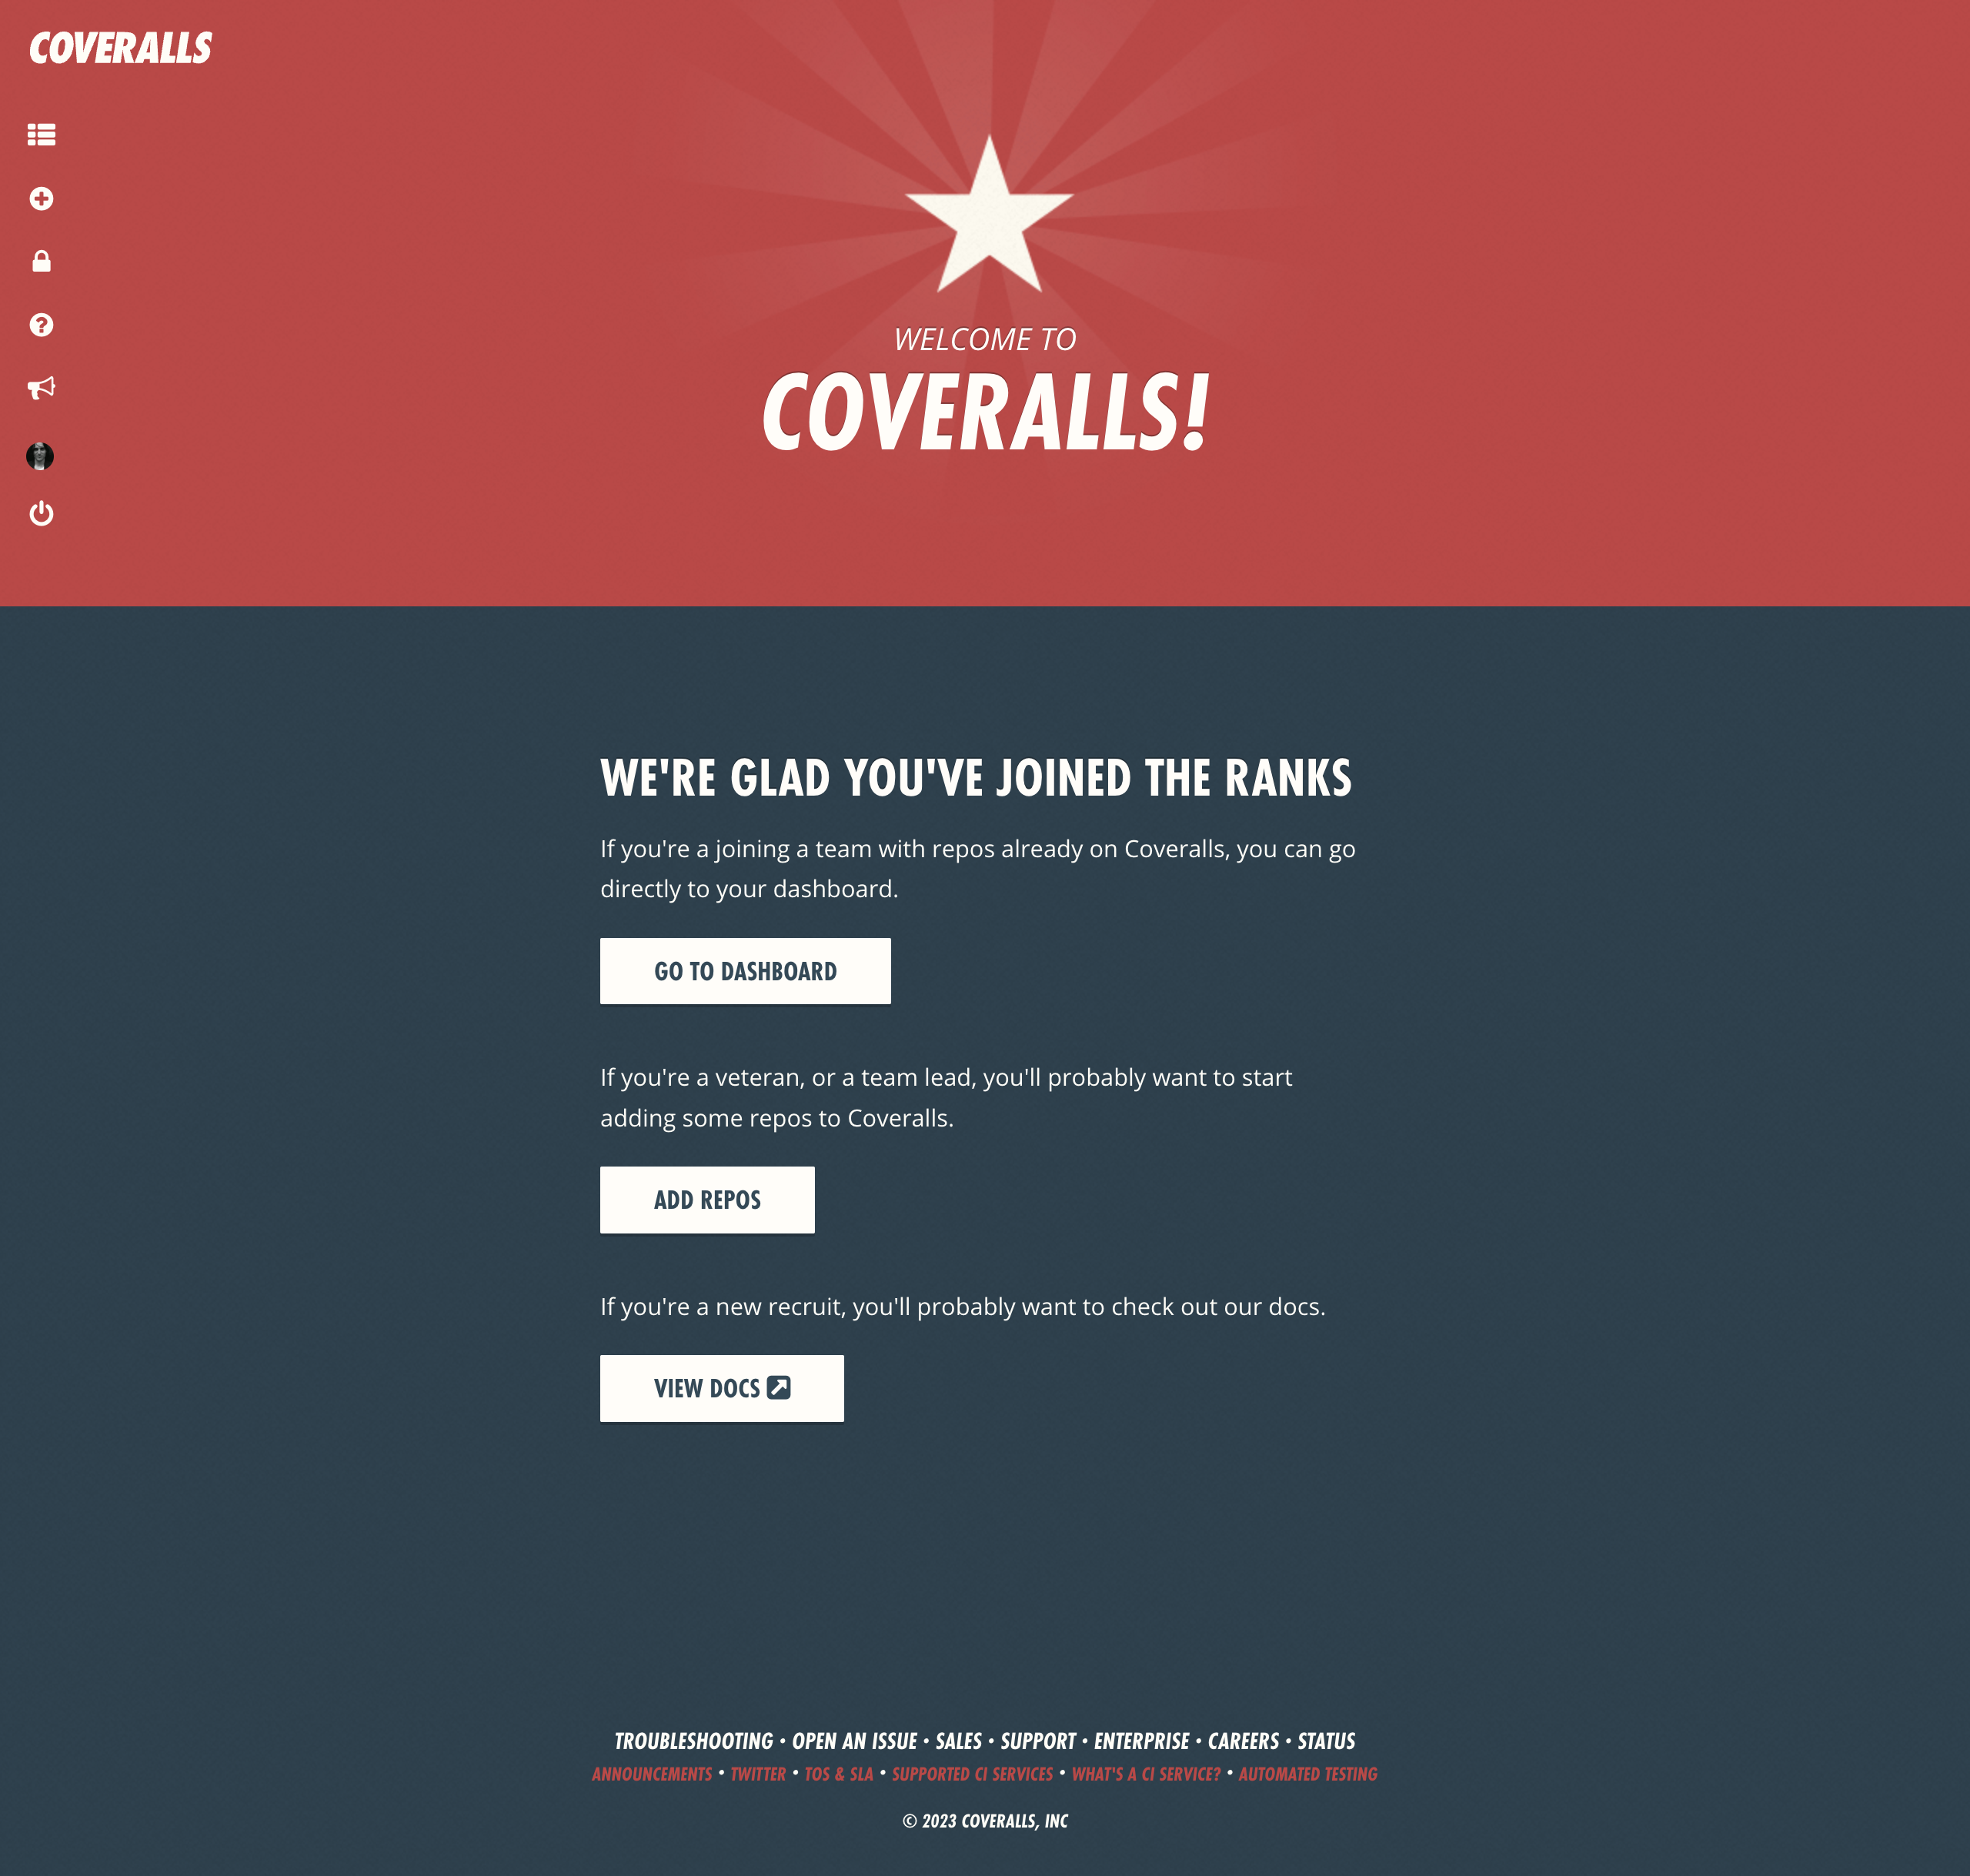
After creating your new subscription, you’ll see the Welcome page, where you can choose where to go next, based on your level of experience with Coveralls.
Welcome Page Info & Actions
- Go to Dashboard — Click to see repos already added to Coveralls
- Add Repos — Click to start adding new repos to Coveralls
- View Docs — Click to visit Coveralls Docs > Getting Started
The Dashboard
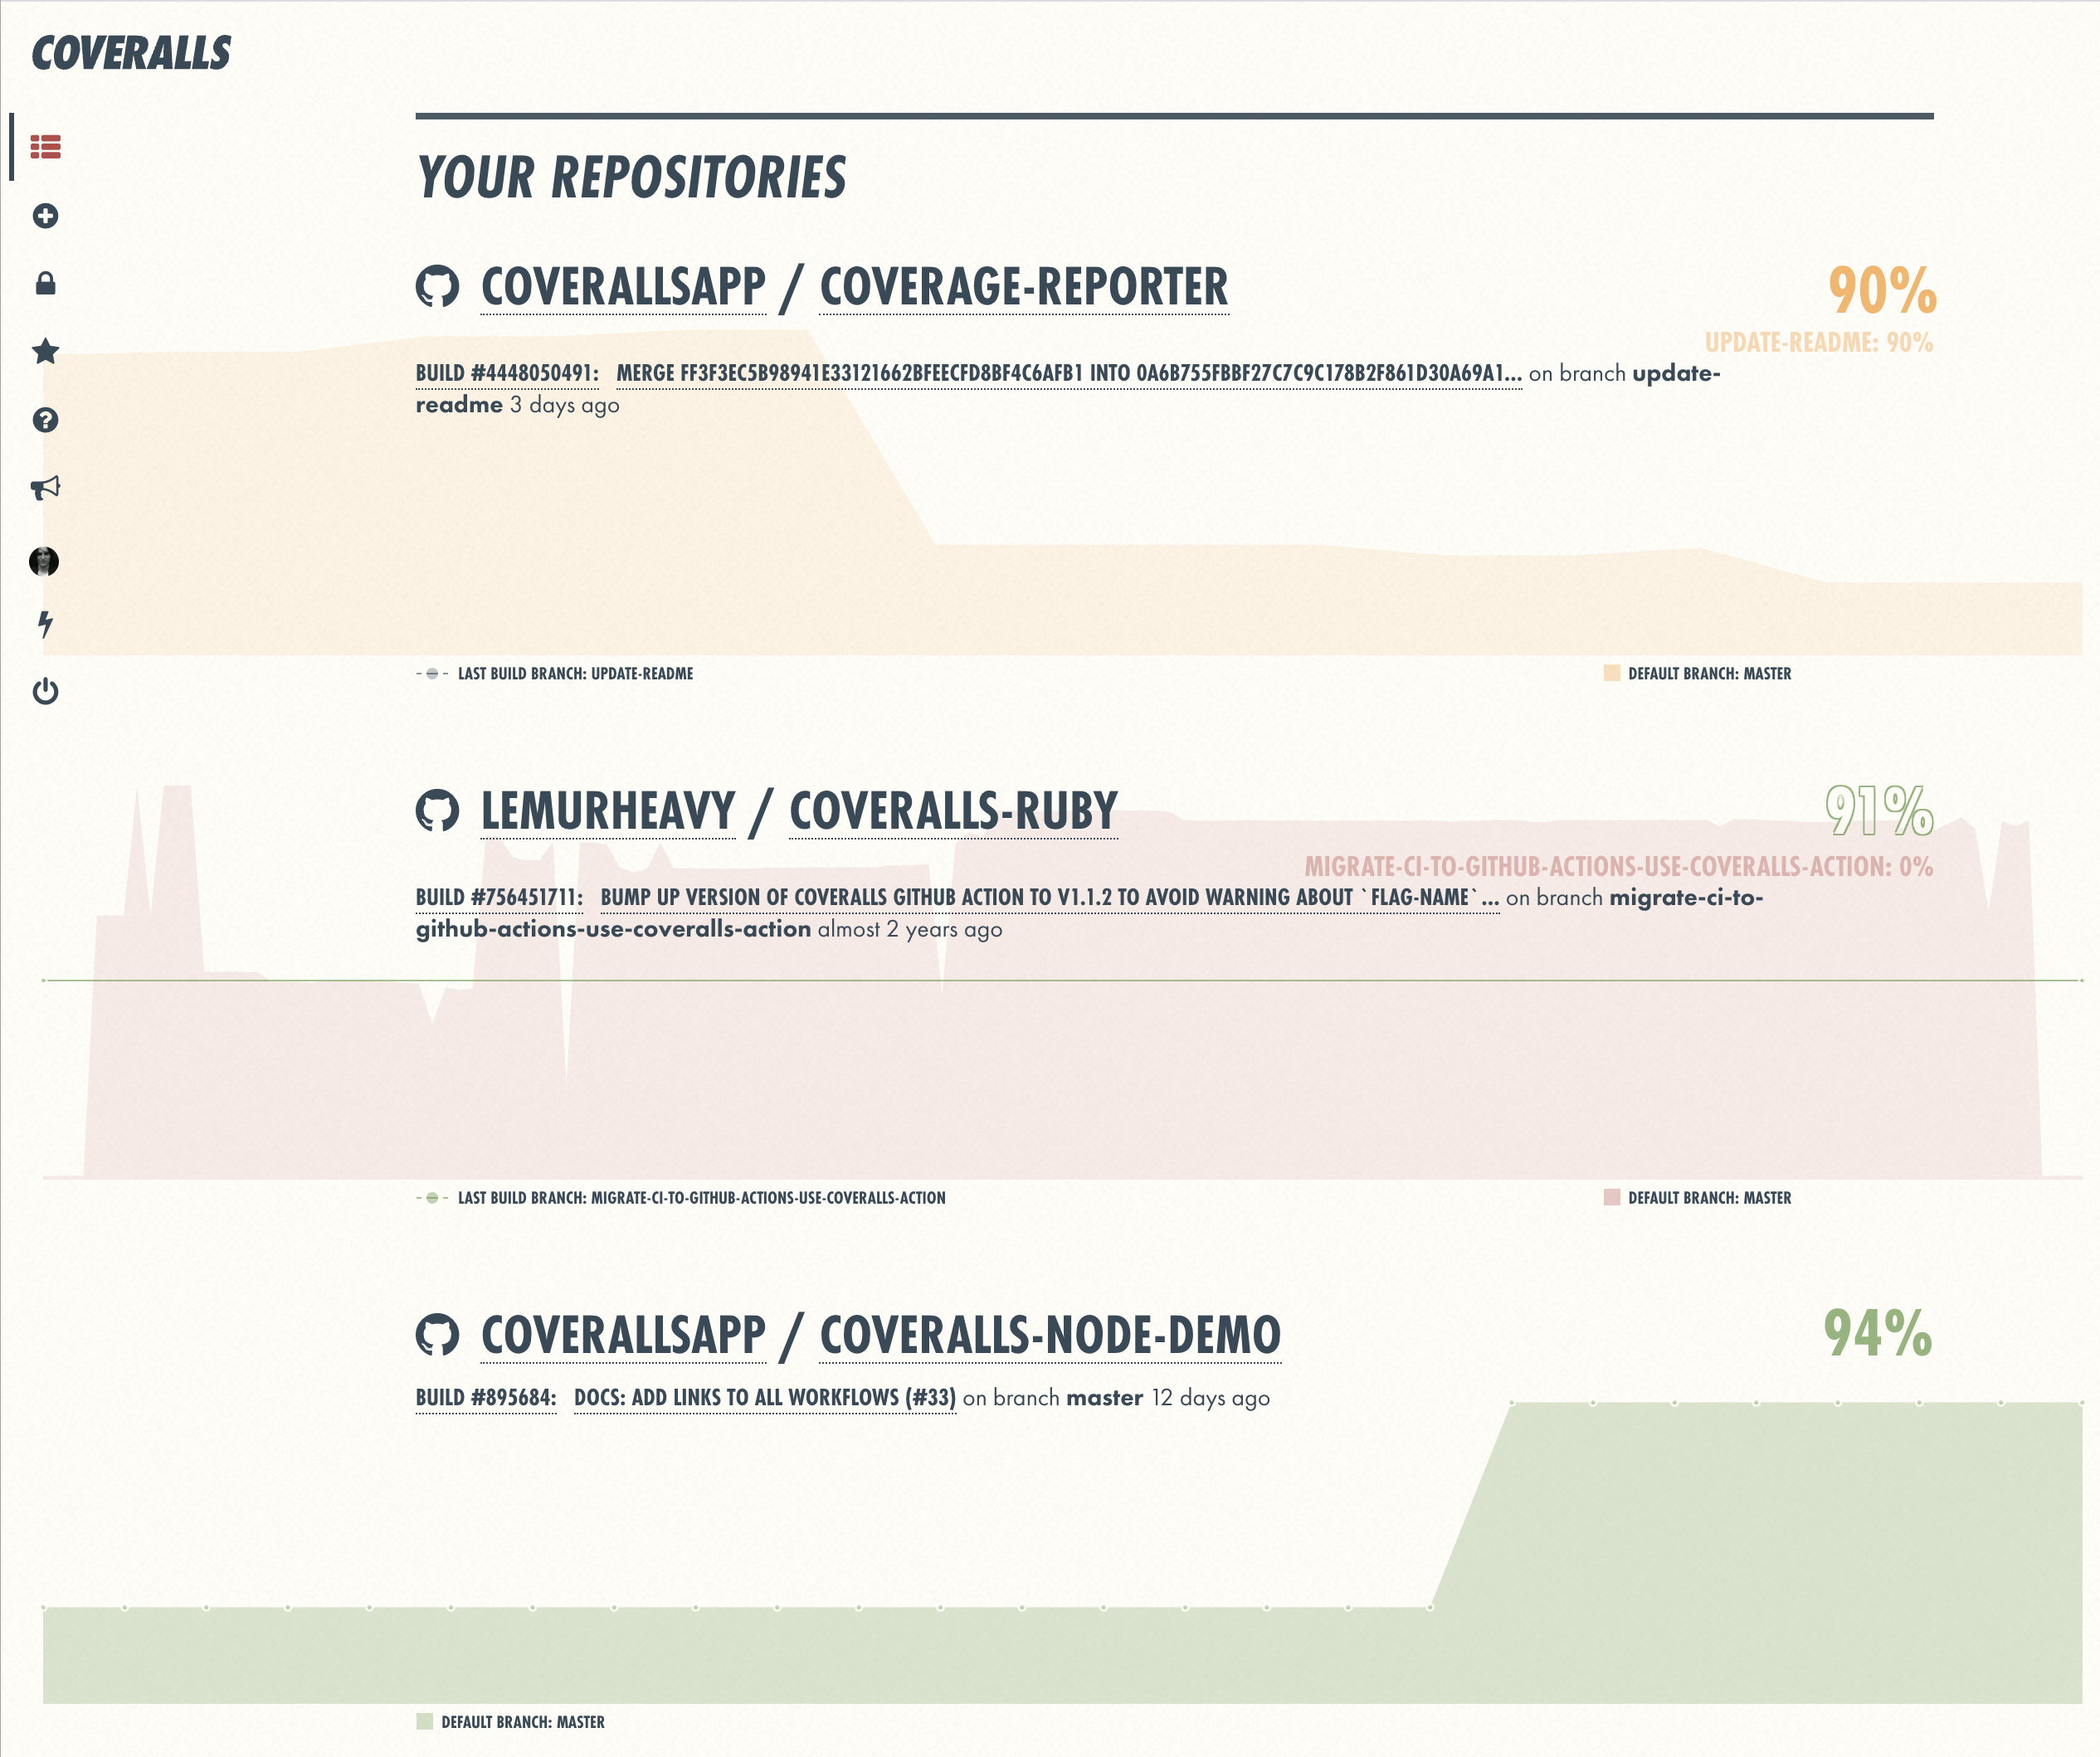
The Coveralls Dashboard (aka. All Repos Page) is the first page you’ll see when you log in to Coveralls. It’s a good place to start if you’re looking for a quick overview of coverage across all of your projects.
Dashboard Info & Actions
- Project Name — Click on the project name to go to the Repo Page for that project
- Project Coverage — Coverage % for the project’s main branch
- Last Build — The project’s last build; click to go to the Build Page for that build
- Build Coverage — Coverage % for the last build’s branch
The Add Repos Page
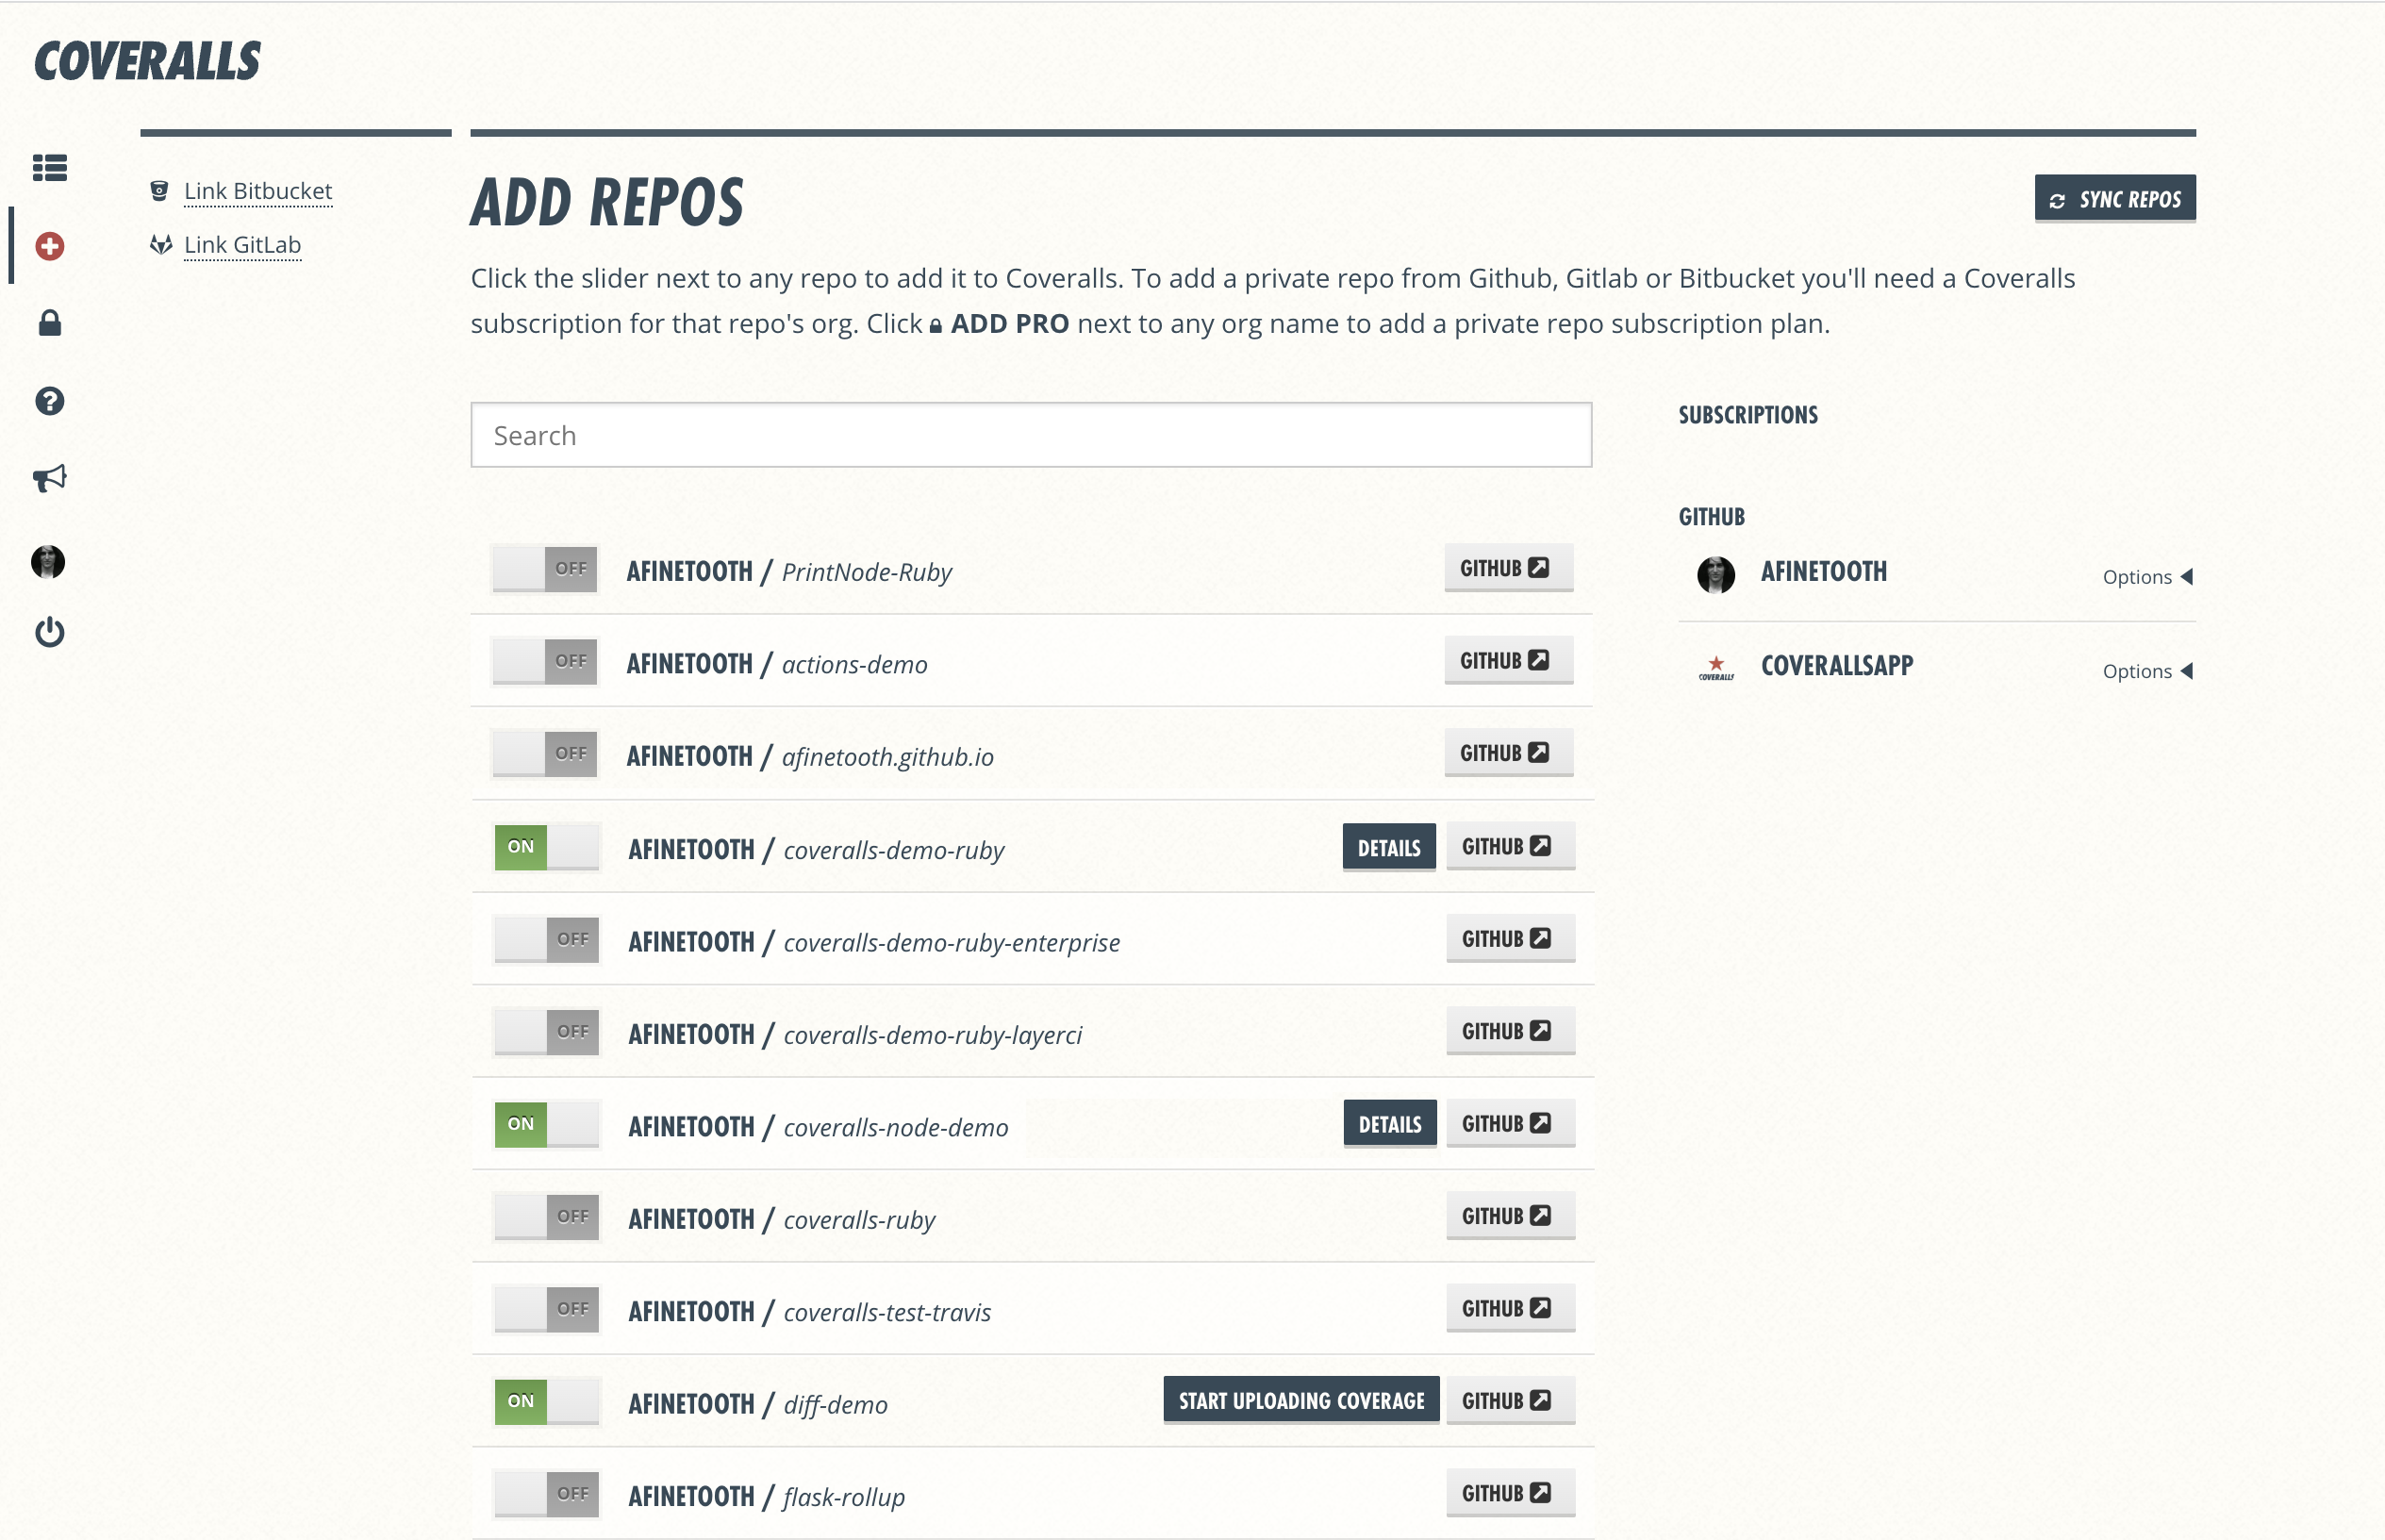
The Add Repos Page is where you can add repos from your git hosting services to Coveralls—each creating a new Coveralls Repo. You can add repos from GitHub, GitLab or Bitbucket.
Add Repos Page Info & Actions
Left Nav (Connect Services)
Link Github — If not already linked Link GitLab — If not already linked Link Bitbucket — If not already linked
Header (Search & Sync)
- Instructions — How to add repos to Coveralls
- Search — Search for a repo by name
- Sync — Click Sync Repos to sync repos from all connected services
Main Section (Repo List)
- Add Repo — Click ON/OFF toggle to add a repo to your Coveralls account
- Set up Repo — Click Start Uploading Coverage to set up coverage reports for repo
- View Details — Click Details to view existing coverage reports for a repo
- Visit Git Home — Click Github/Gitlab/Bitbucket to visit repo at git service
- Pagination — Page through current list of repos
Right Nav (Orgs & Subscriptions)
- Subscriptions — Click subscription name to filter repos by subscription
- Orgs — Your orgs, listed by service; click org name to filter repos by org
- Add Subscription — Click Add Pro to add a subscription for an org
Repo Start Page
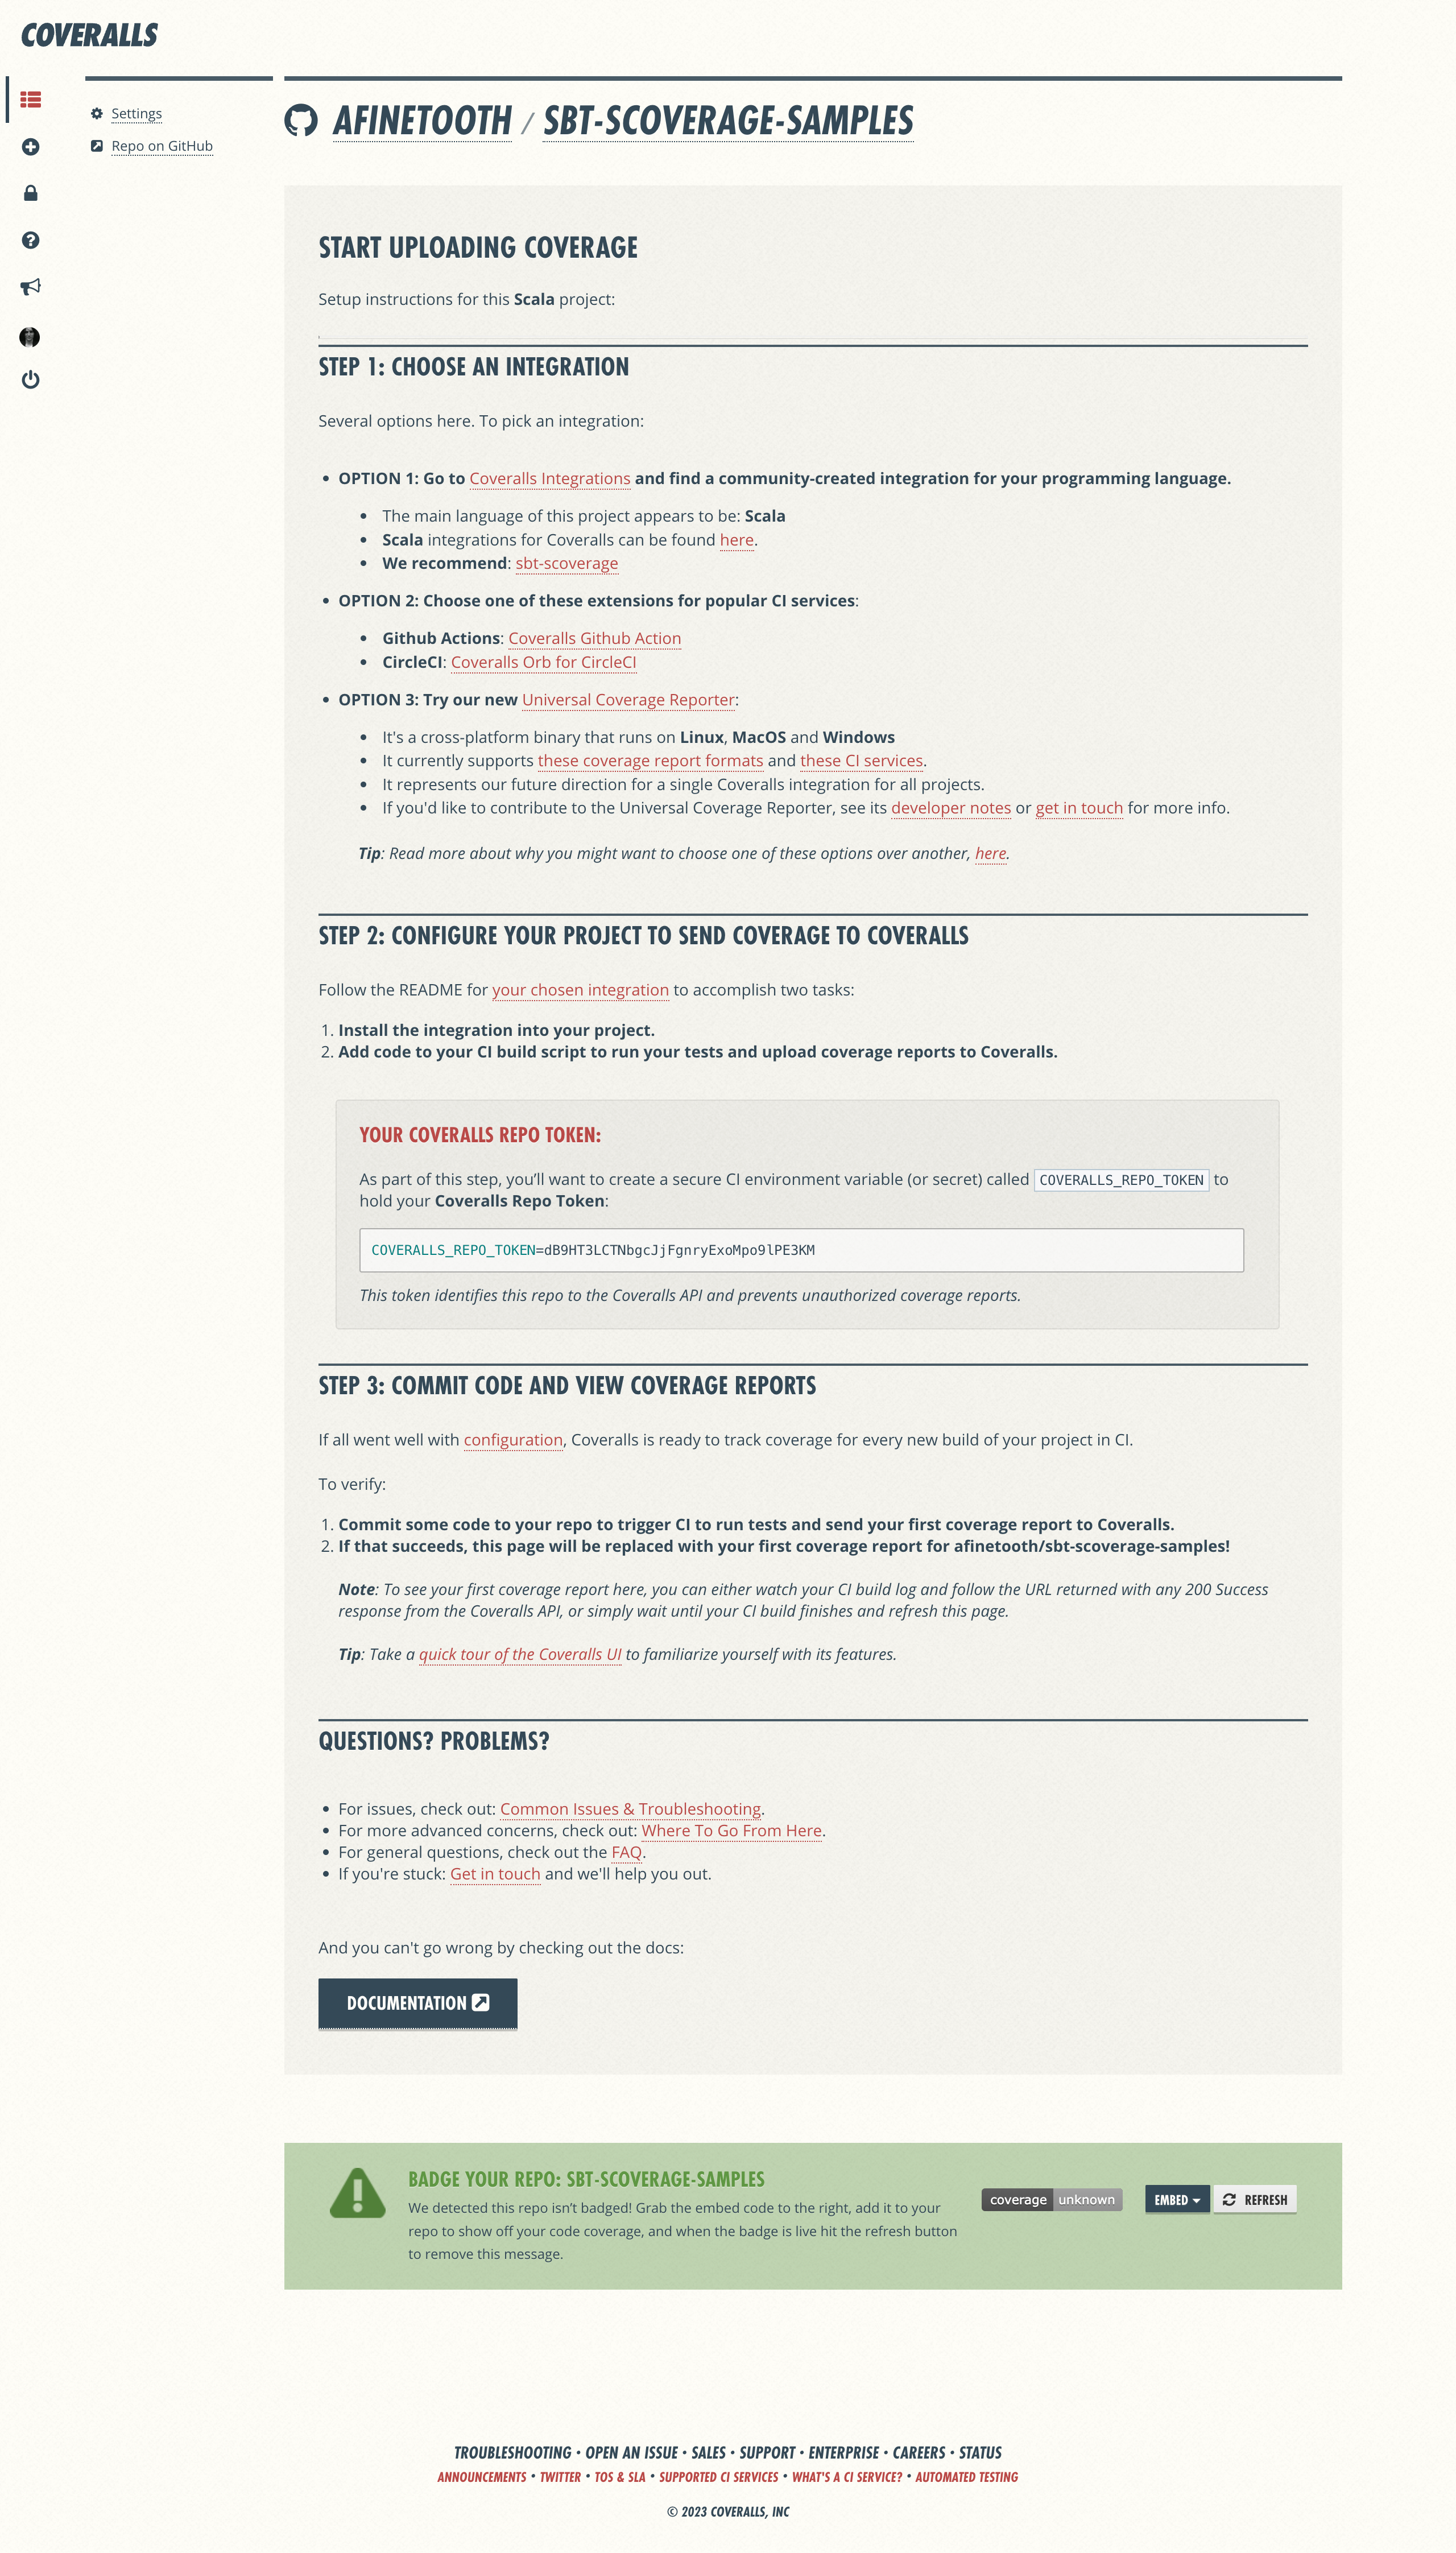
The Repo Start Page is the page you’ll see after you add a repo to Coveralls, but before Coveralls has received any coverage reports for it. It provides instructions for setting up coverage reports for the repo.
Repo Start Page Info & Actions
Left Nav
- Settings — Click to access the Repo Settings Page for the repo
- Repo on Github/Gitlab/Bitbucket — Click to visit the repo at your git service
Main Section (Setup Help)
- Start Uploading Coverage — Instructions for integrating this repo with Coveralls
- Choose an Integration — Integration options based on project’s main language
- Configure Your Project — Steps to configure the project for coverage reporting
- Coveralls Repo Token — First opportunity to copy the repo token to clipboard
- Commit Code & View Coverage — Steps to create your first coverage report
- Questions? Problems? — Support links for issues and next steps
- Badge Your Repo — First opportunity to add coverage badge to your README
Repo Page
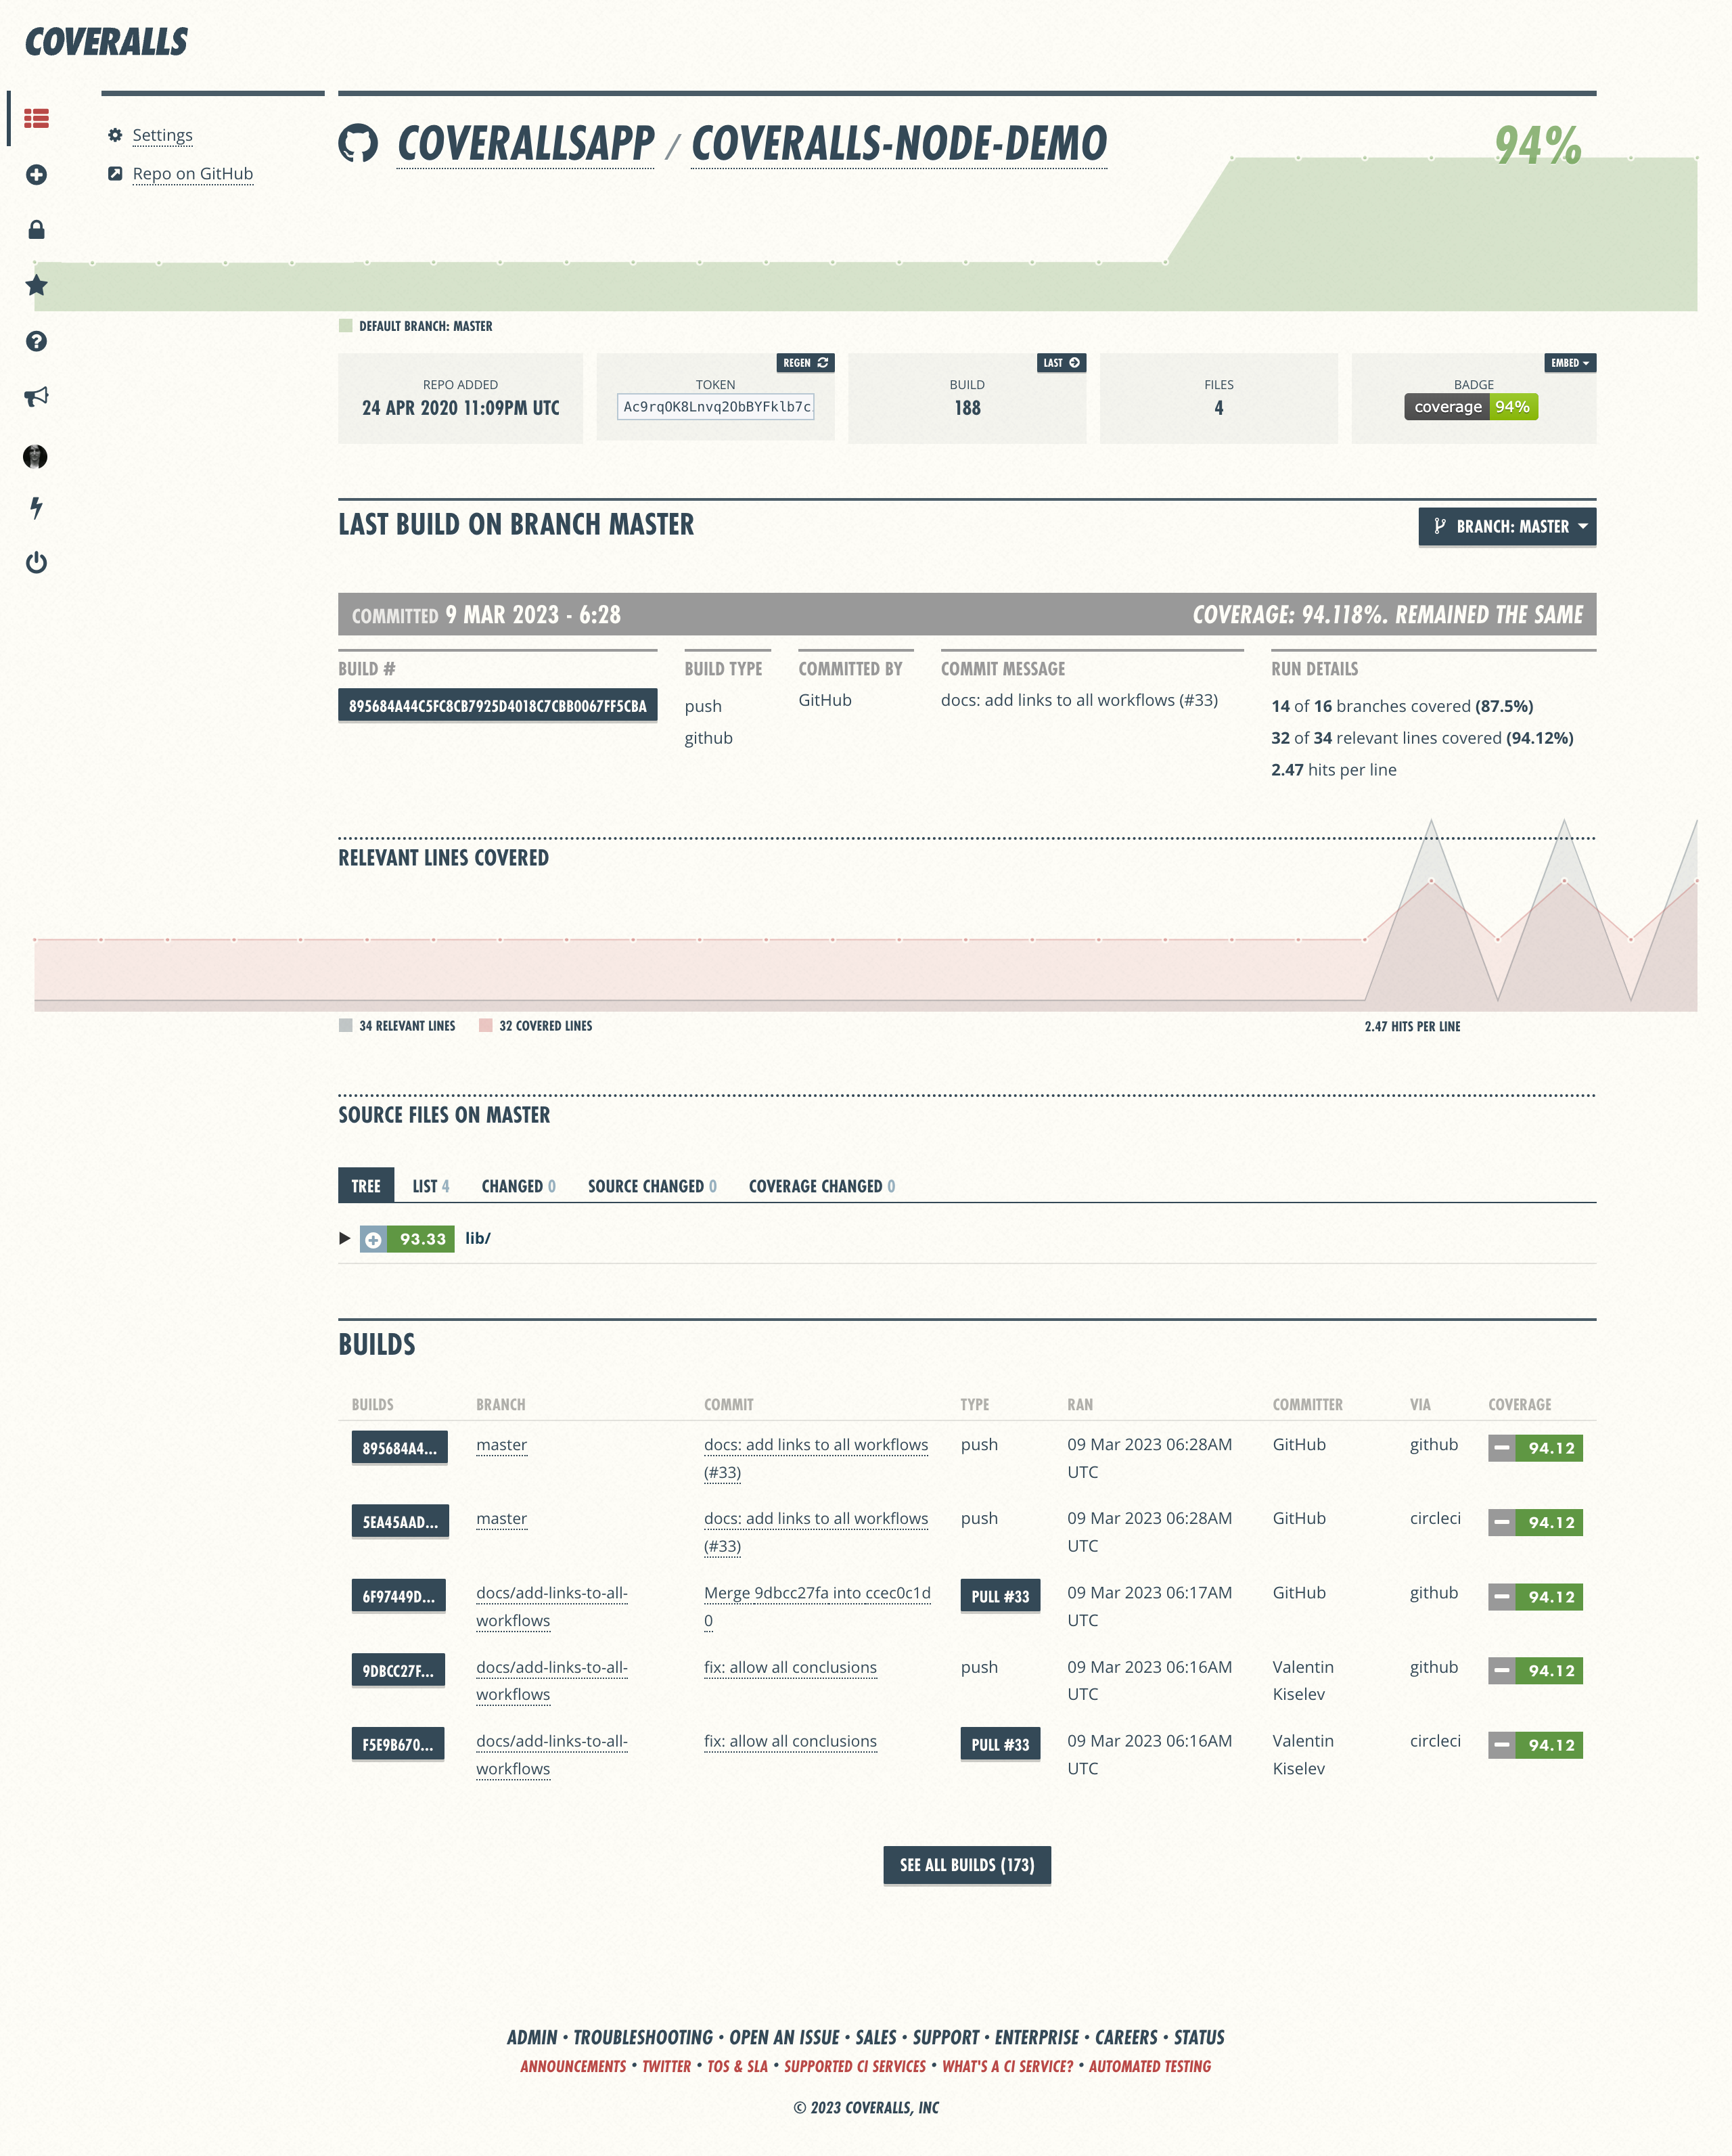
Repo Page Info & Actions
Left Nav
- Settings — Click to access the Repo Settings Page for the repo
- Repo on Github/Gitlab/Bitbucket — Click to visit the repo at your git service
Main Section (Coverage Details)
- Repo Name — Repo name, with breadcrumb link to parent org
- Coverage % — Coverage % for the repo’s default branch
- Coverage Graph — Coverage trend graph for the repo’s main branch
- Repo Details — Date added, Repo token, # builds, # files, Badge
- Last Build — Last build on default branch; click to visit Build Page
- Build Info Table — Details for last build: #, Type, Commit, Coverage breakdown
- Line Coverage Graph — Graph comparing covered lines to relevant lines
- Source Files — Name, Coverage % & details; click to visit Source File Pages
- Recent Builds — Last five builds in build history; click to See All Builds
Build Page
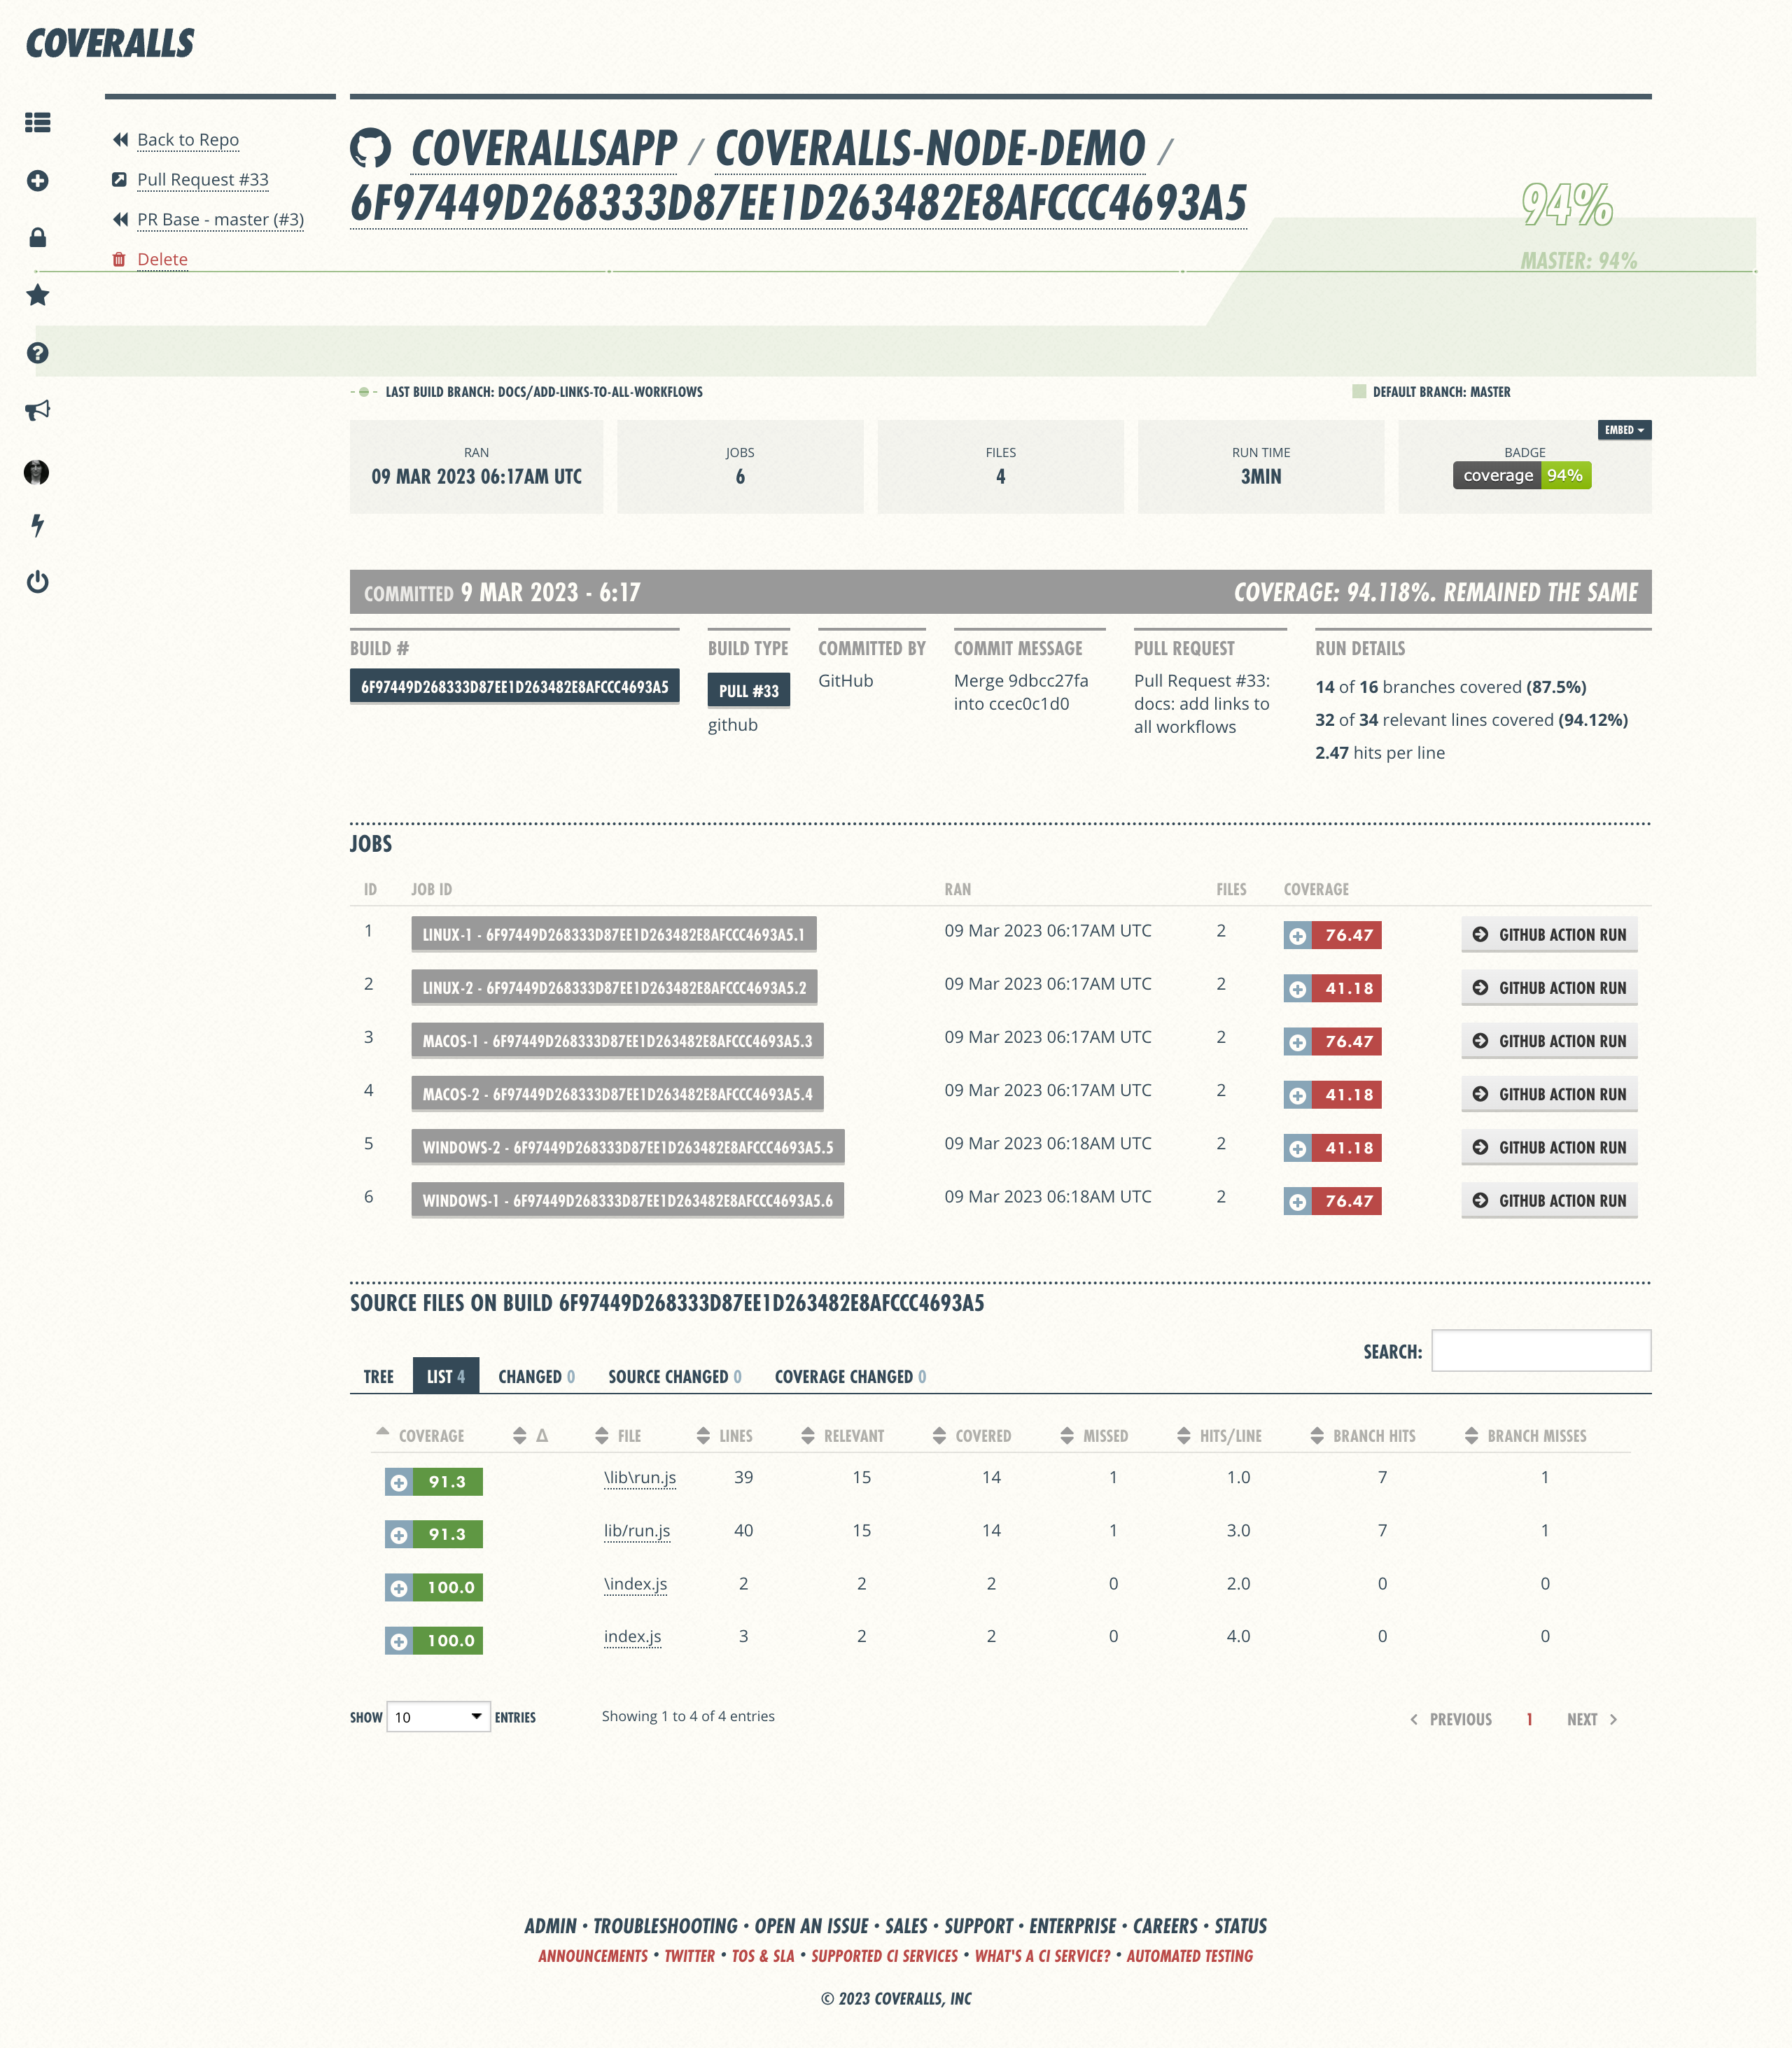
Build Page Info & Actions
Left Nav
- Back to Repo — Click to return to Repo Page
- Commit
— Click to visit commit at your git service (push builds only) - Pull Request
— Click to visit pull request at your git service (PR builds only) - Previous Build — Click to access previous build on came branch (push builds only)
- Base Build — Click to access base build (PR builds only)
- Delete — Click to delete the build
Main Section (Coverage Details)
- Build Name — Build name, with breadcrumb link to parent repo
- Build Coverage — Coverage % for this build
- Coverage Graph — Coverage trend graph for repo’s default branch
- Build Details — Run date, # jobs, # files, Run time, Badge
- Build Info Table — #, Type, Commit, PR title (PR only), Run details, Coverage %
- Jobs List — All jobs / subprojects w/ run details, coverage % & links to Job Pages
- Source Files — In build; Name, Coverage % & details; link to Source File Pages
Job Page
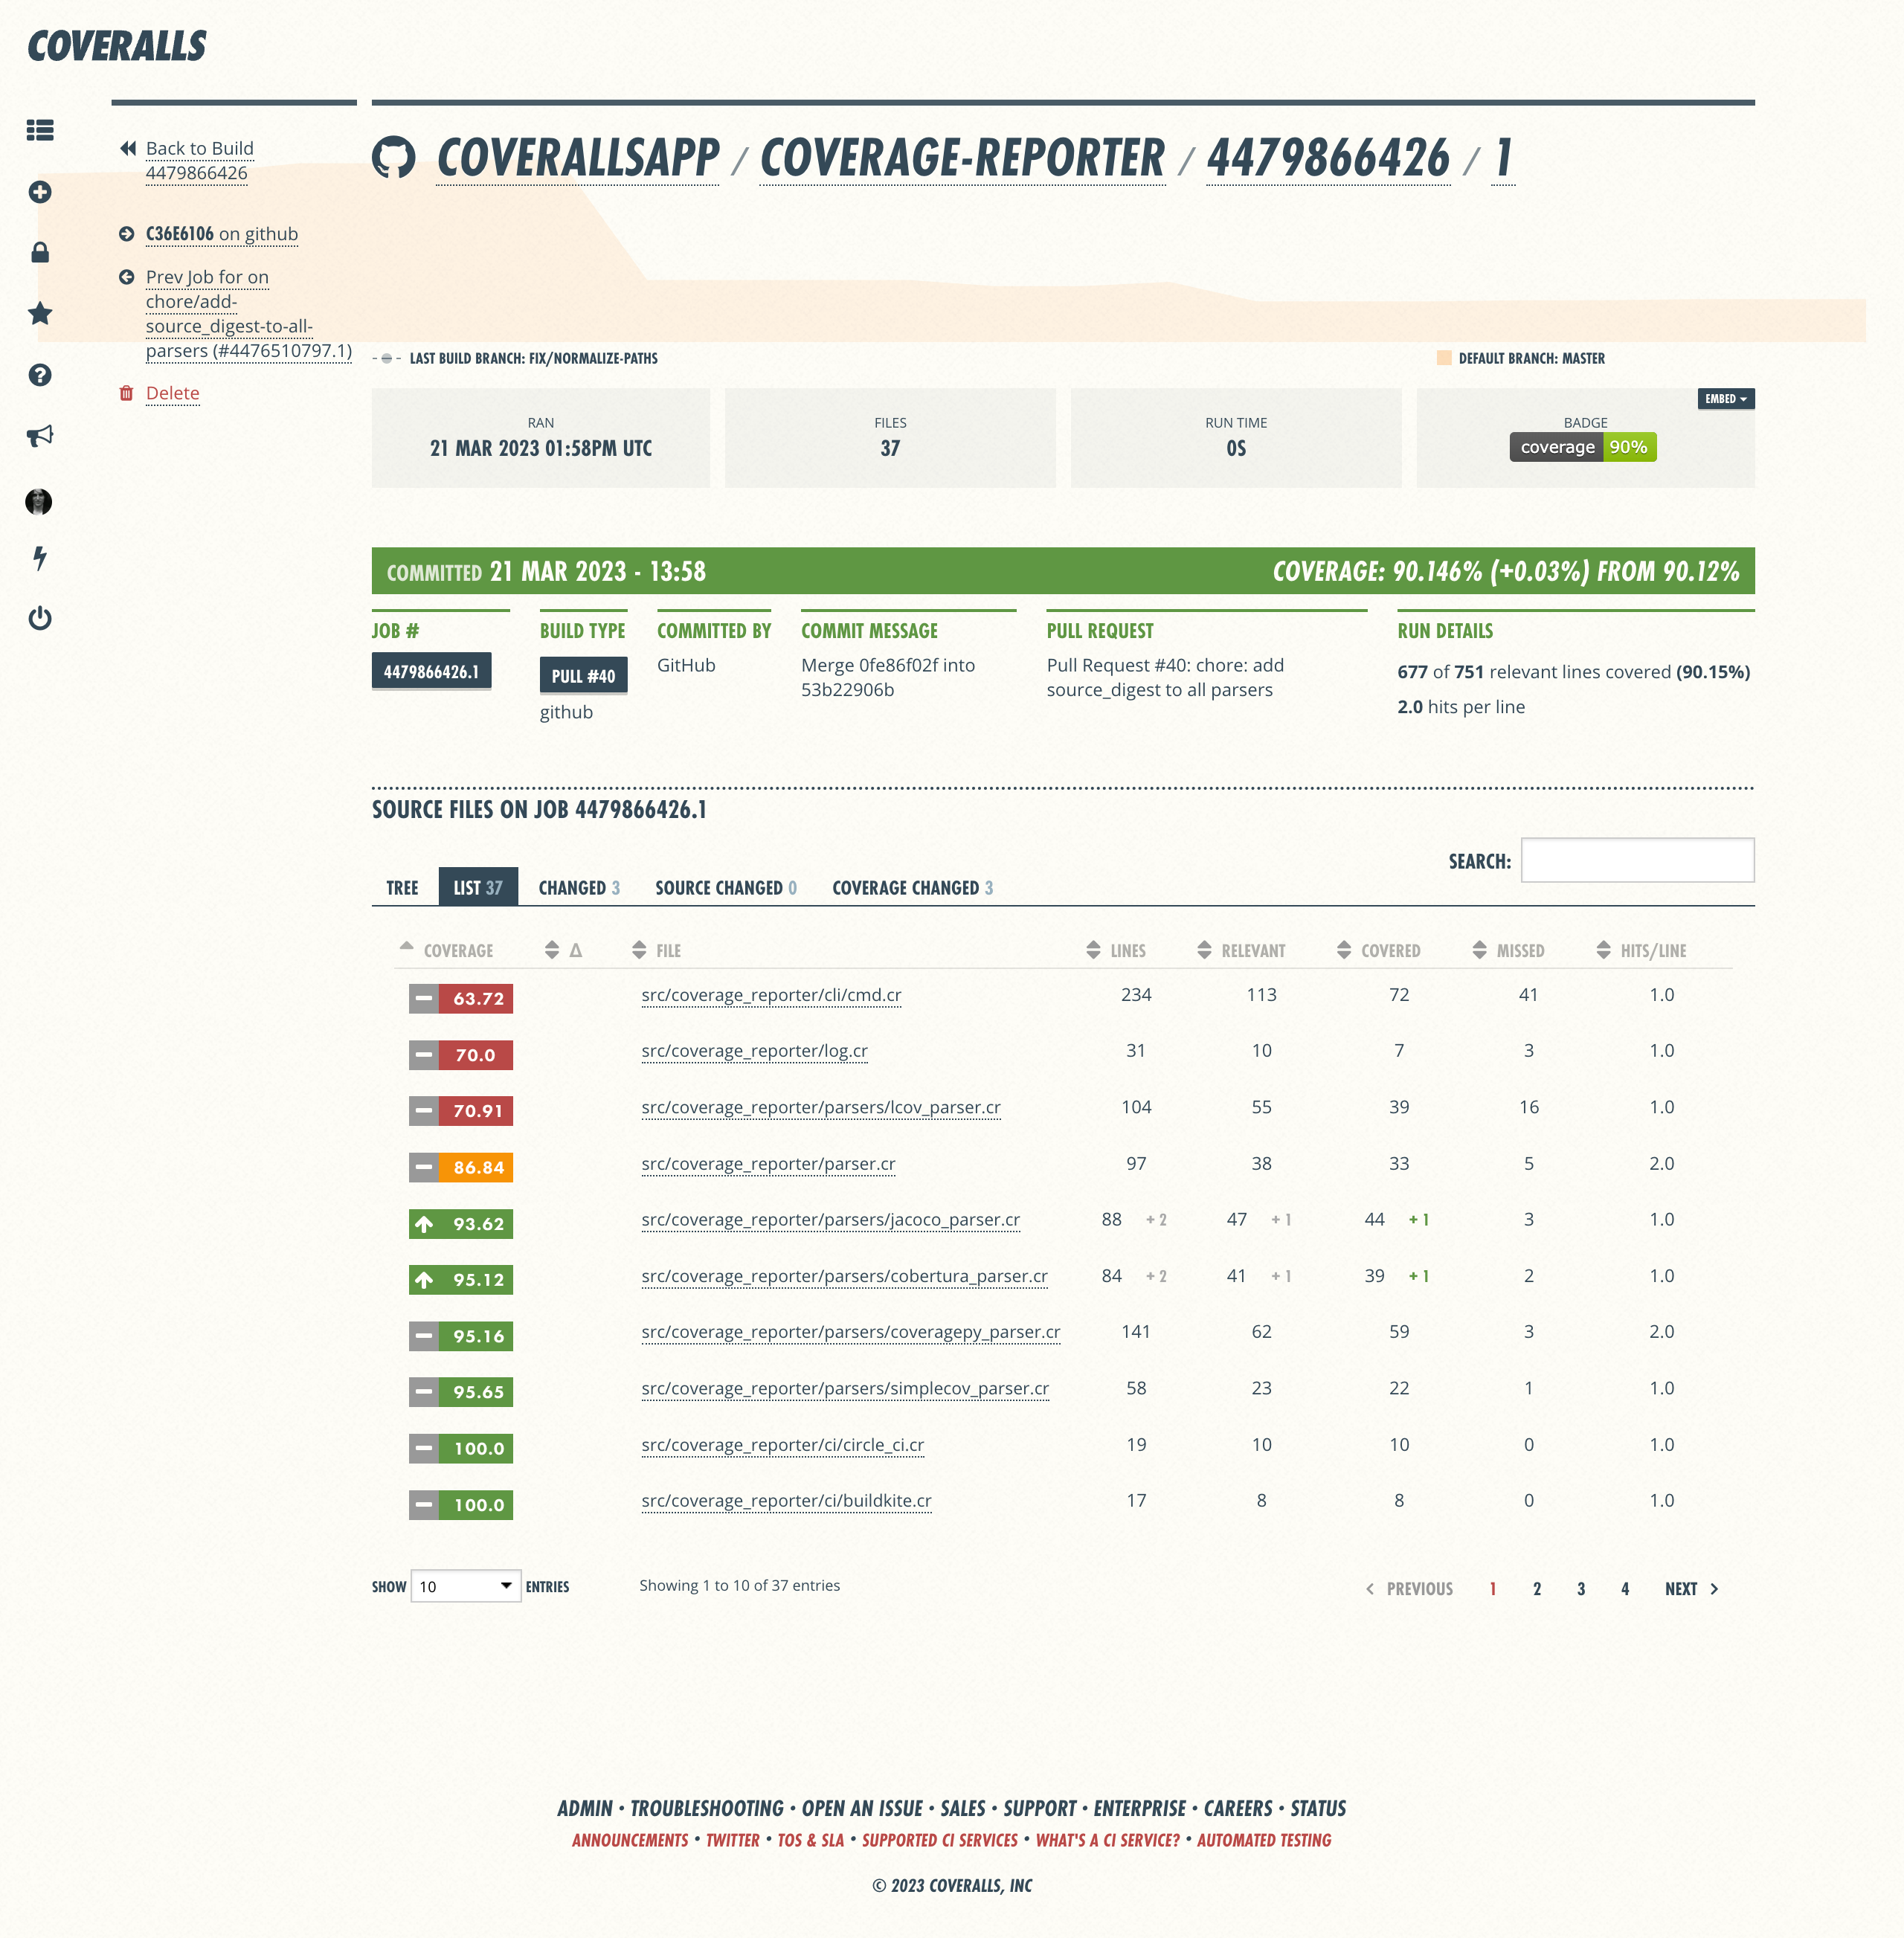
Job Page Info & Actions
Left Nav
- Back to Build — Click to return to Build Page
- Commit
— Click to visit commit at your git service - Delete — Click to delete the job
Main Section (Coverage Details)
- Job Name — Job name, with breadcrumb links to parent build and repo
- Job Coverage — Coverage % for this job
- Coverage Graph — Coverage trend graph for repo’s default branch
- Job Details — Run date, # files, Run time, Badge
- Job Info Table — #, Type, Commit, PR title (PR only), Run details, Coverage %
- Source Files Table — Name, Coverage details & changes; link to Source File Pages
Source File Page
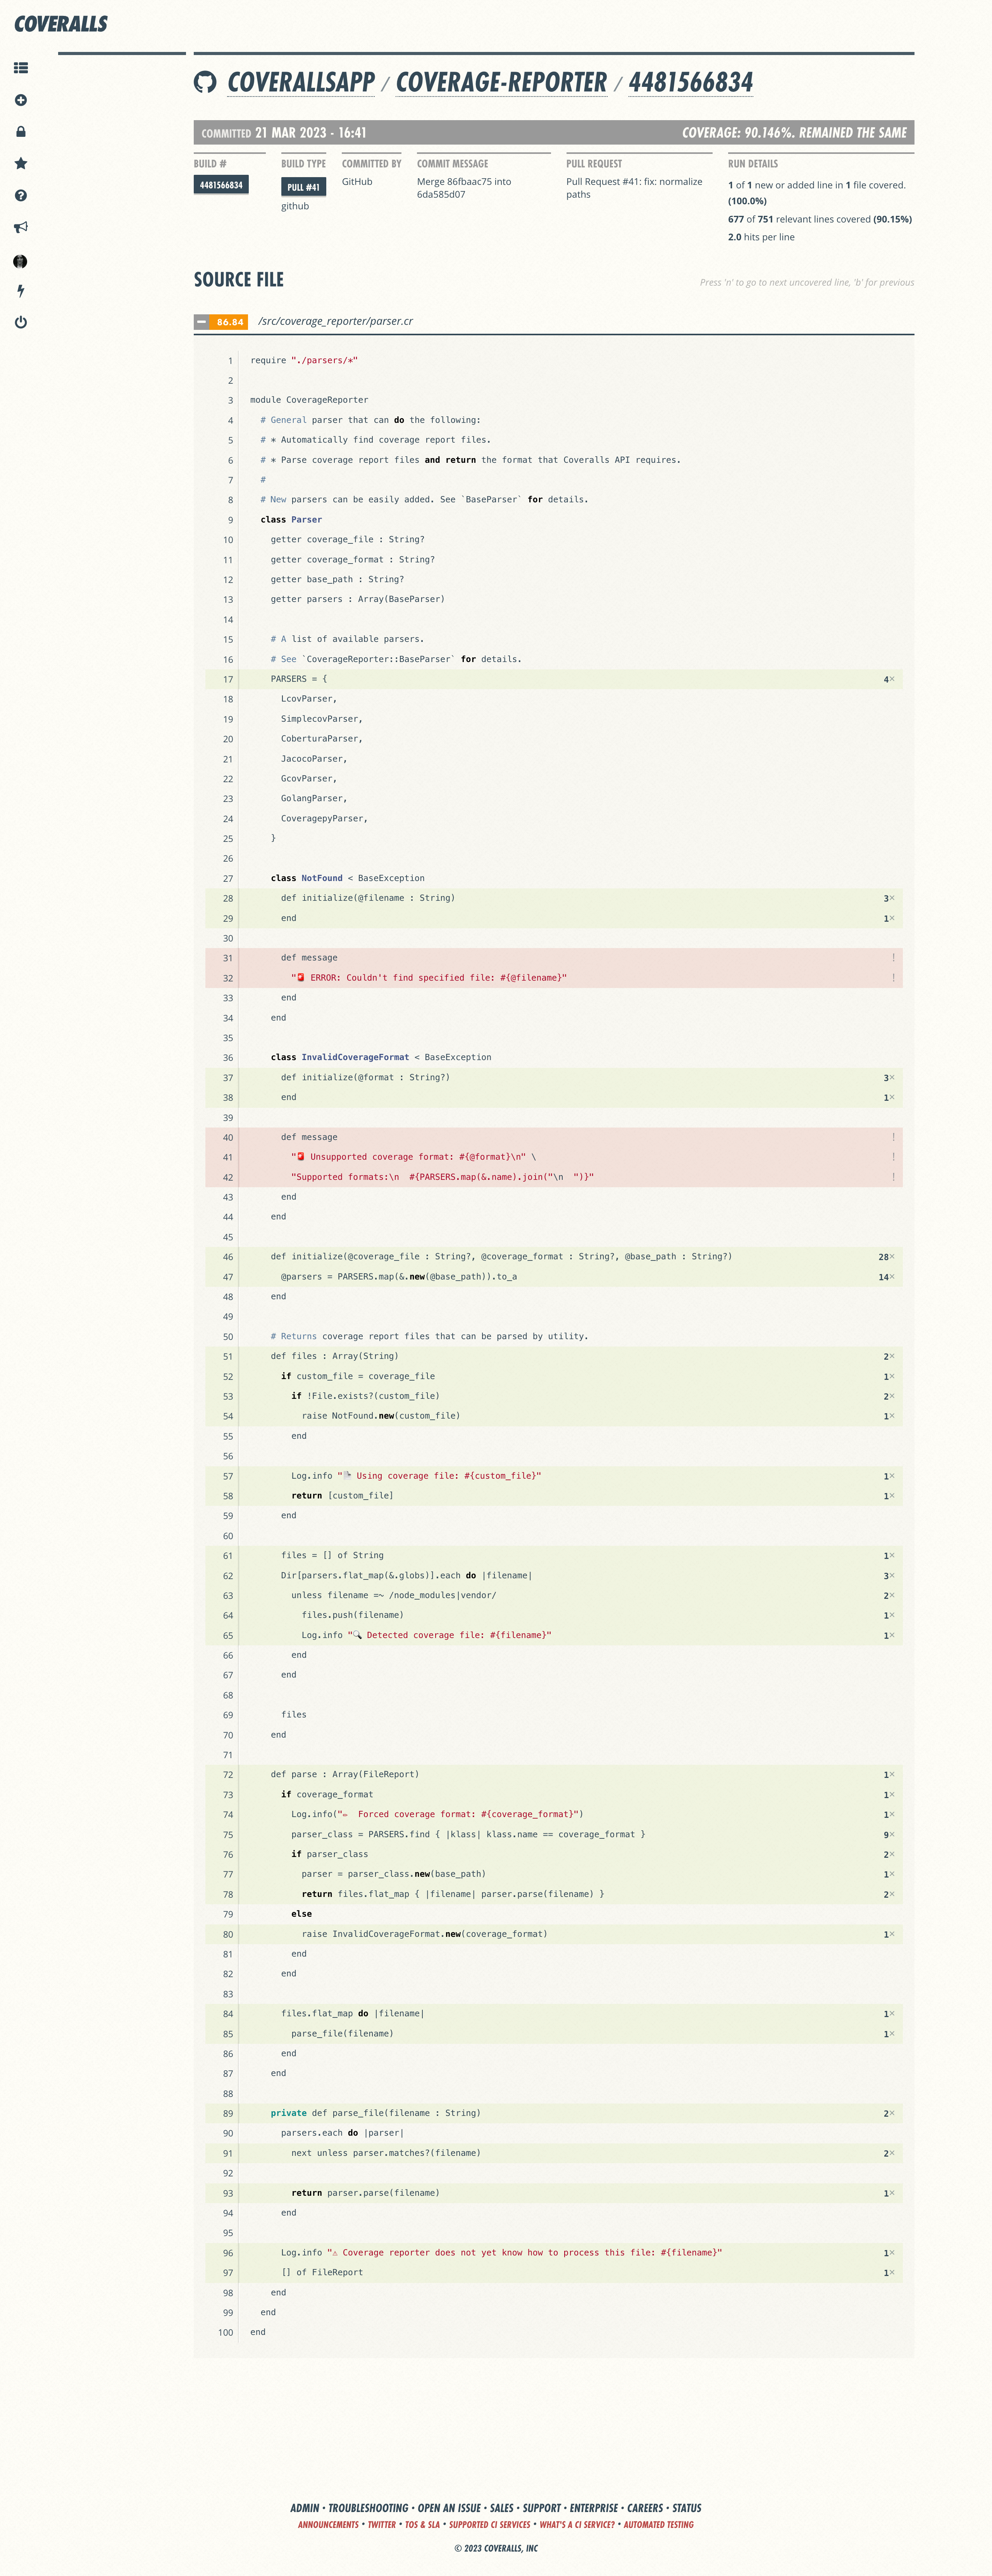
Source File Page Info & Actions
- Build/Job — Build or job name, with breadcrumb links back to parent repo
- Build/Job Info — #, Type, Commit, PR title (PR only), Run details, Coverage %
- Source File — Coverage %, Color-coded line-by-line coverage hits/misses
Repo Settings
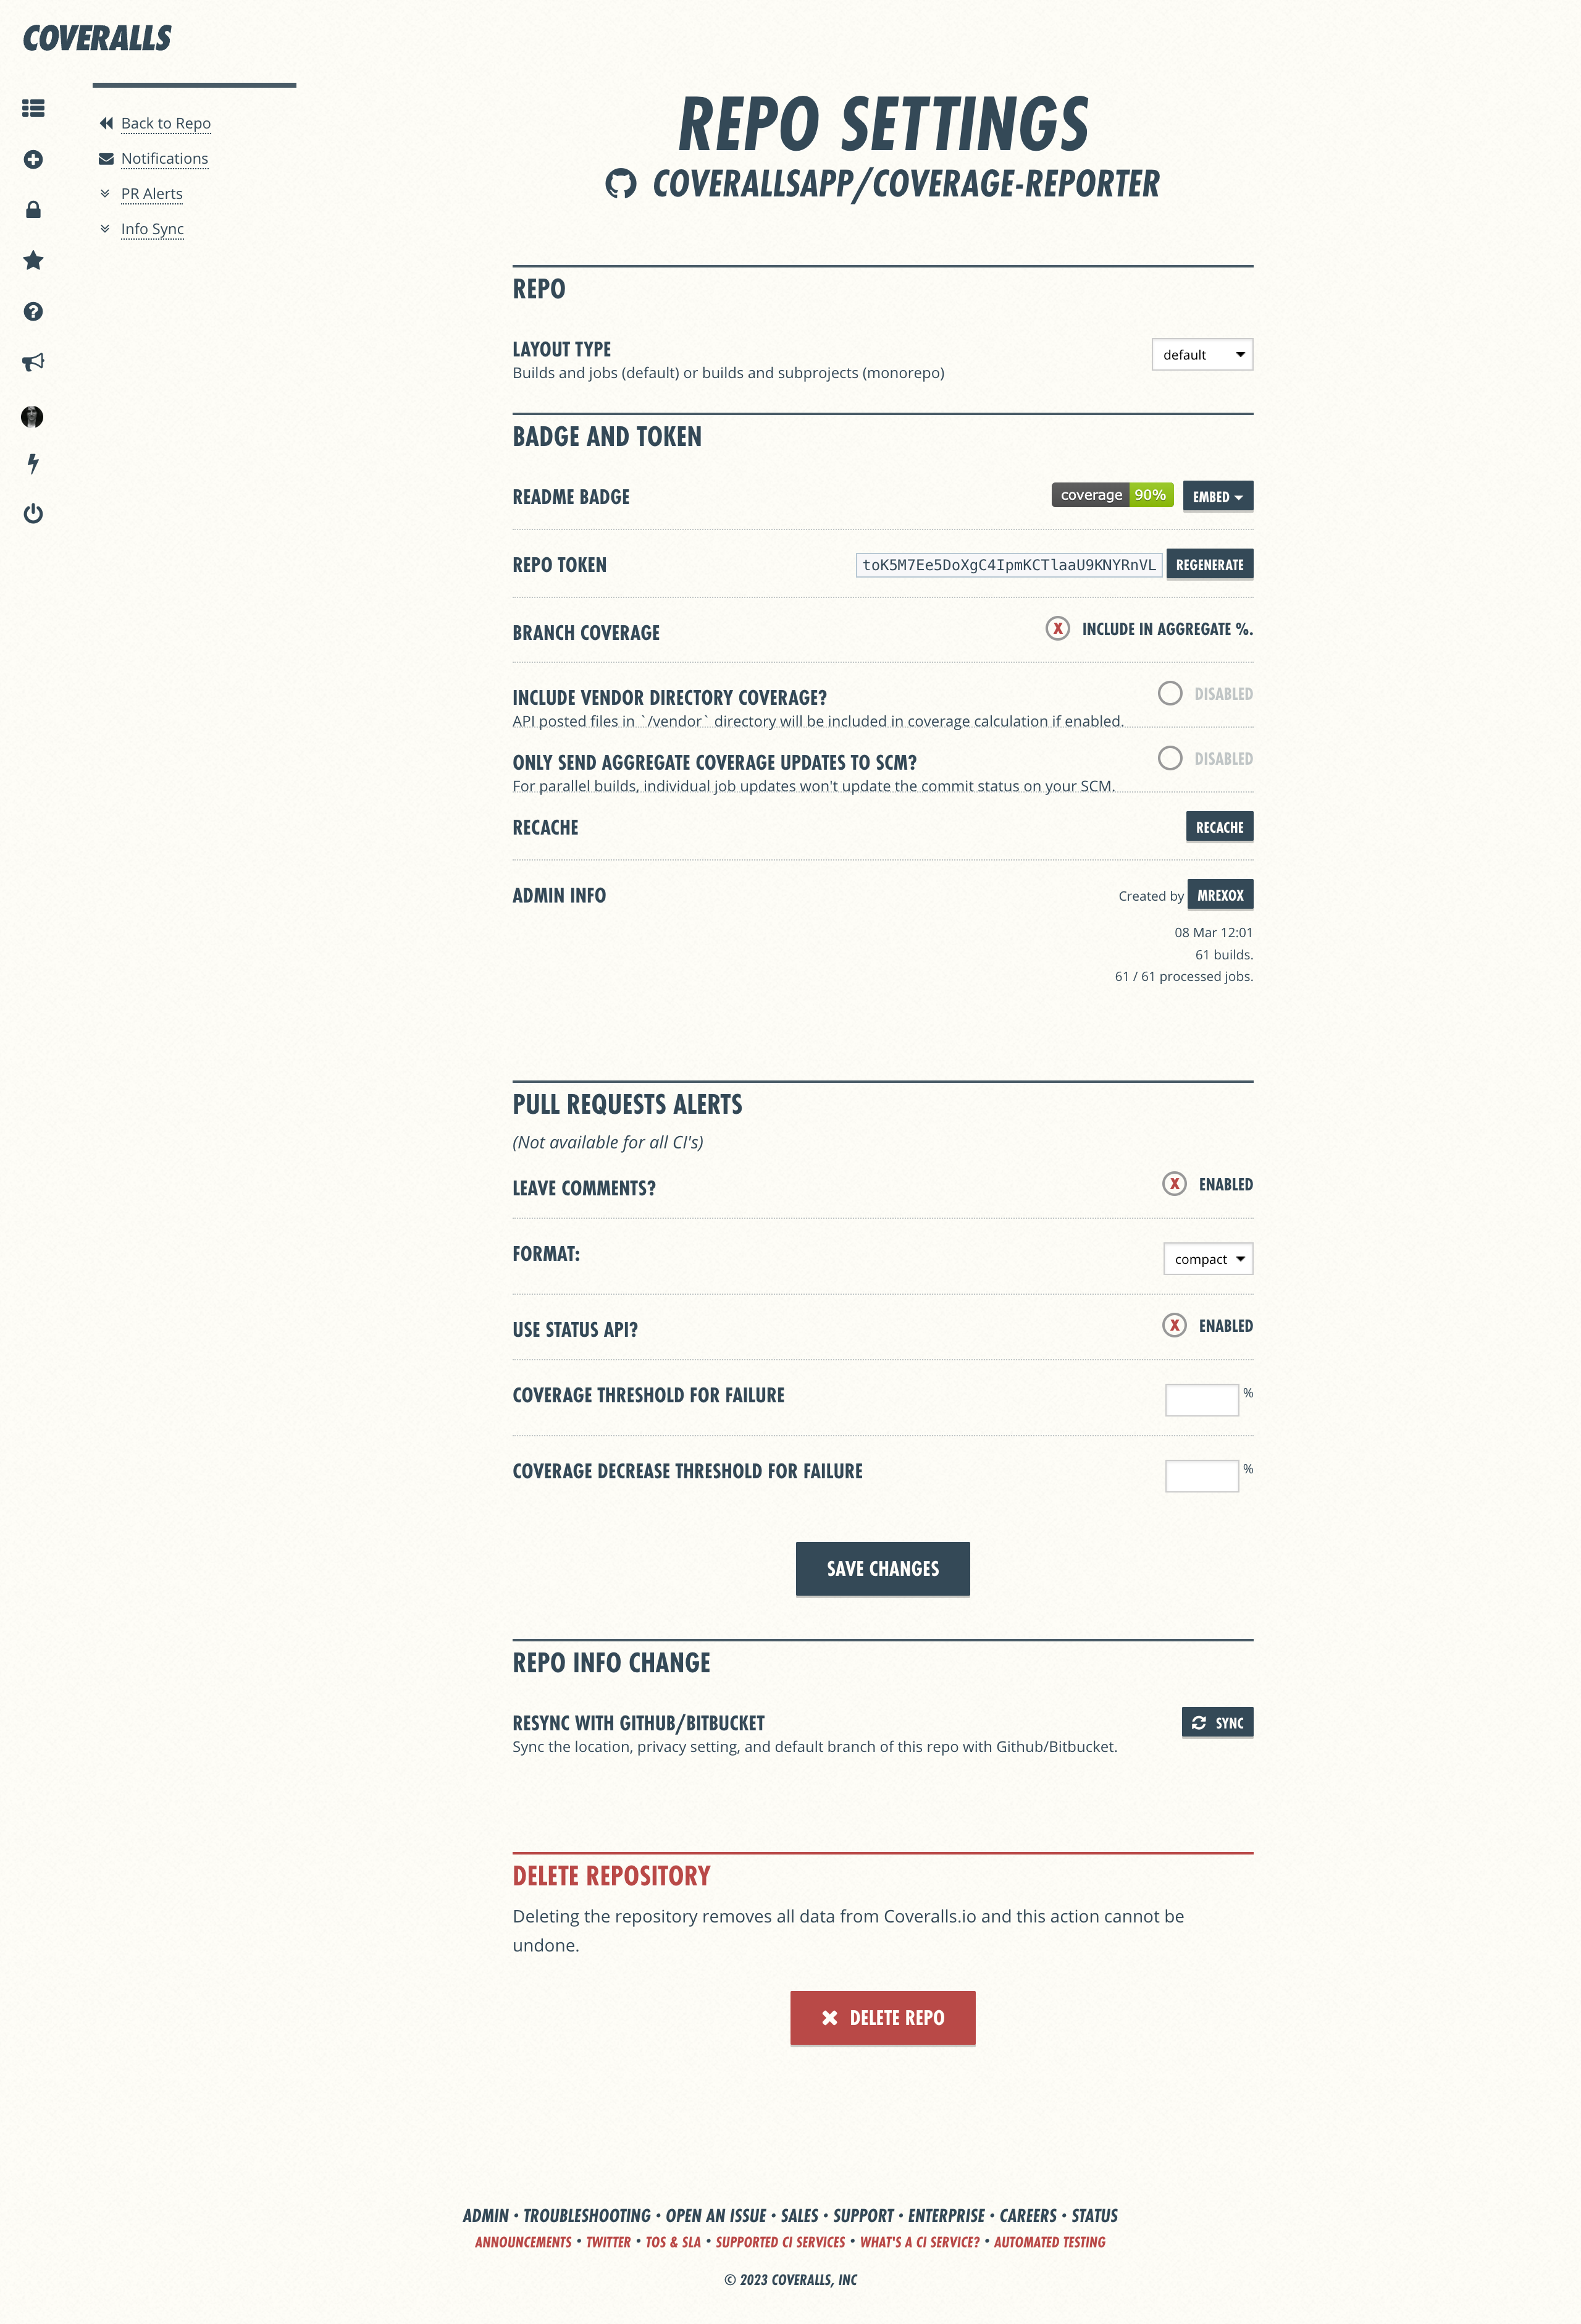
Repo Settings Info & Actions
Left Nav
- Back to Repo — Click to return to Repo Page
- Notifications — Click to visit Notifications
- PR Alerts — Jump to Pull Request Alerts section
- Info Sync — Jump to Repo Sync section
Main Section (Settings)
- General — Repo layout type; regular or monorepo
- Badge & Token — Badge, Repo token, Branch coverage, Recache, Admin info
- Pull Requests — Enable PR comments, format; compact or detailed
- Status Updates — Enable status updates, Coverage threshold, Decrease threshold
- Repo Changes — Resync with git service
- Delete Repo — Delete repo from Coveralls (cannot be undone)
Repo Notifications
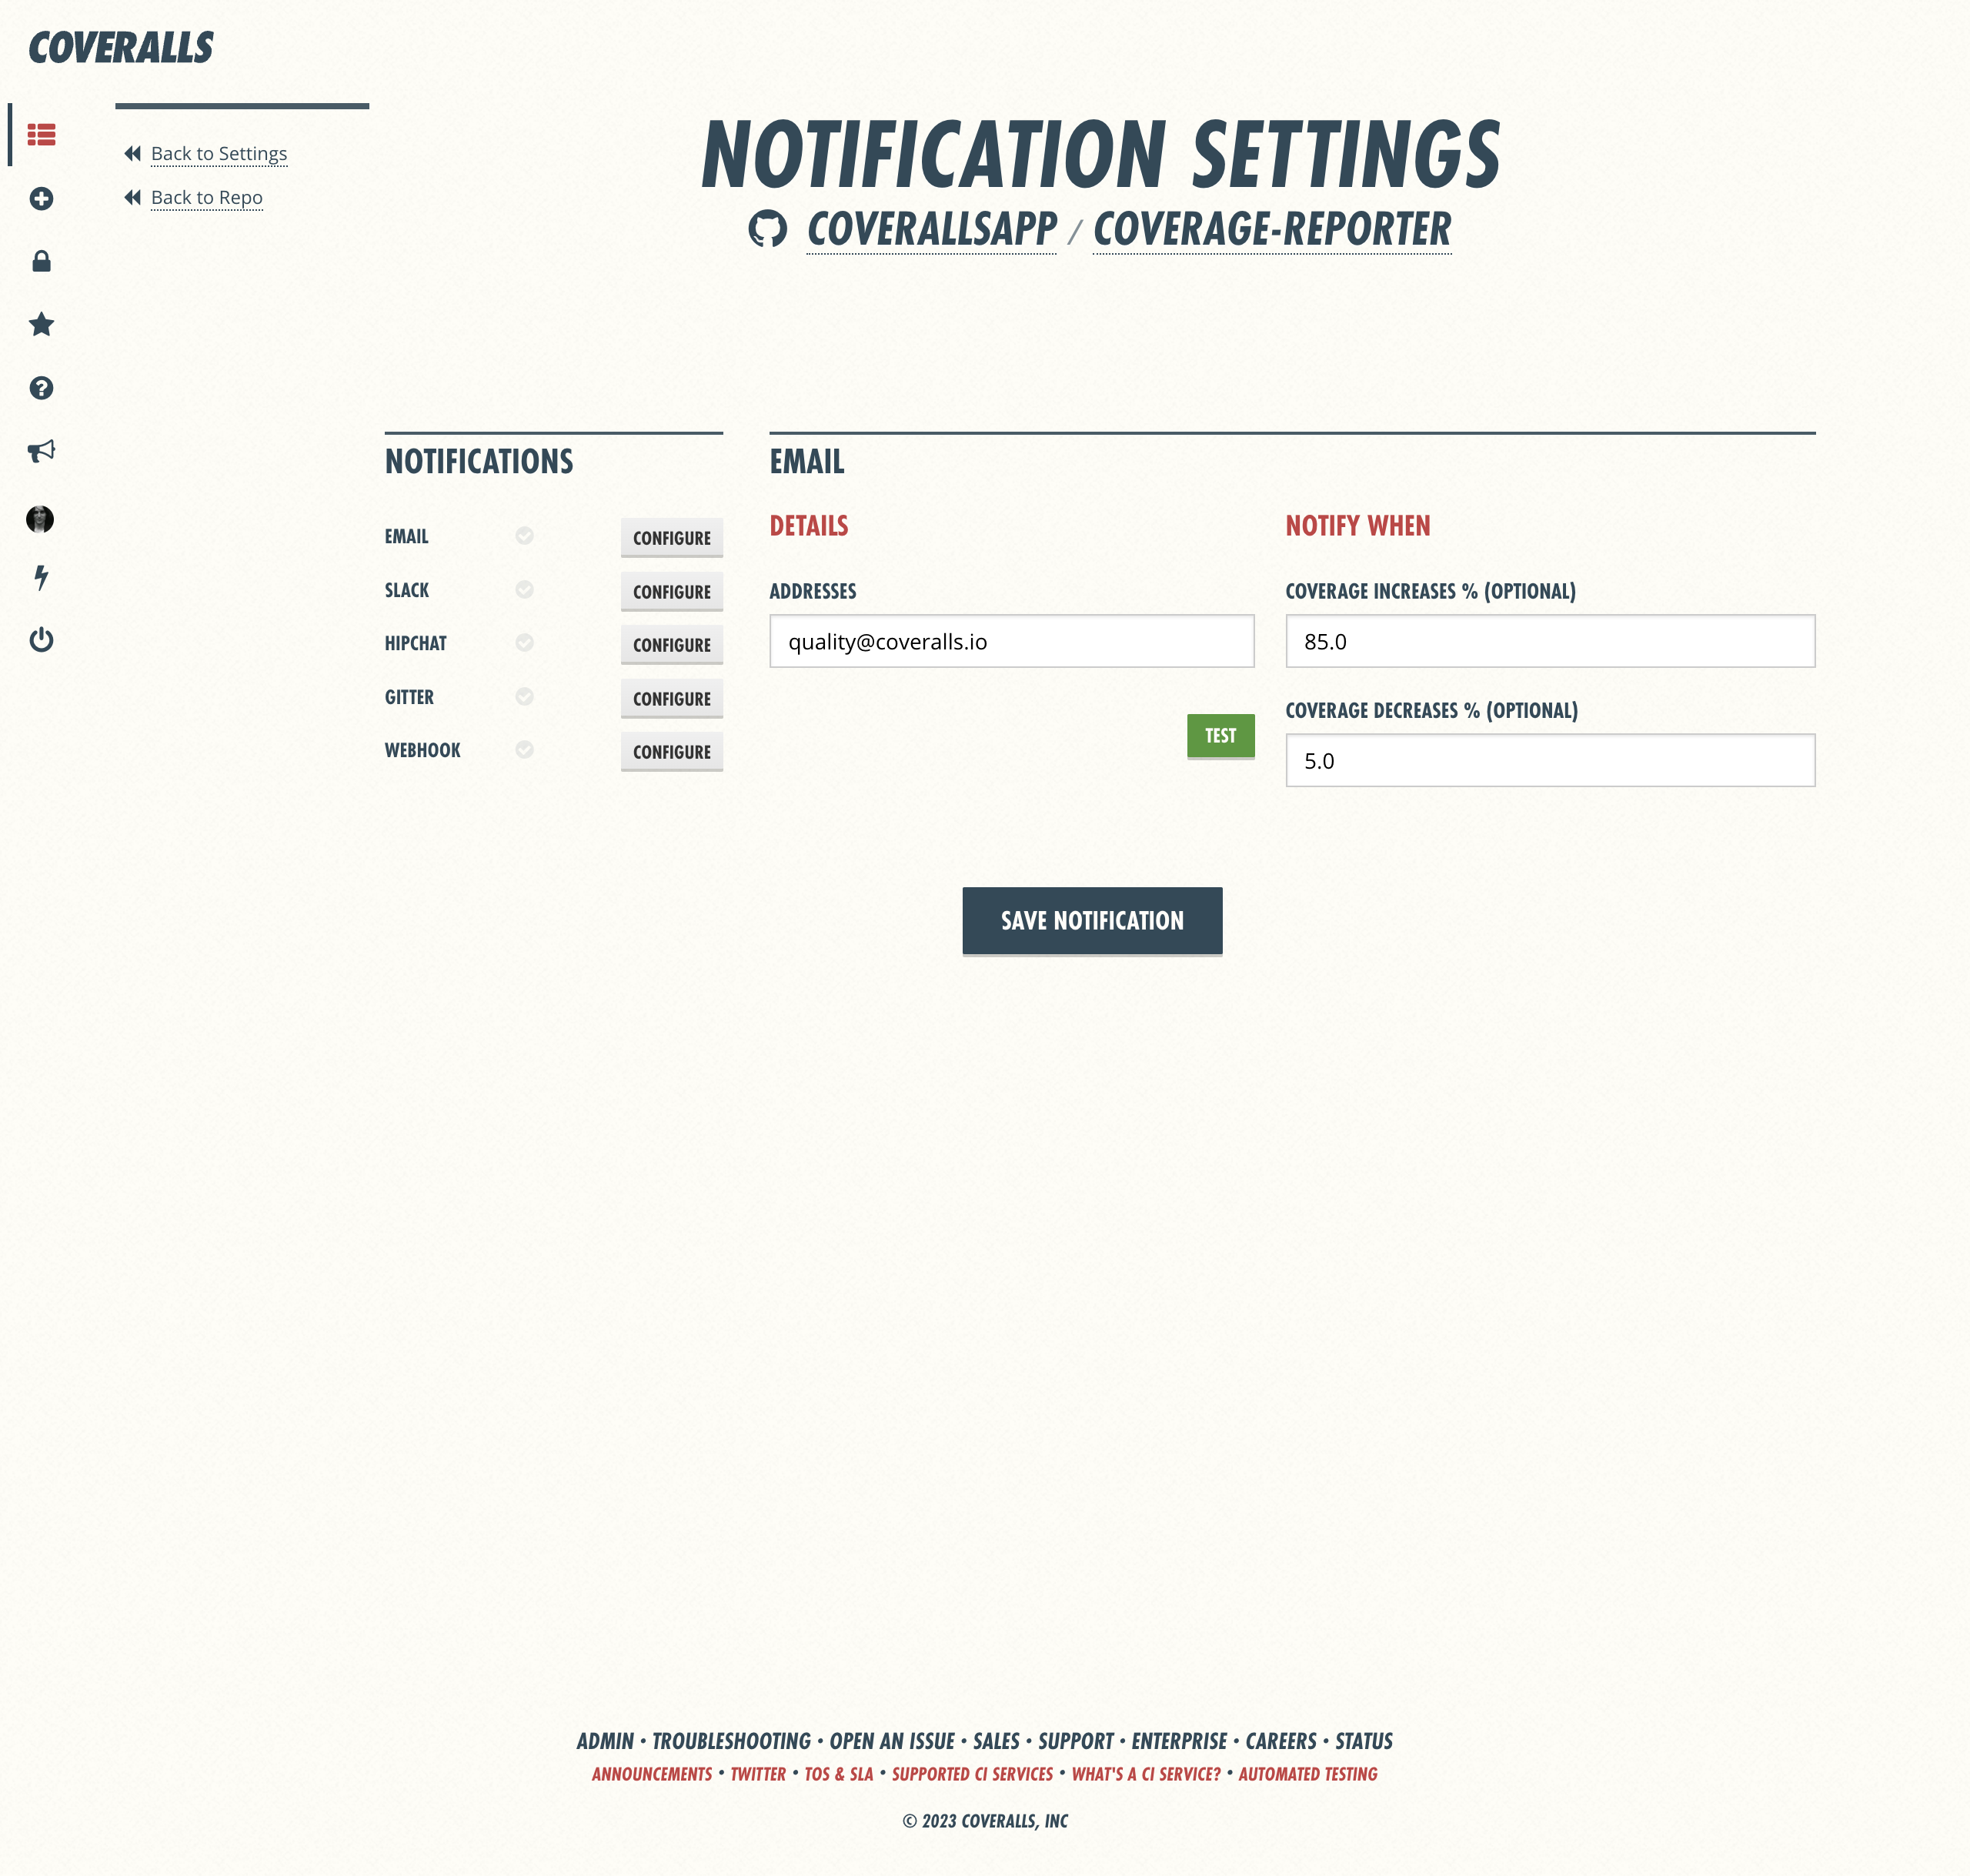
Repo Notifications Info & Actions
Left Nav
- Back to Repo — Click to return to Repo Page
- Back to Settings — Click to return to Repo Settings
Main Section (Notifications)
- Email — Set up email notifications
- Slack — Set up Slack notifications
- HipChat — Set up HipChat notifications
- Gitter — Set up Gitter notifications
- Webhook — Set up general webhook notifications
Build History
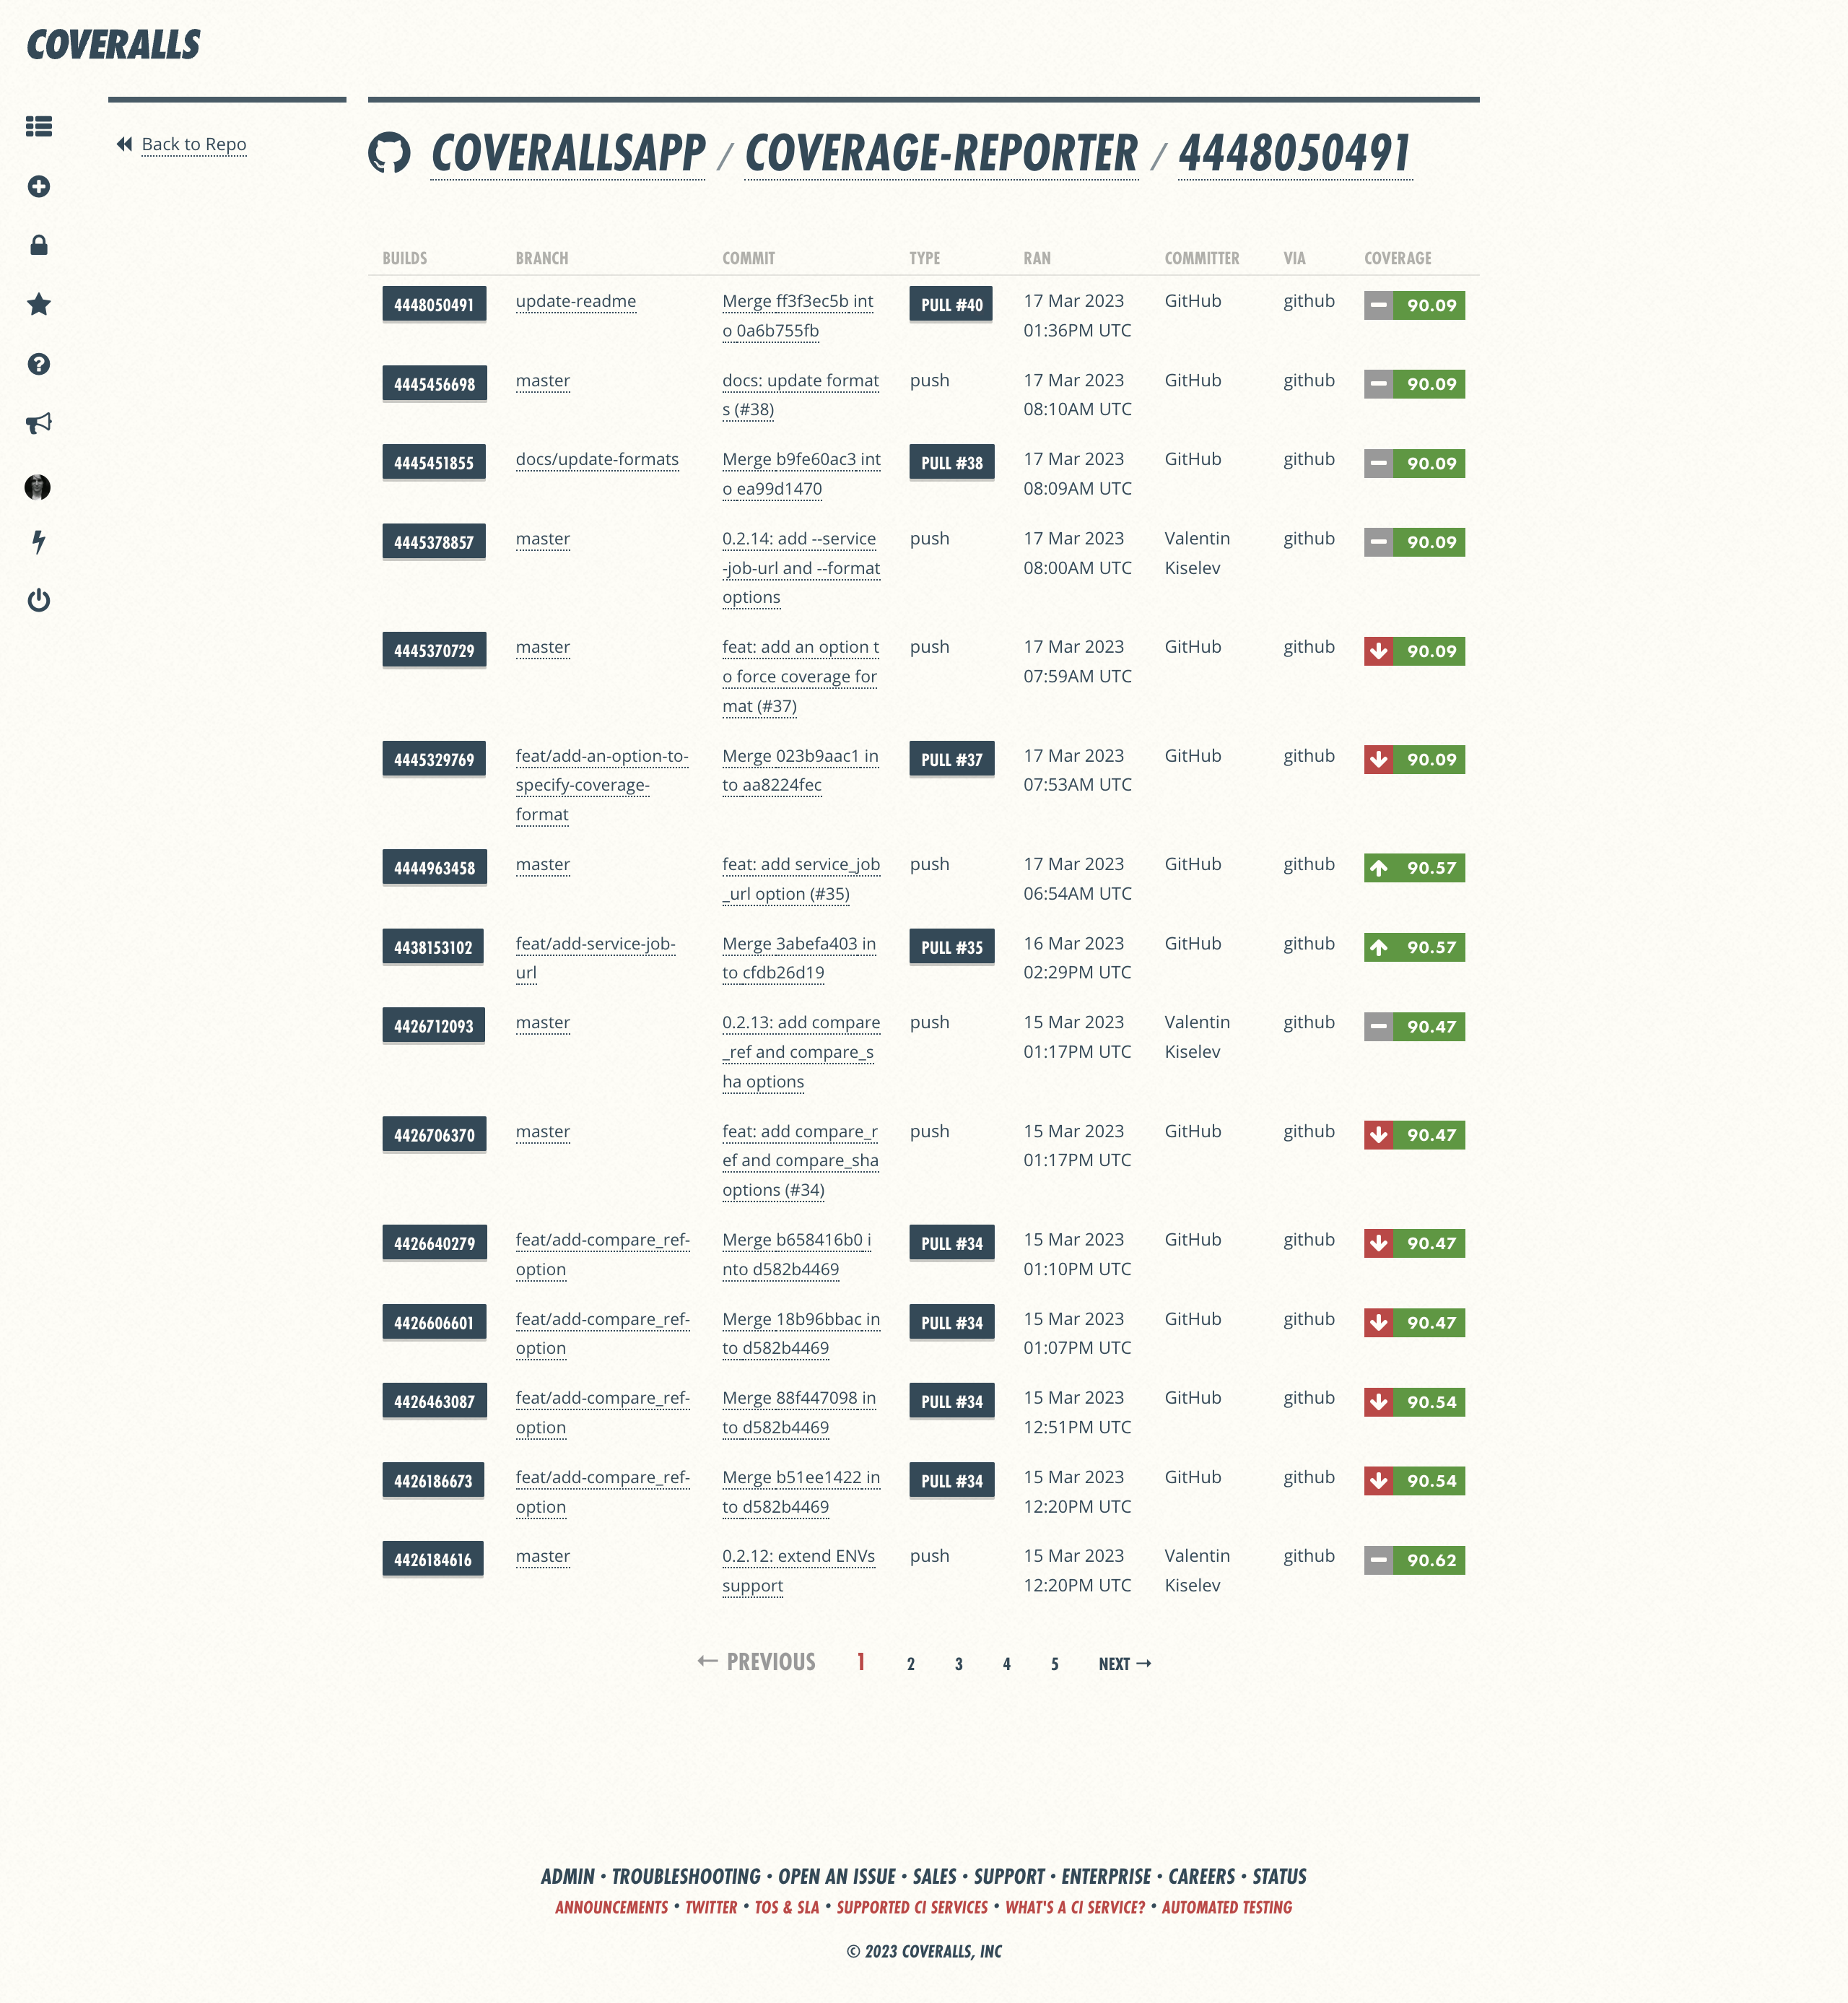
Build History Info & Actions
Left Nav
- Back to Repo — Click to return to Repo Page
Main Section (Build History)
- Build History — List of all builds for the repo
- Builds Table — Build #, Branch, Commit, Type, Run date, Service, Coverage %
- Pagination — Click to access prev, next or specific page of builds (15 per pg)
Subscriptions Page
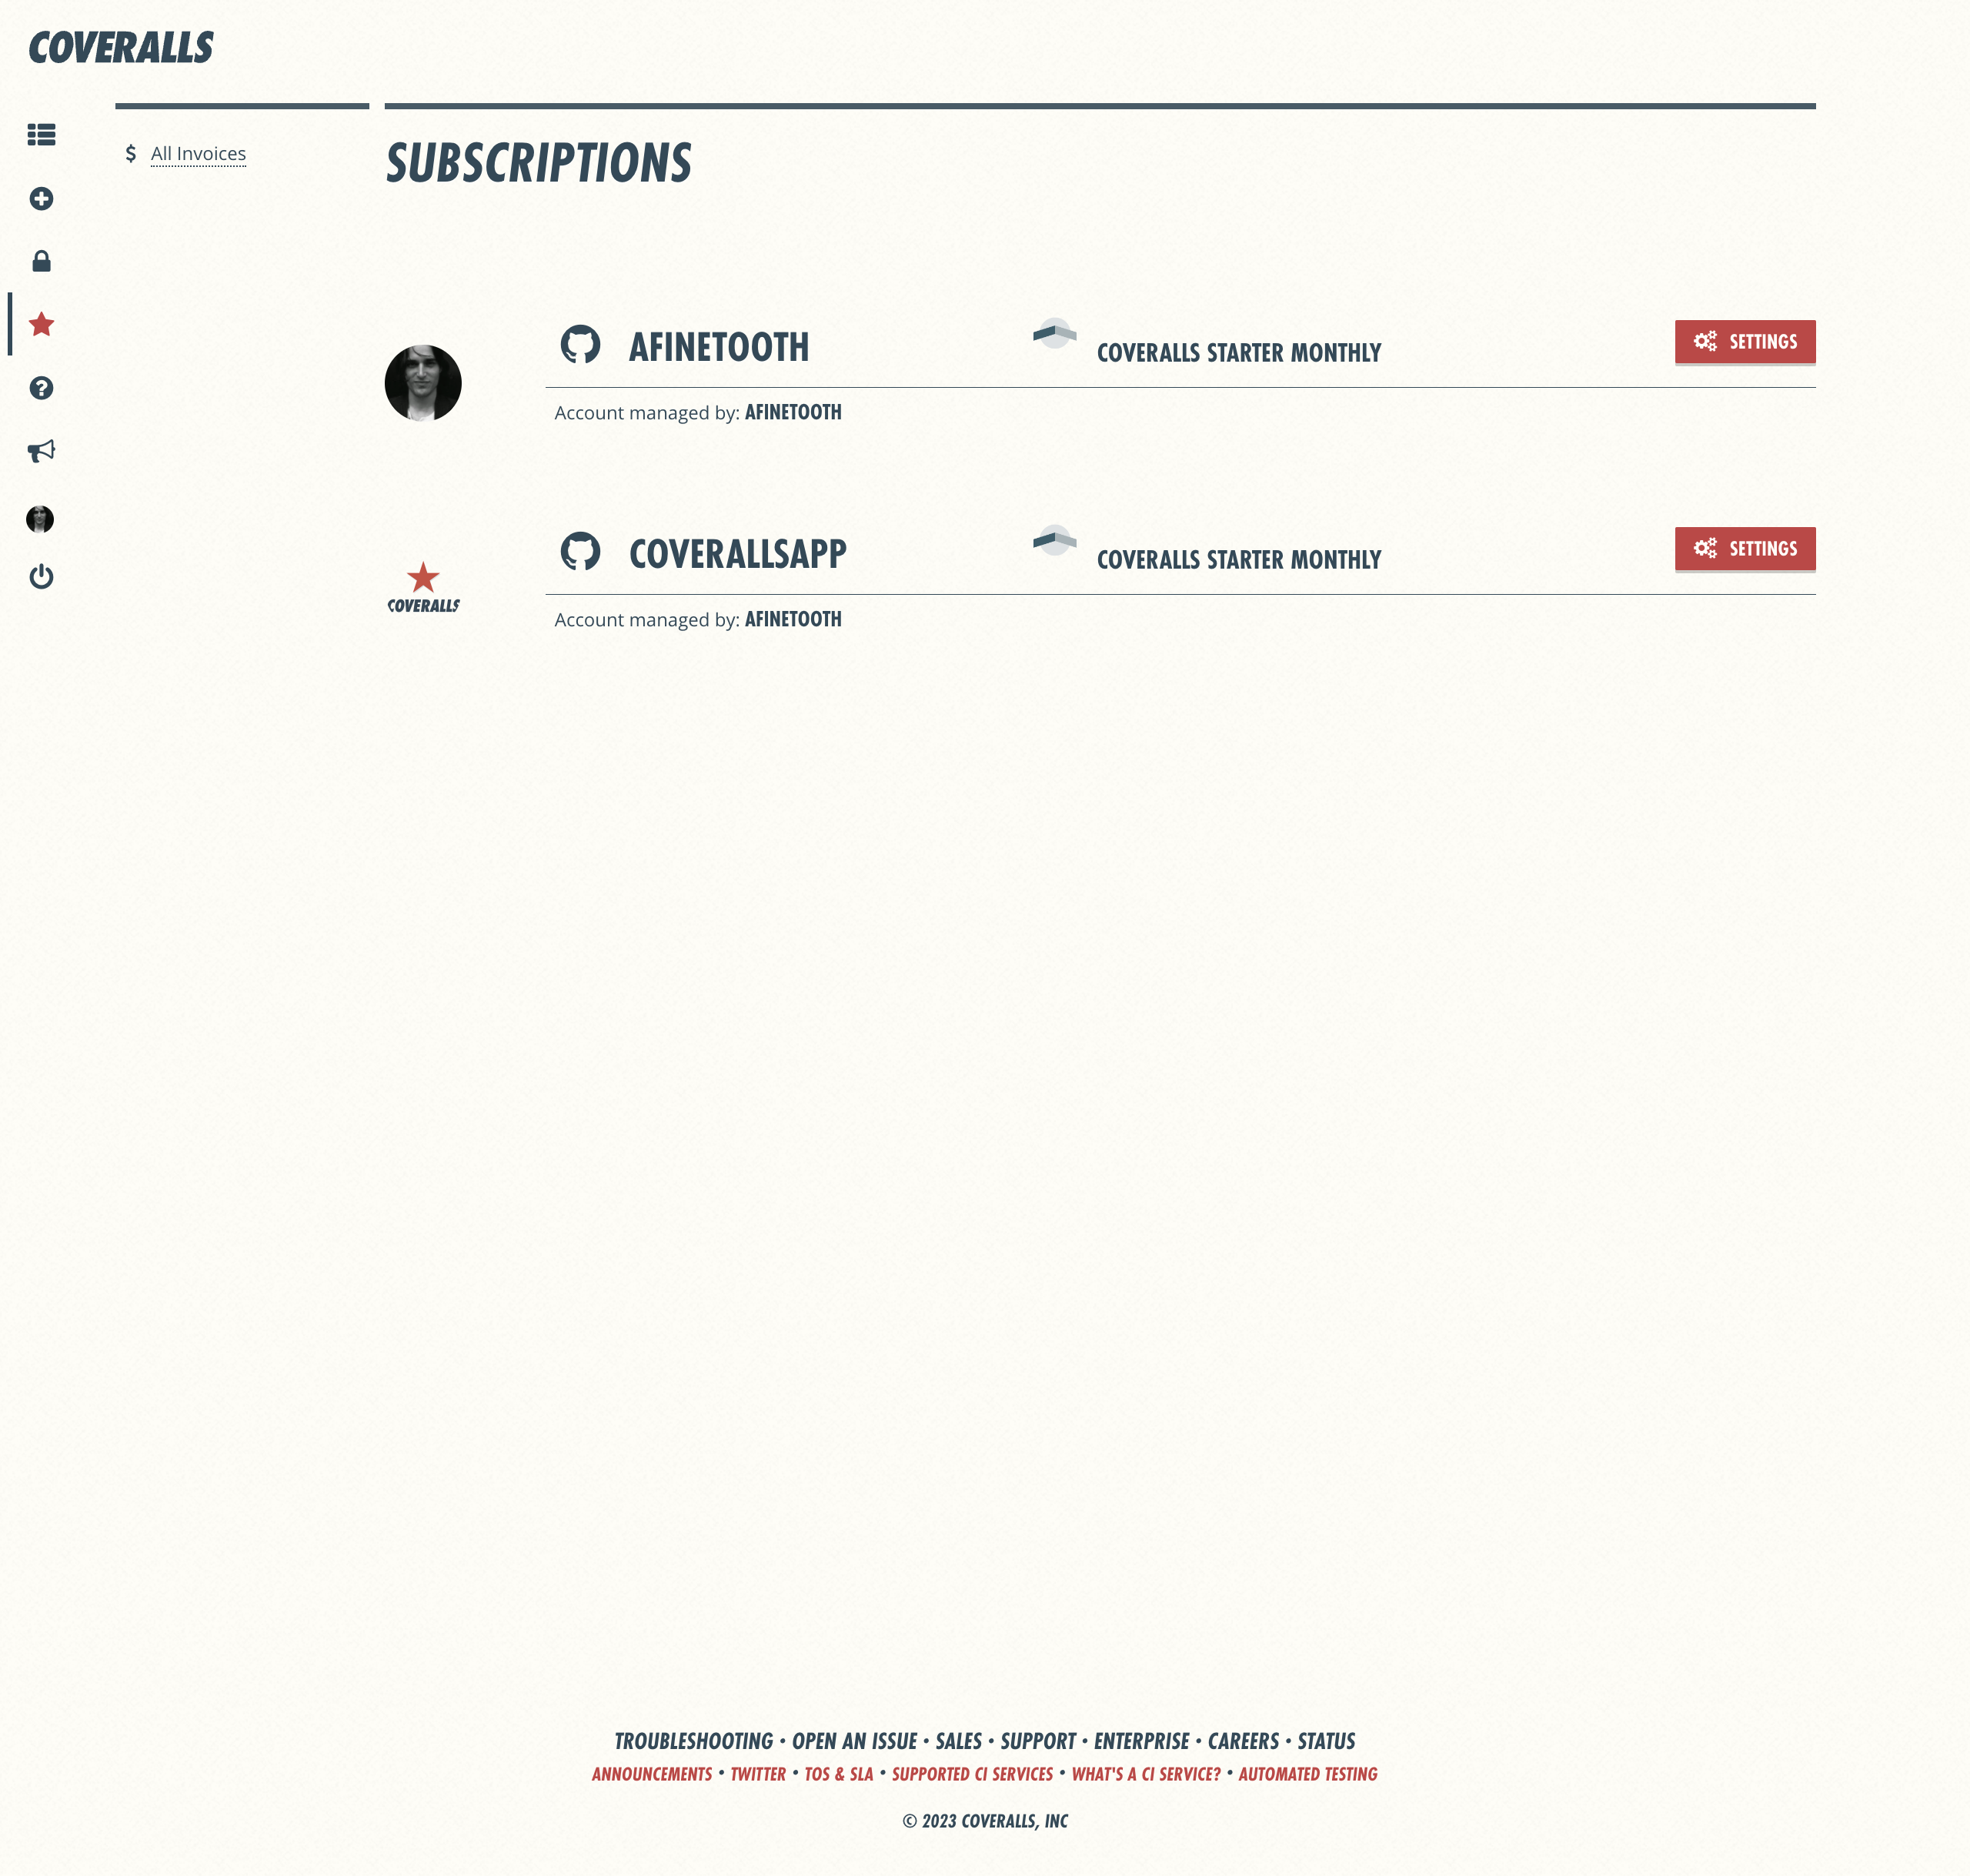
Subscriptions Page Info & Actions
Left Nav
- All Invoices — Click to see Invoices for all subscriptions
Main Section (Subscriptions)
- Subscriptions — All active subscriptions, by org name, owner and plan
- Settings — Click to manage settings for each subscription (owner only)
Subscription Details
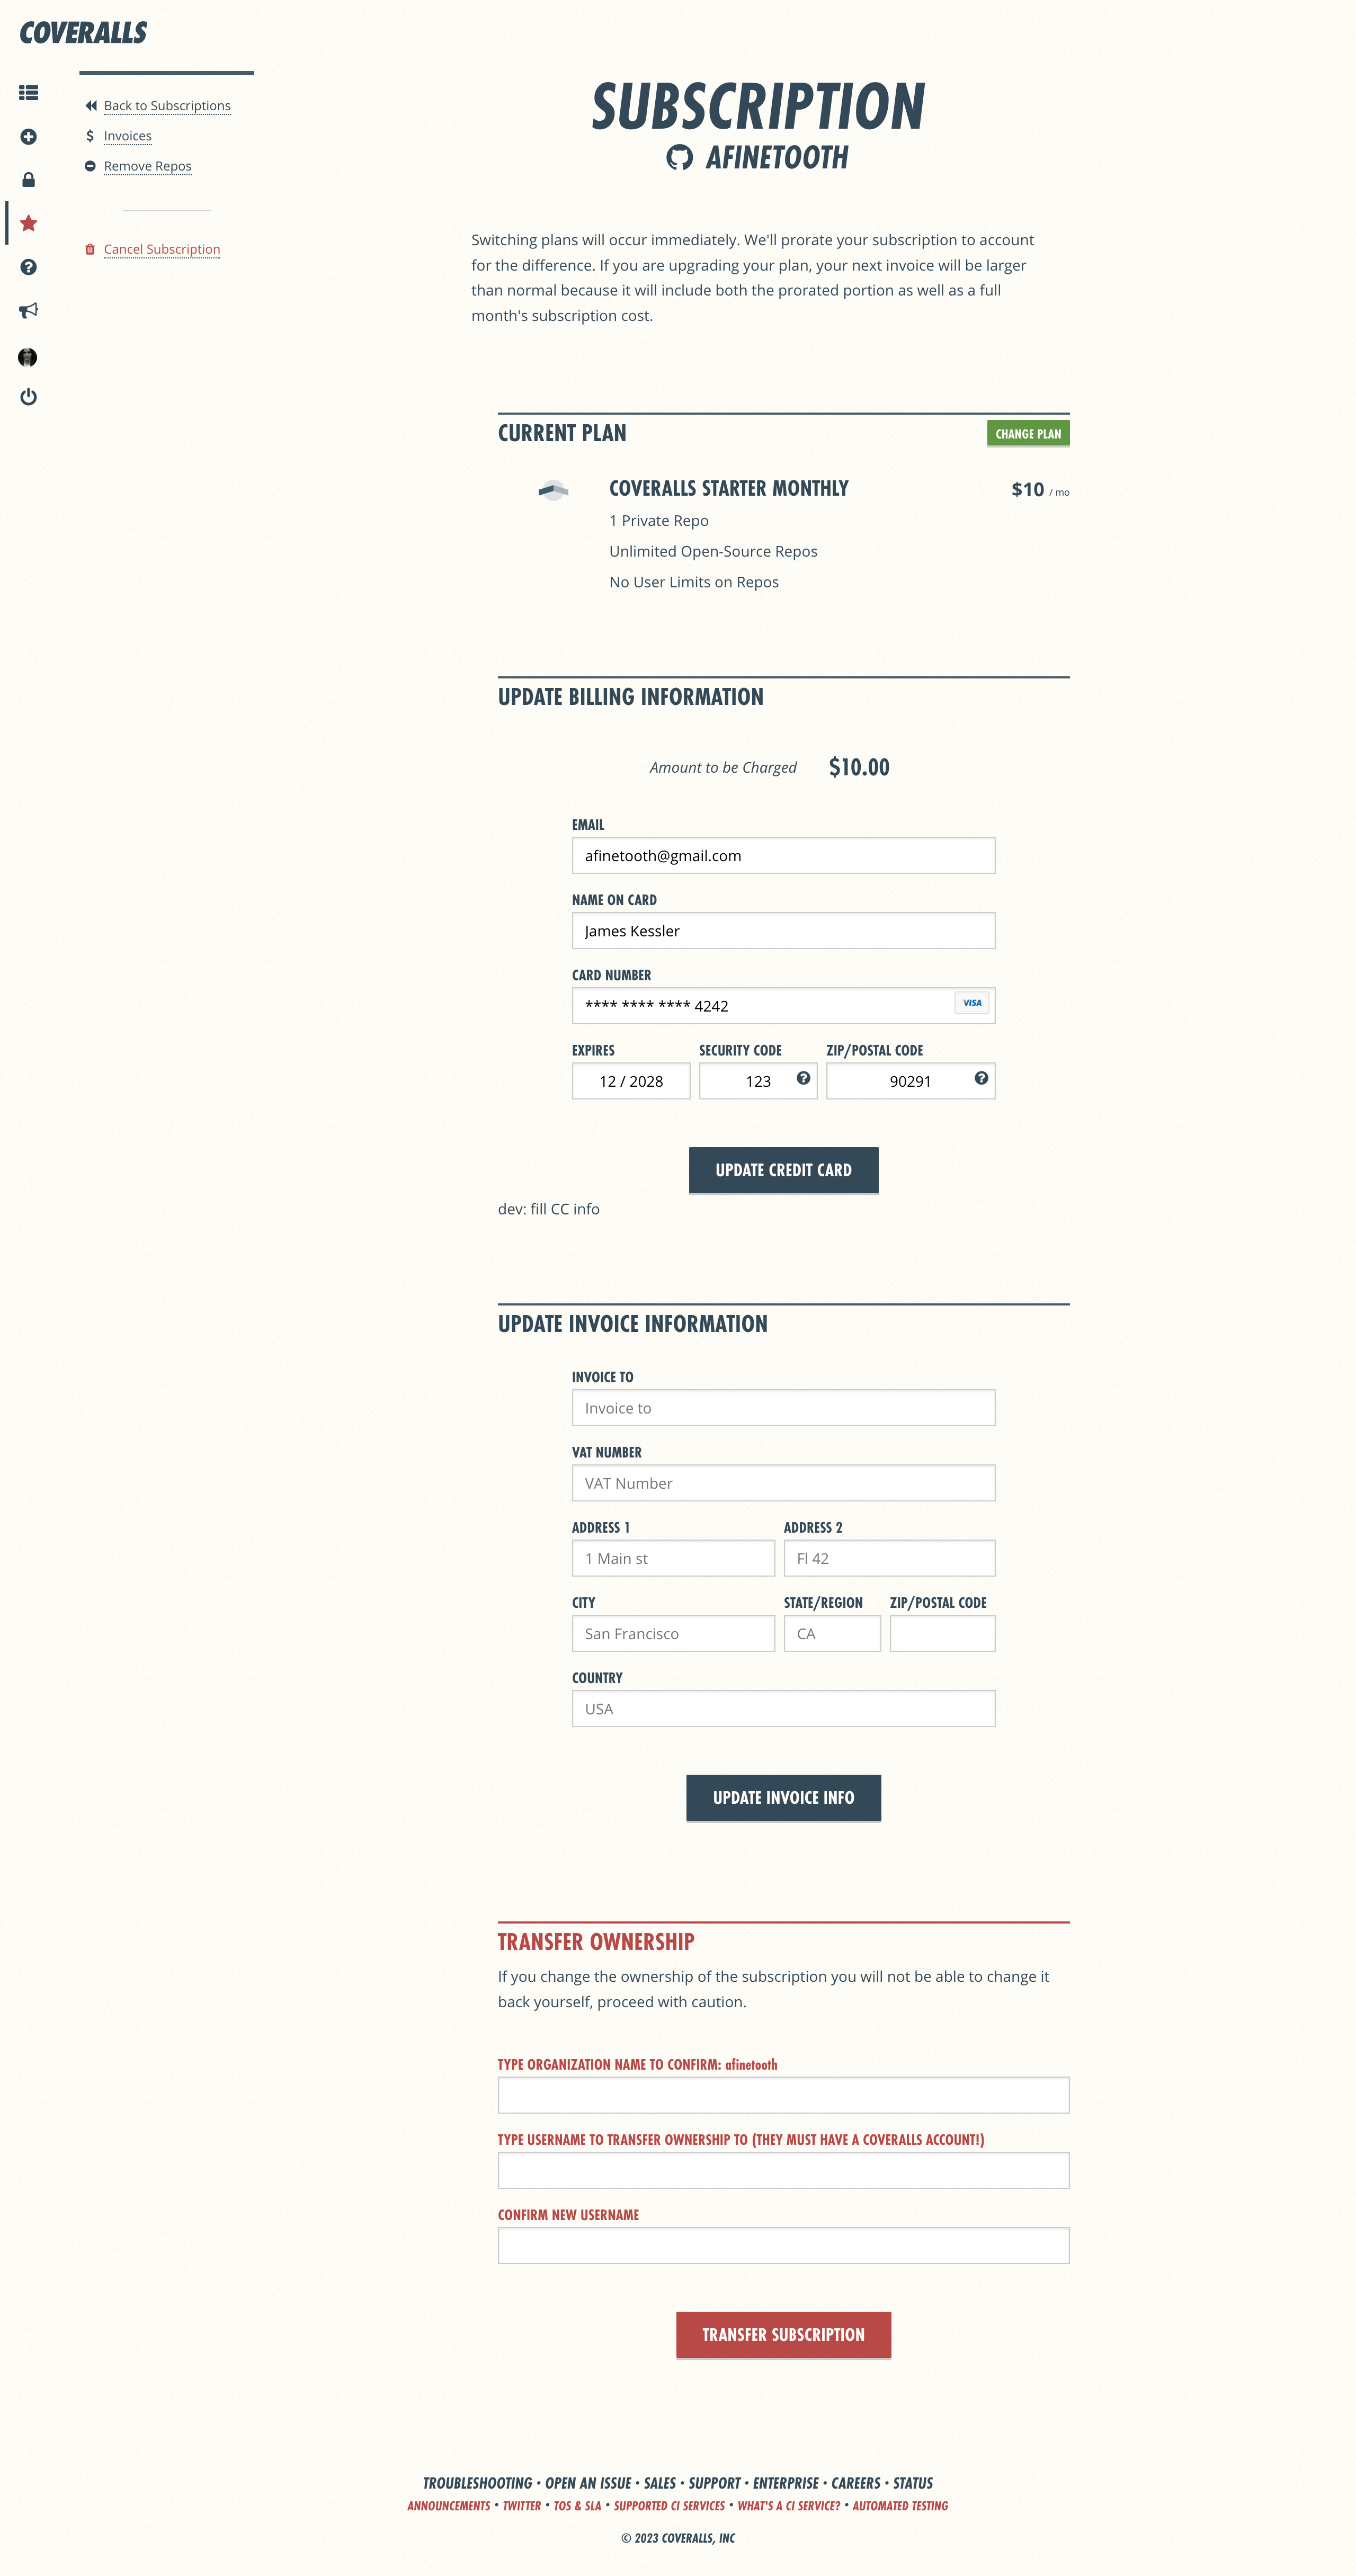
Subscription Details Info & Actions
Left Nav
- Back to Subscriptions — Click to return to Subscriptions Page
- Invoices — Click to see Invoices for this subscription
- Remove Repos — Click to remove repos from this subscription
- Cancel Subscription — Click to cancel this subscription
Main Section (Subscription Details)
- Current Plan — Current plan details
- Change Plan — Click to change plan for this subscription
- Update Billing Info — Change billing info for this subscription
- Update Invoice Info — Change info that should appear on invoices
- Transfer Subscription — Transfer ownership of subscription to another user
Subscription > Invoices
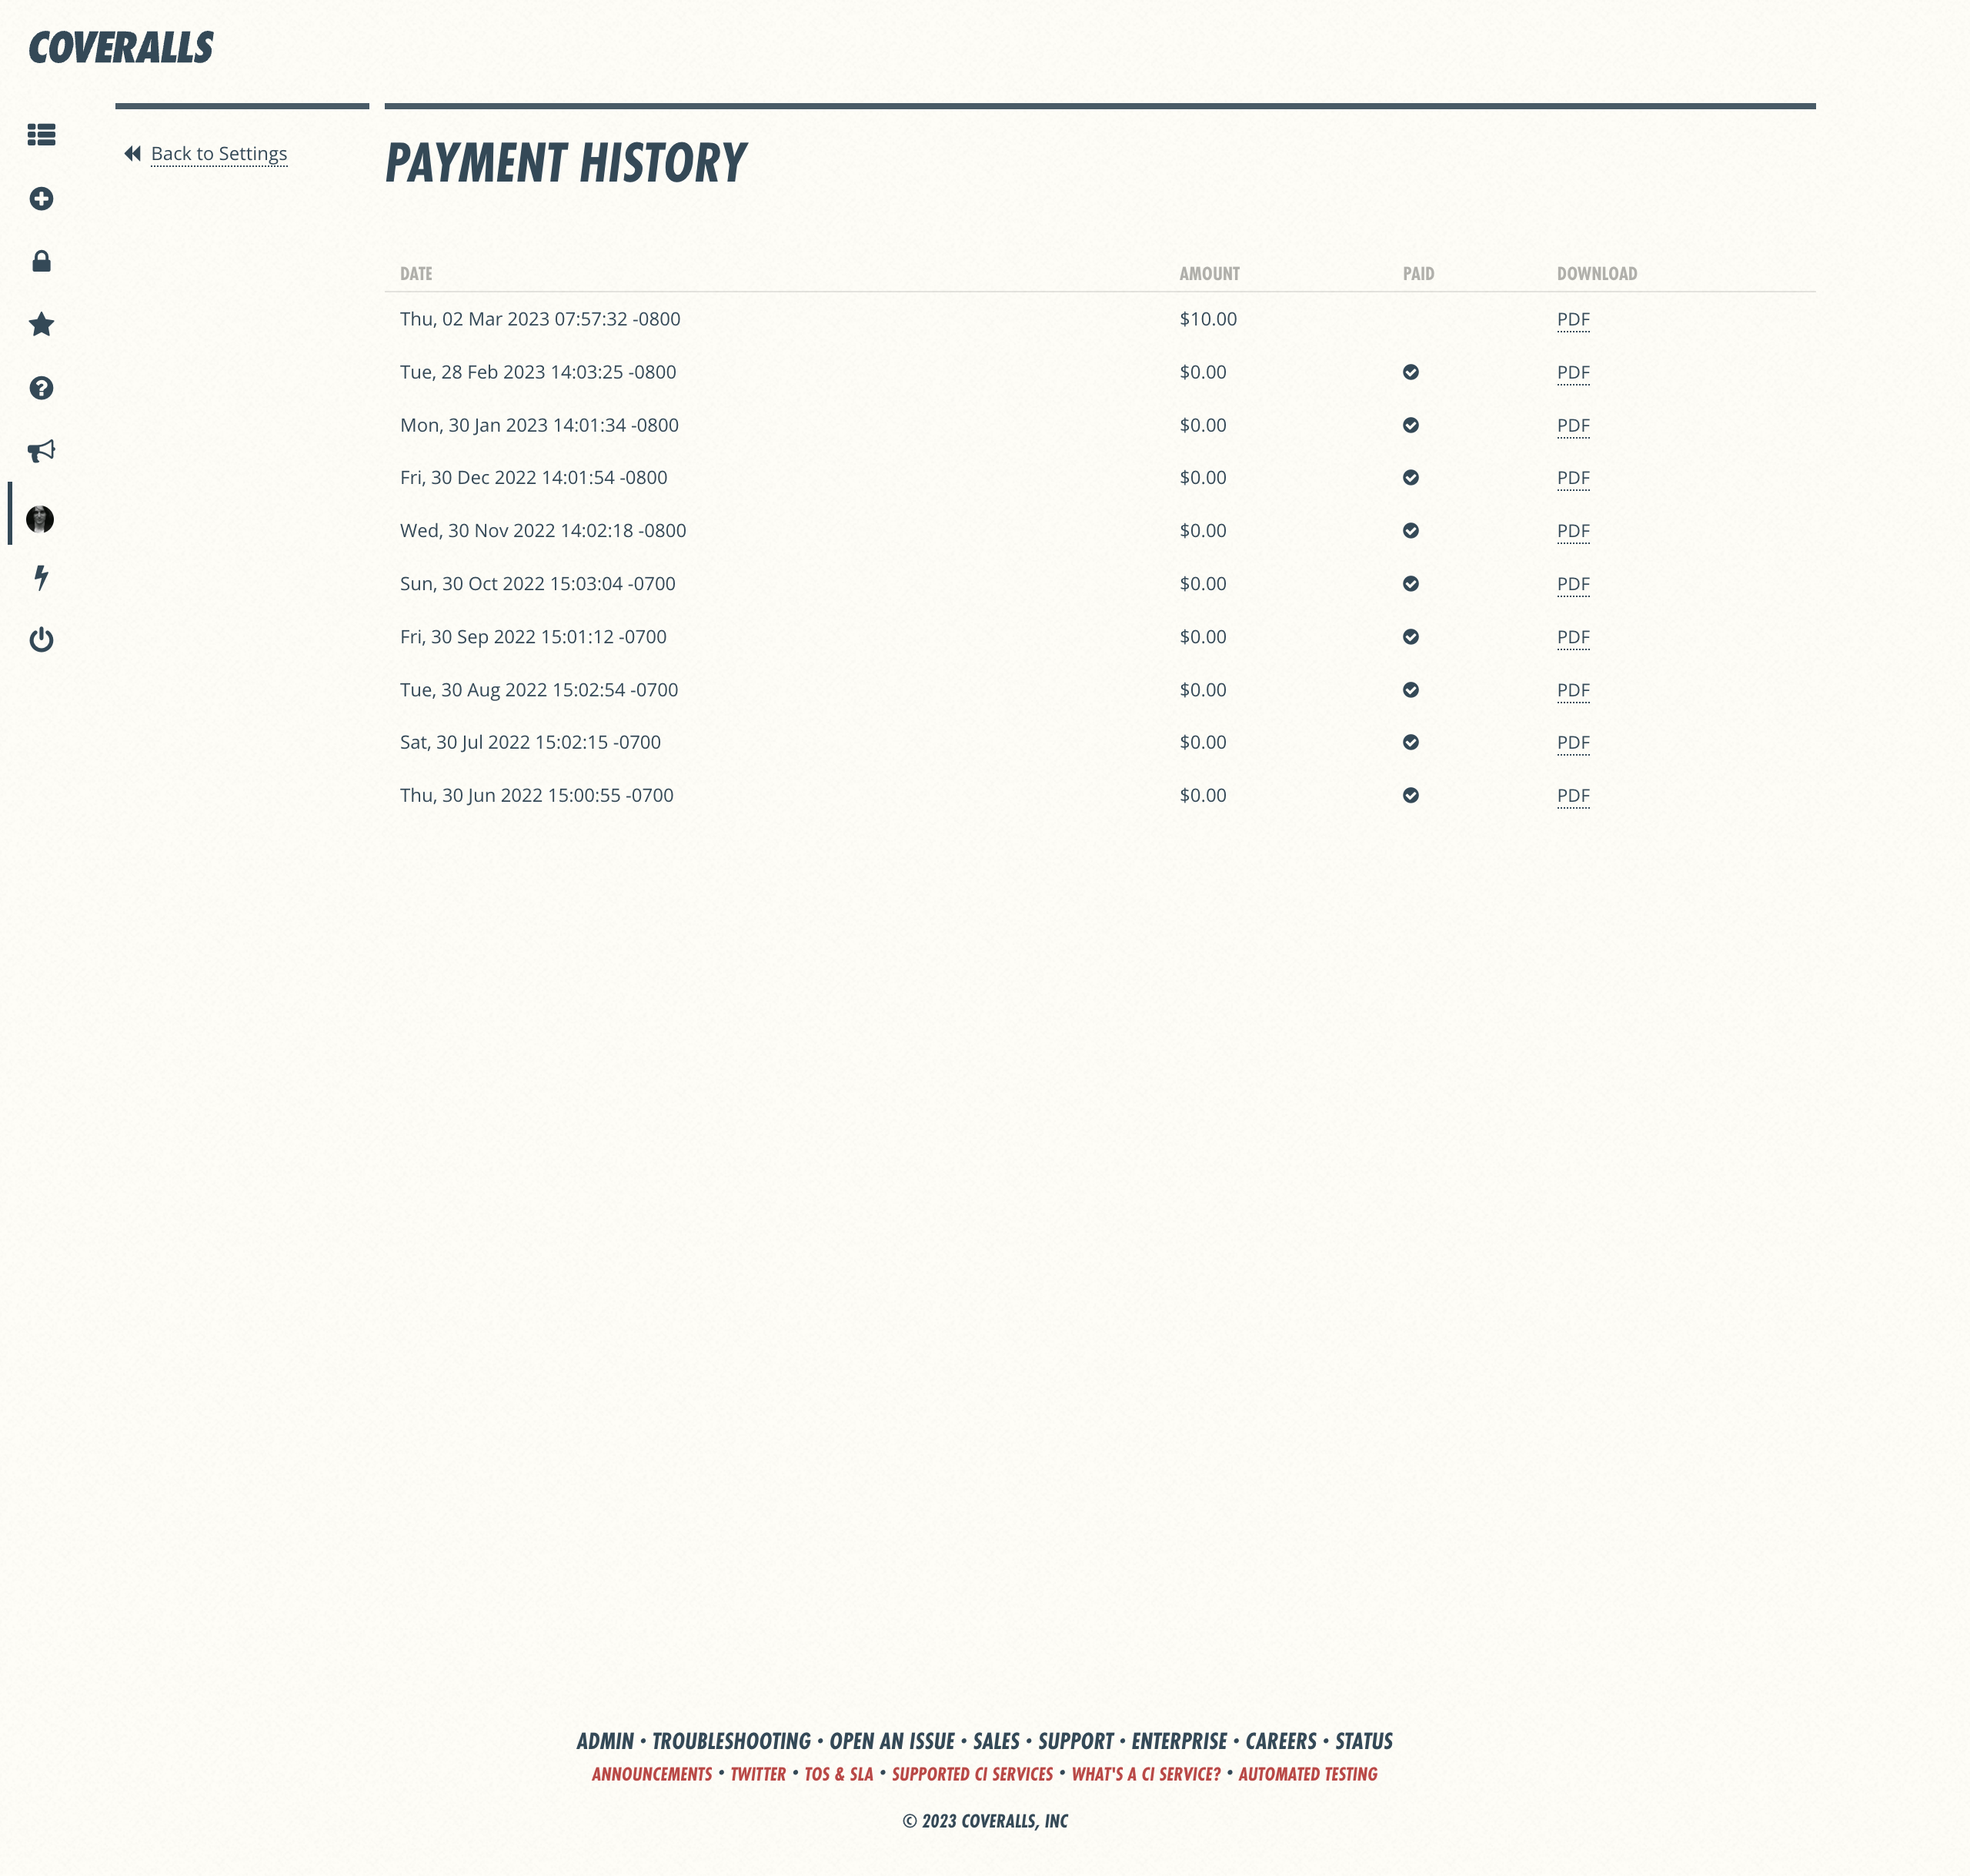
Subscription > Invoices Info & Actions
Left Nav
- Back to Subscription — Click to return to Subscription Details page
Main Section (Invoices)
- Payment History — List of all invoices by date, amount, status
- PDF — Download a PDF of this invoice
Subscription > Remove Repos
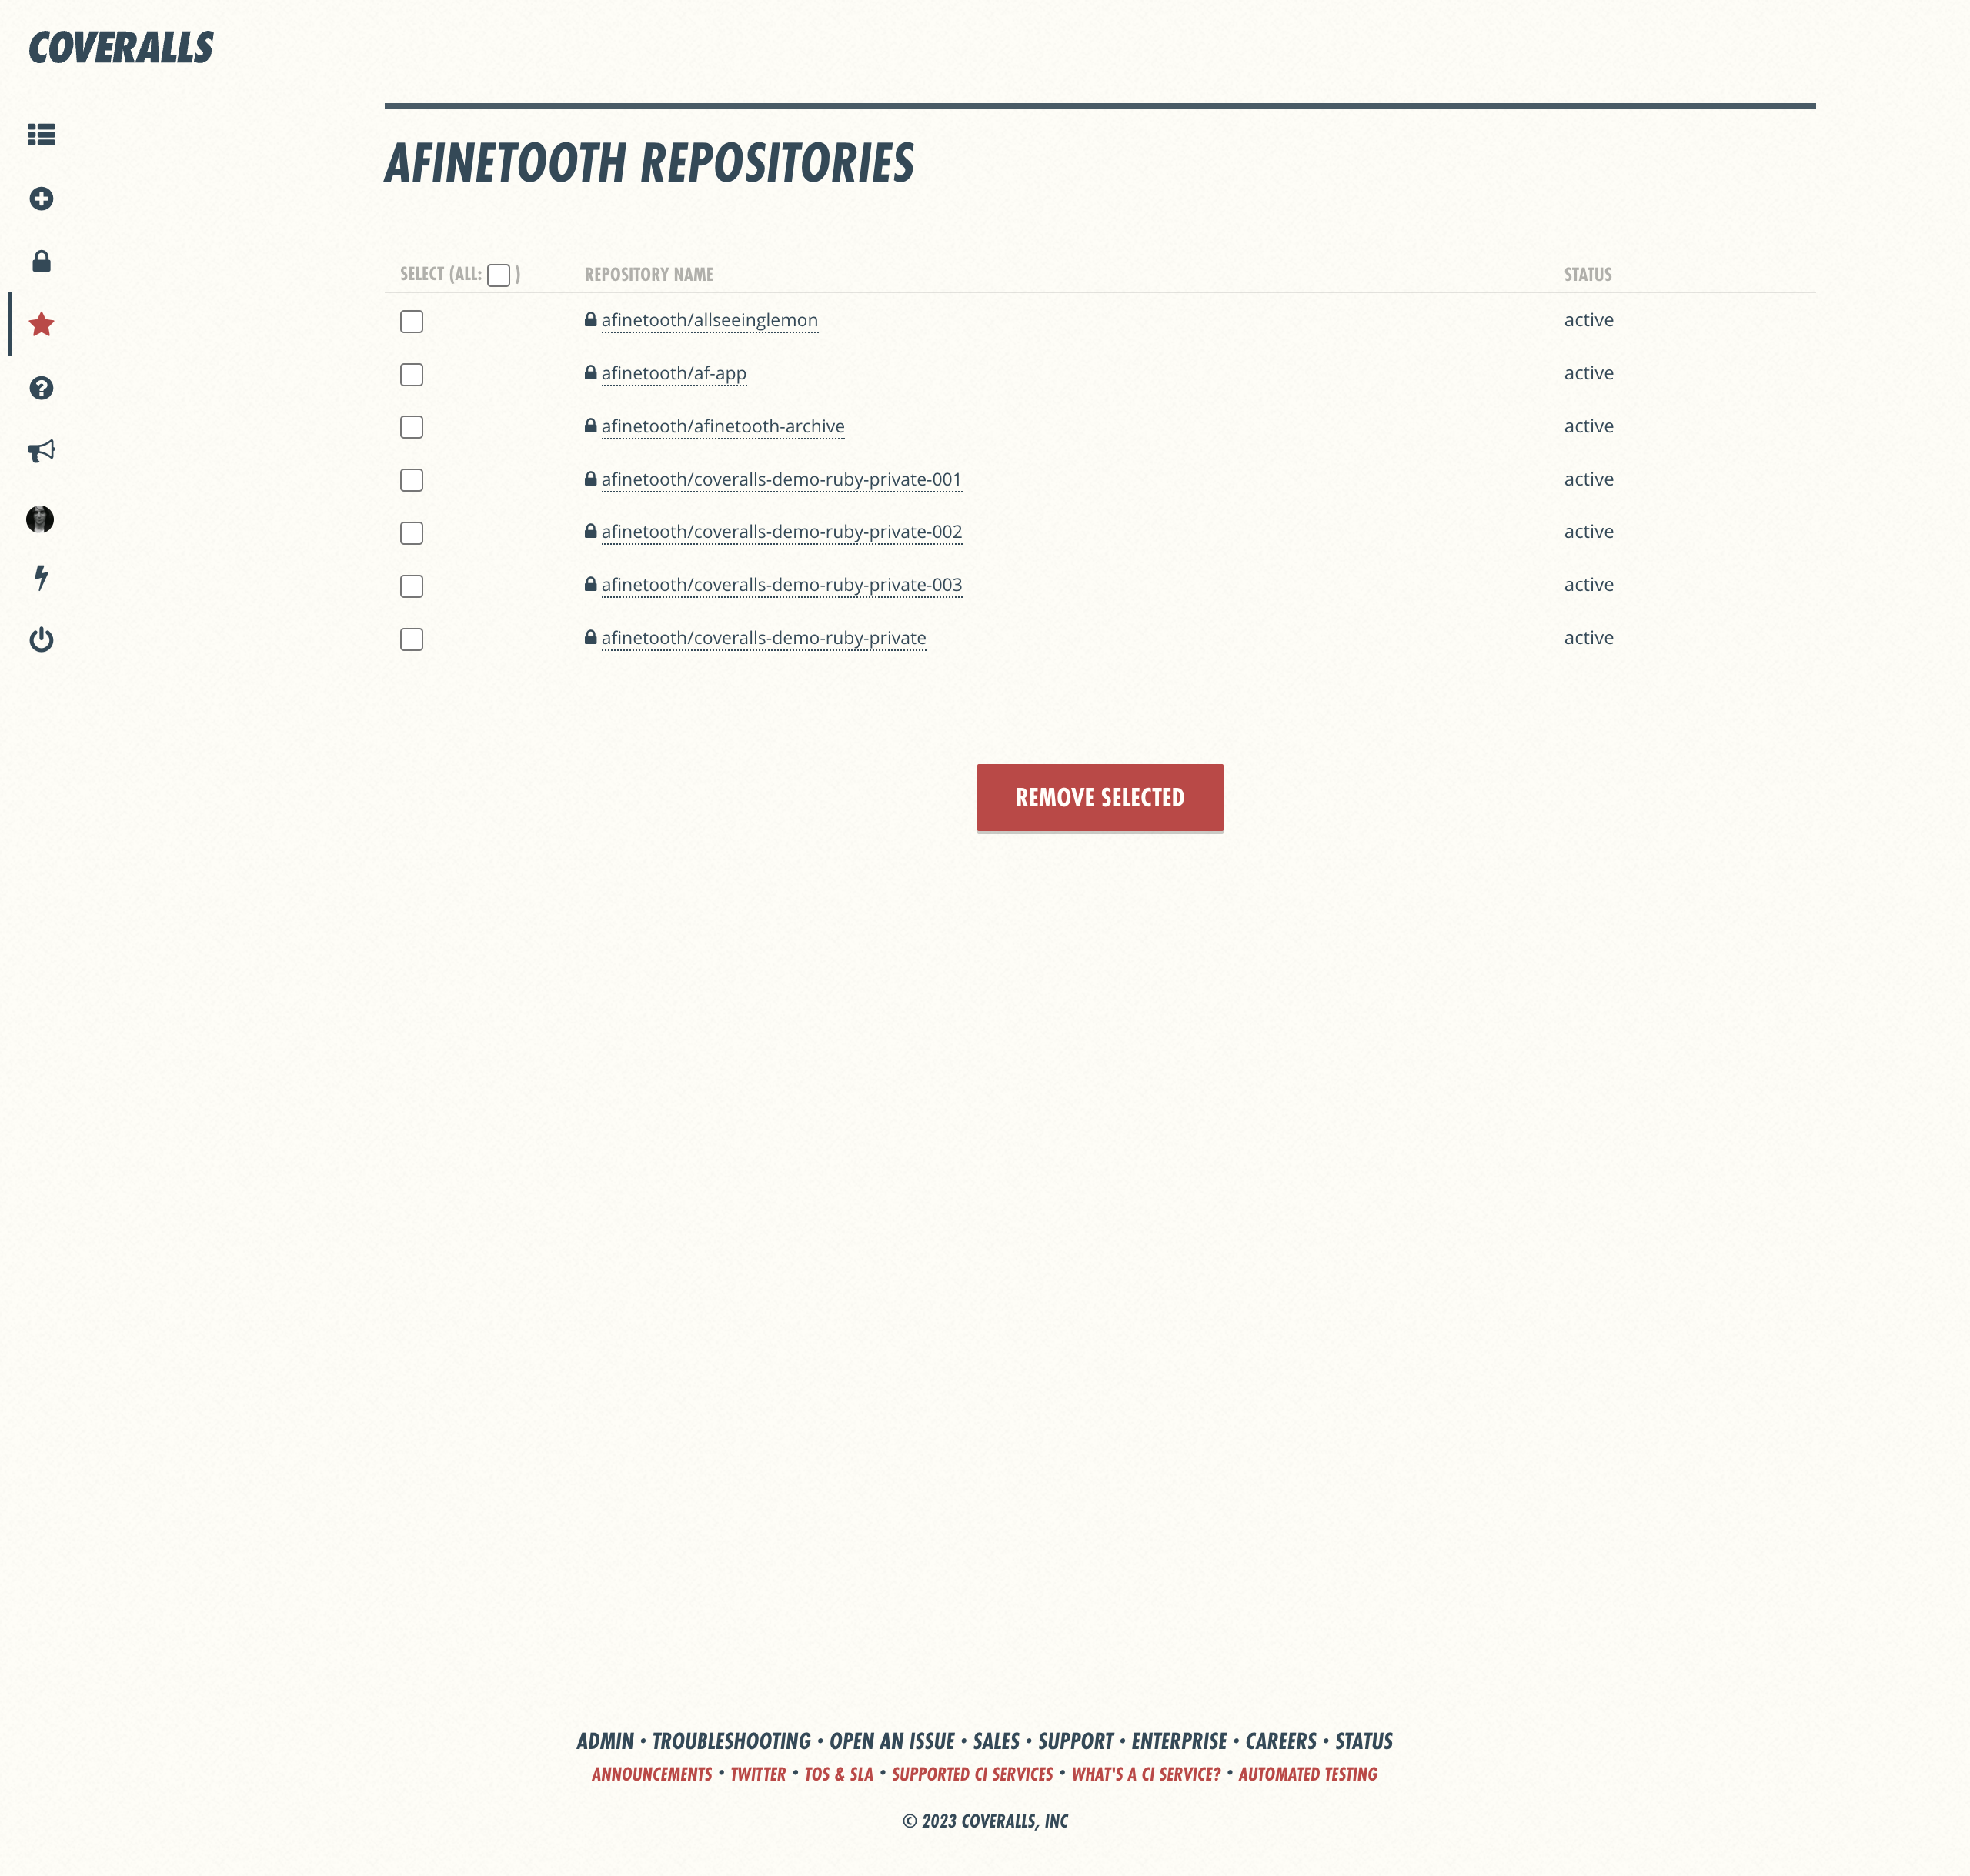
Subscription > Remove Repos Info & Actions
Left Nav
- Back to Subscription — Click to return to Subscription Details page
Main Section (Remove Repos)
- Repos — List of all private repos in this subscription by name, status
- Select Repo — Check to select repo for removal
- Select All — Check to select all repos for removal
- Remove Selected — Click to remove selected repos from subscription
Account Page
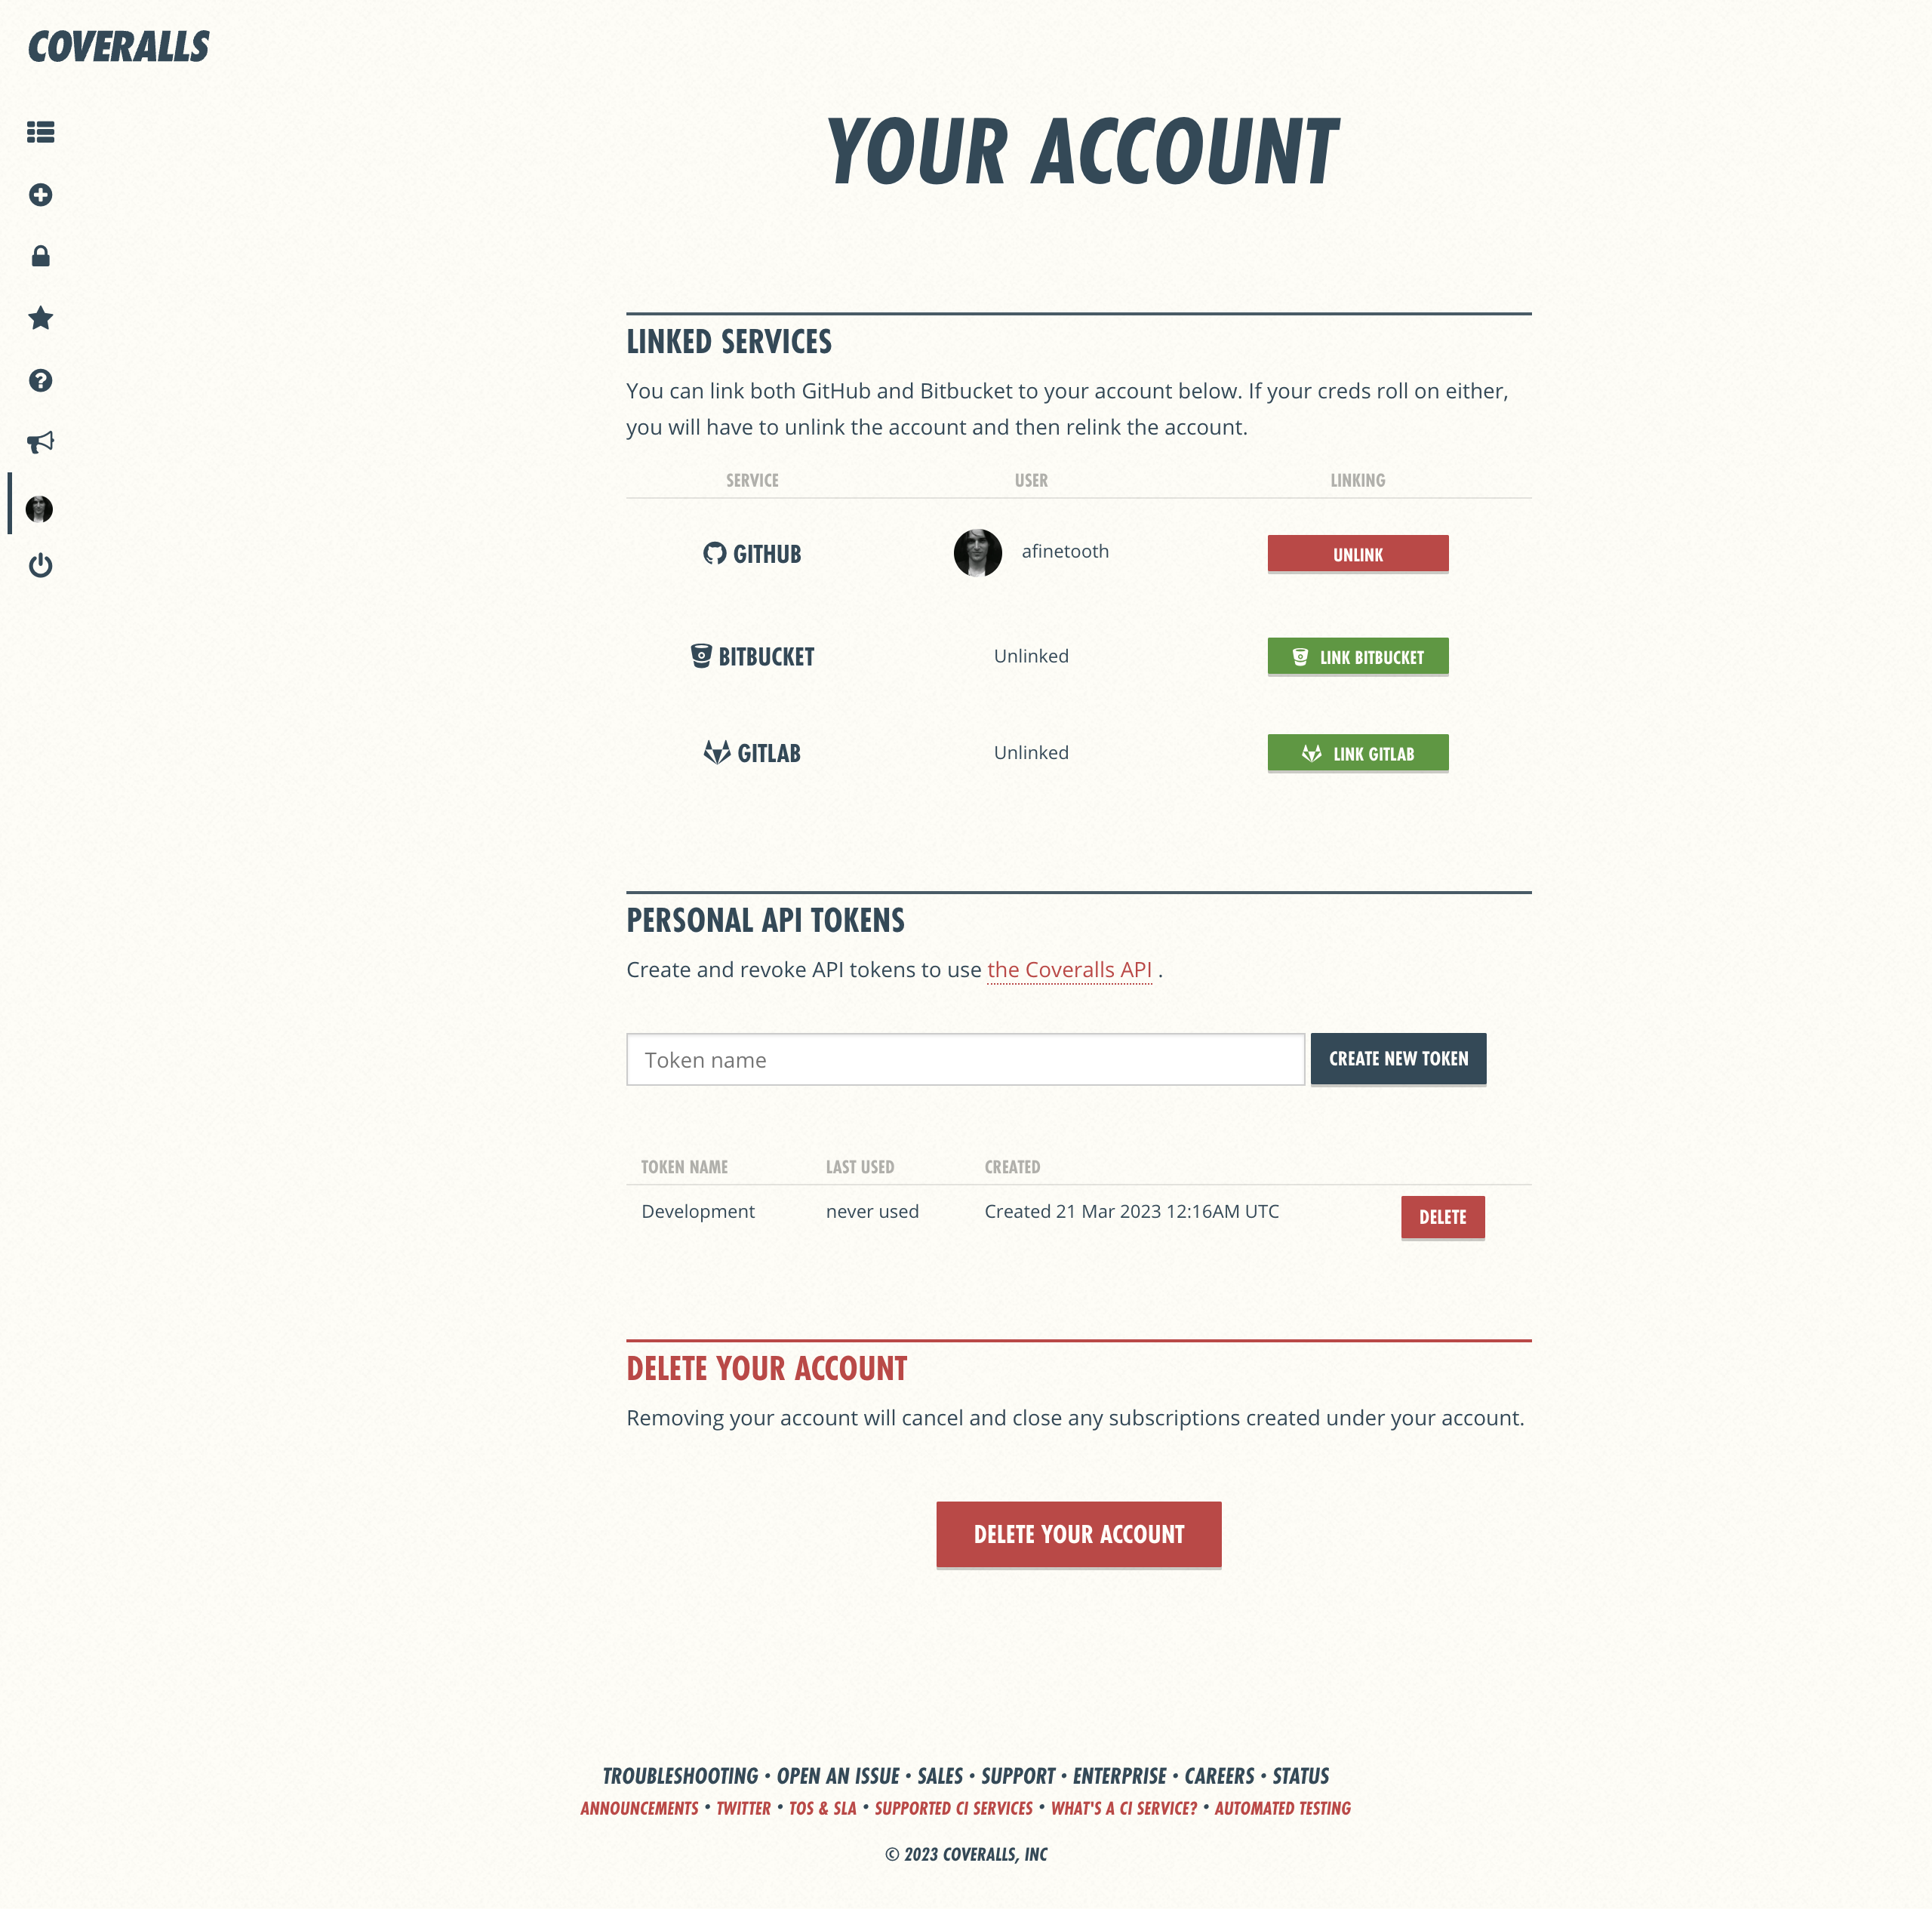
Account Page Info & Actions
- Linked Services — Click to link or unlink repo hosting services
- Personal API Tokens — Name and create new tokens to use the Coveralls API
- Delete Account — Click to delete your Coveralls user account *
* Deleting your user account will not delete any of your Coveralls subscriptions. To cancel a subscription, visit the Subscription Details page for your subscription and click Cancel Subscription.
Announcements
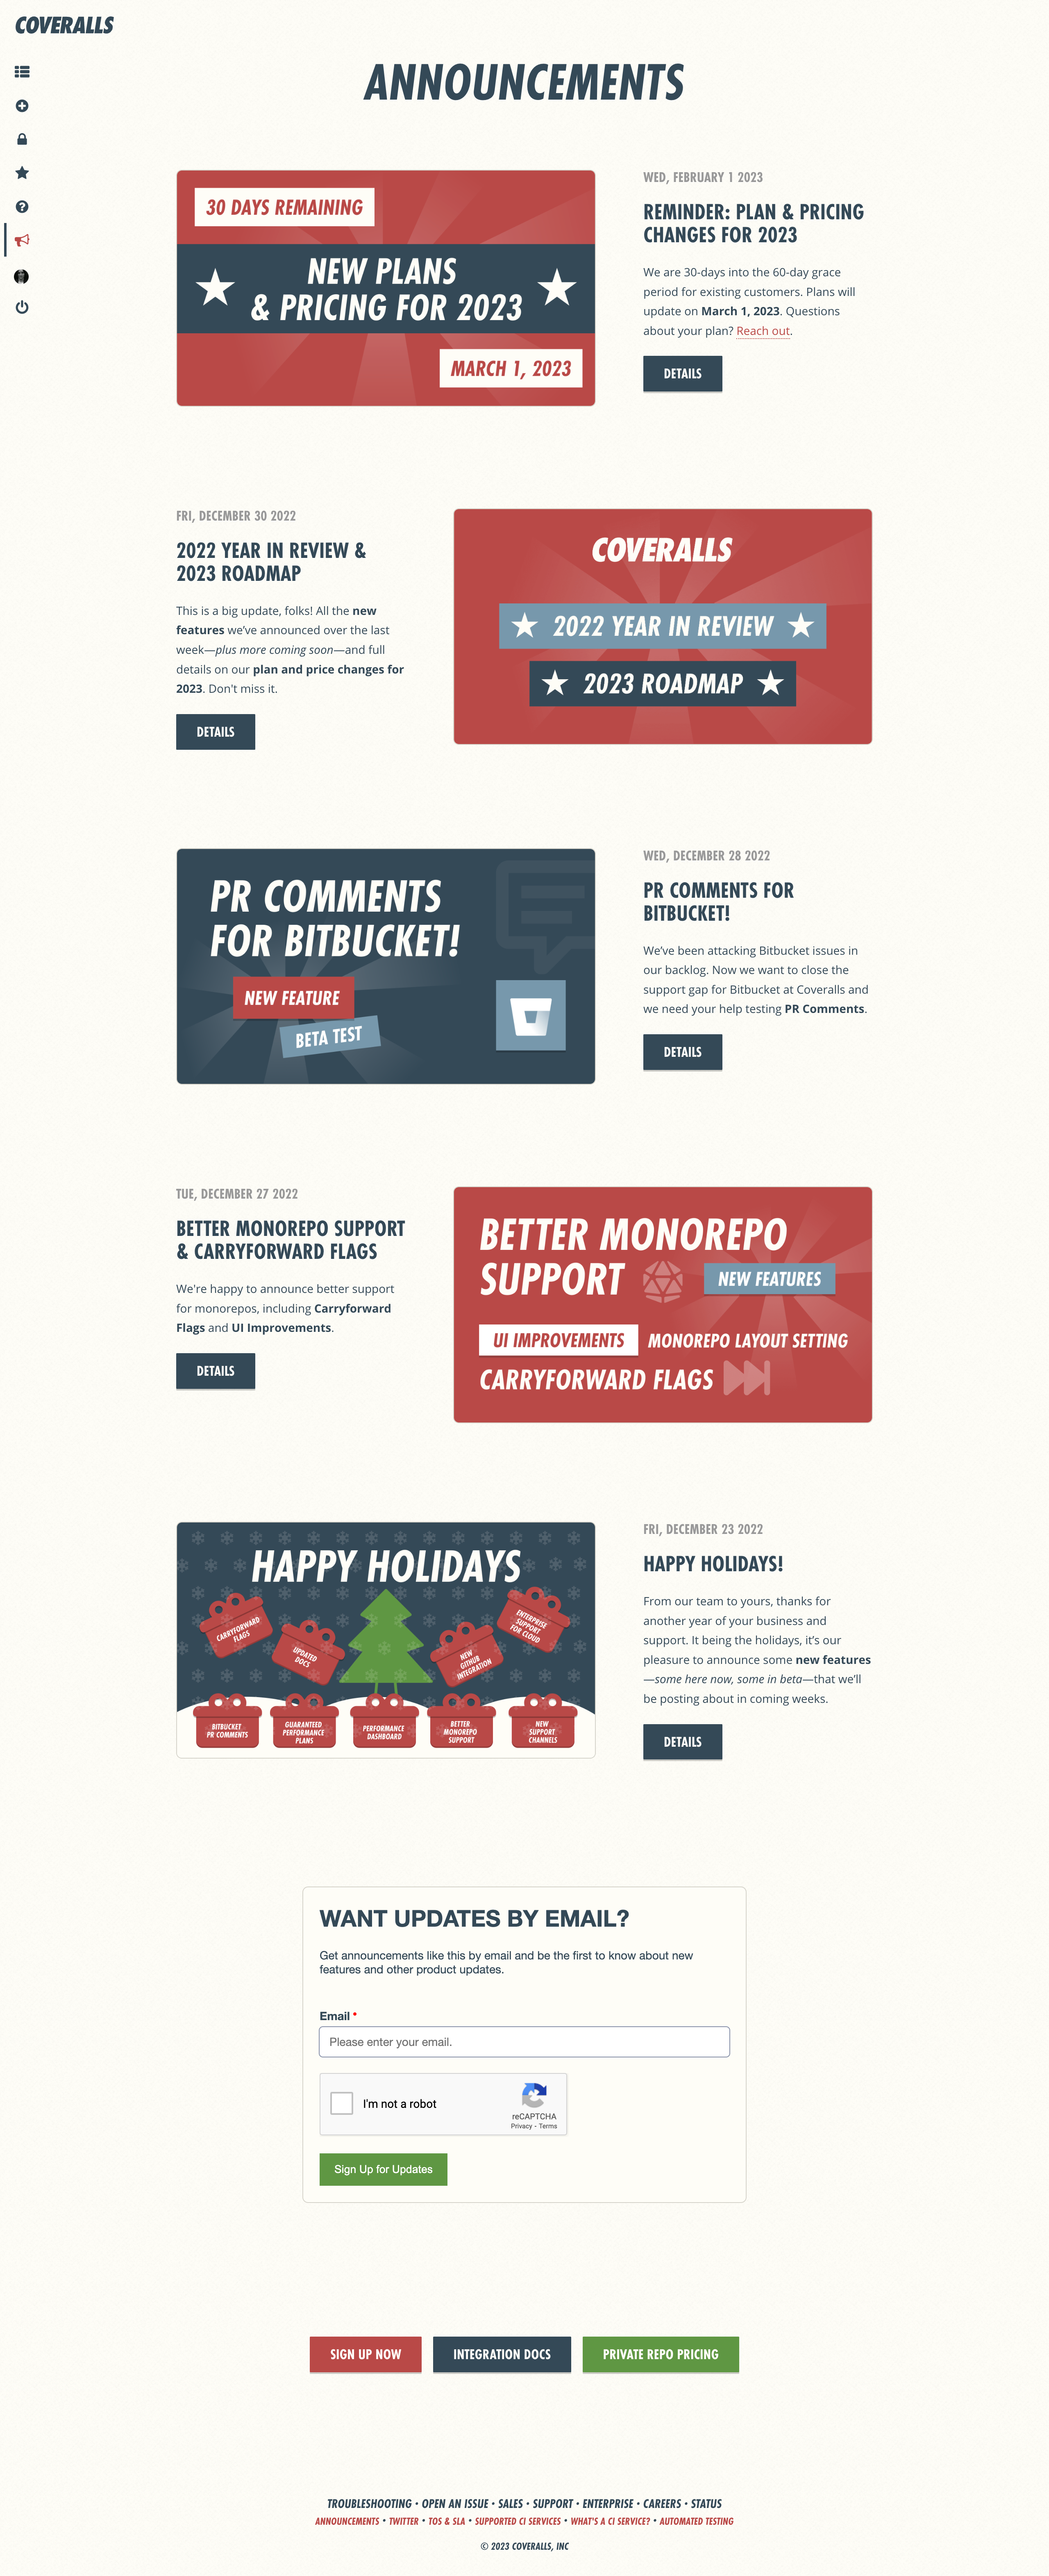
The Announcements Page is where we post important updates and news about Coveralls. You can also subscribe for the same updates delivered to your inbox.
Announcements Page Info & Actions
- Announcements — List of all announcements by date, title, and description
- Subscribe — Enter your email address to subscribe to Coveralls announcements
Any problems, questions or comments about this doc? Let us know.